.png?width=75&height=75&name=Untitled%20design%20(22).png)
In Ressio, managing customer information is simple and organized. Whether you’re adding a new client or updating an existing one, the system is designed to help you maintain clean, searchable records.
Table of contents
- Customer Groups
- Using the Customer Page
- Adding Customers
- Customer Visibility on Projects
- Granting Access
Customer groups
Customers in Ressio are organized as groups or family units. This allows flexibility in managing households or teams working with you.
-
Customer Group: Think of this as a household (e.g., The Smiths), a business, or a team.
- Individual Contracts: Each group can have one or more individuals—such as a couple, an architect, or a designer. Each contact has unique access to their project(s).
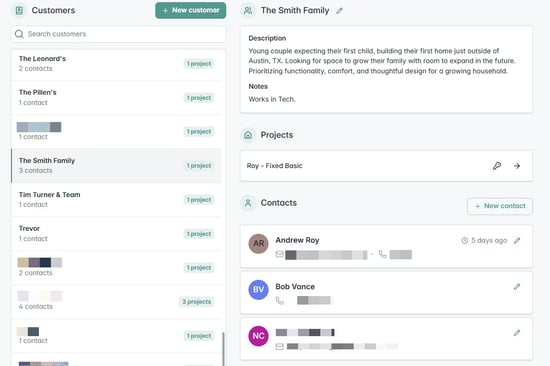
Shared Contacts: A contact (e.g., a designer) can belong to multiple customer groups using the same email. When they log in, they choose which project to access.
Using the Customer Page
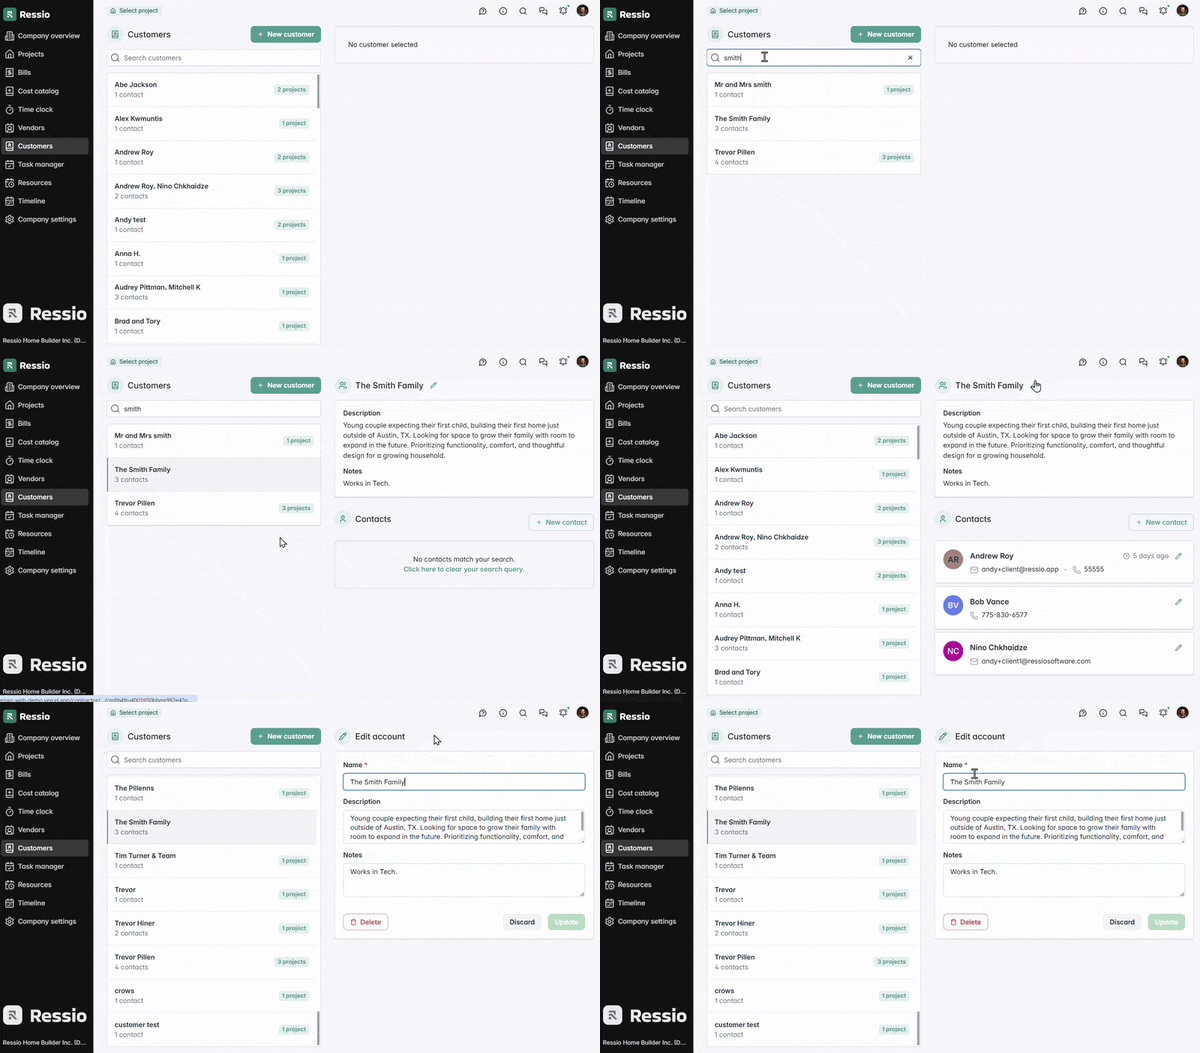
You can find the Customer page in the left menu. This is your hub for managing all client groups and contacts.
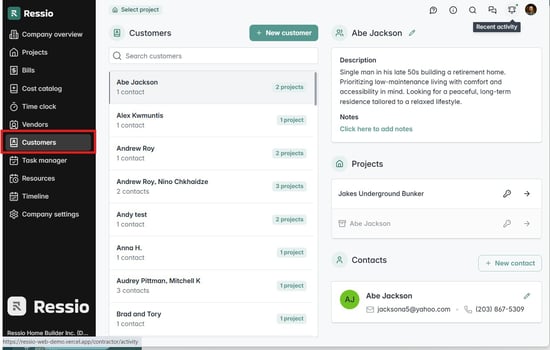
Key actions available:
-
Search for customer groups and contacts
-
View Details: See group name, notes, assigned projects, and contact info
-
Edit customer groups and contacts
-
Discard/Delete groups or contacts
⚠️ Once a contact email is deleted, it can't be reused for another user role (e.g., vendor or builder). It can only be re-added as a client contact unless a different email address is used.
Each contact record shows:
-
Name, email, phone number
-
Links to associated projects and project settings
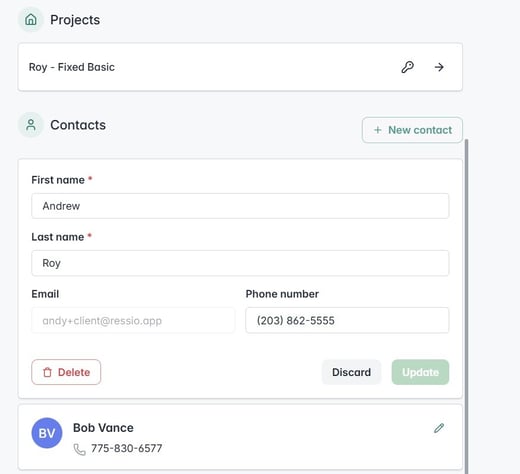
💡 Project Shortcut: Select the 🔑 key icon to access the project customer settings.
Select the ➡️ arrow icon to access the Project Overview page.
Adding Customers
Add customers to save contact information and to manage pre-sale leads.
Customers can be added in two ways:
1. From the Customer Page
-
Click New Customer at the top
-
Enter group name. Description and notes are optional
-
Enter at least one contact with first/last name (email strongly recommended)
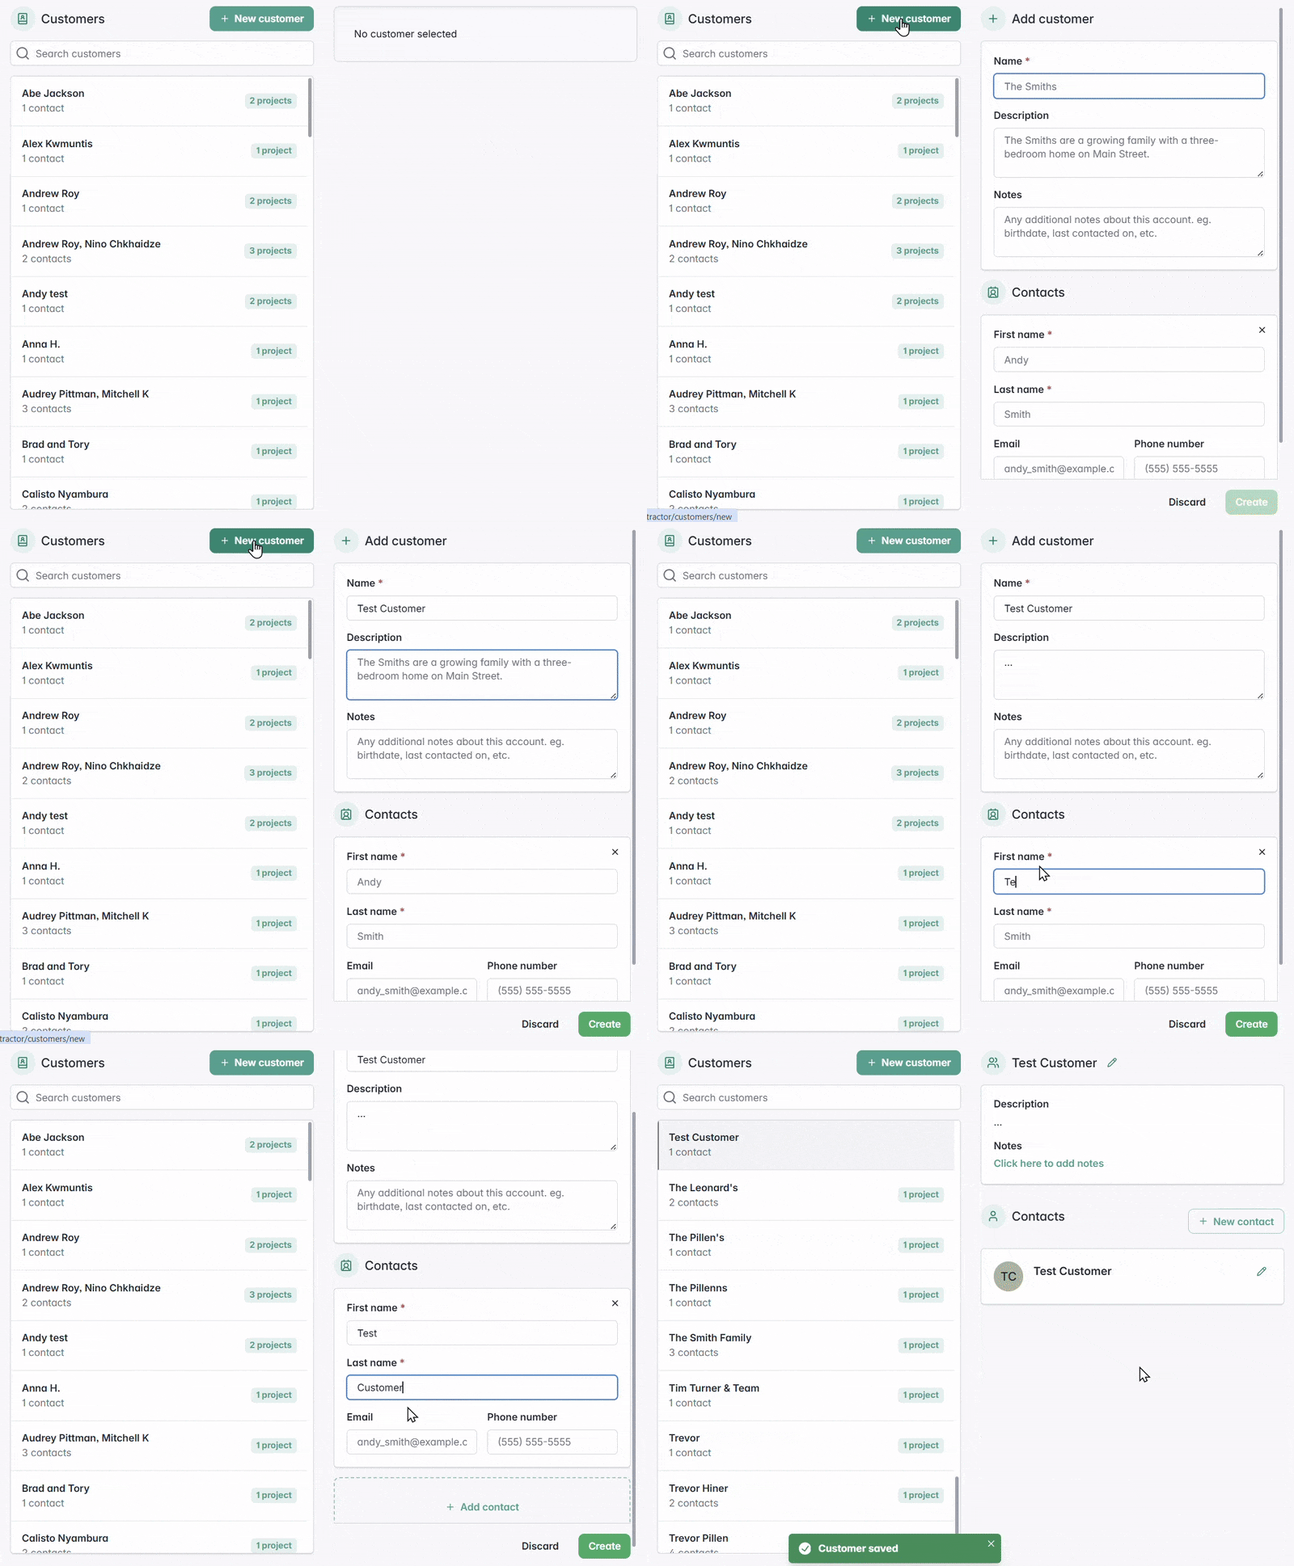
Multiple Contacts: You can add multiple contacts to the group by selectin + Add contact at the bottom.
2. From a Project
Go to Project Details > Customer Tab
New Group/Contact: Select + to create a new group and contacts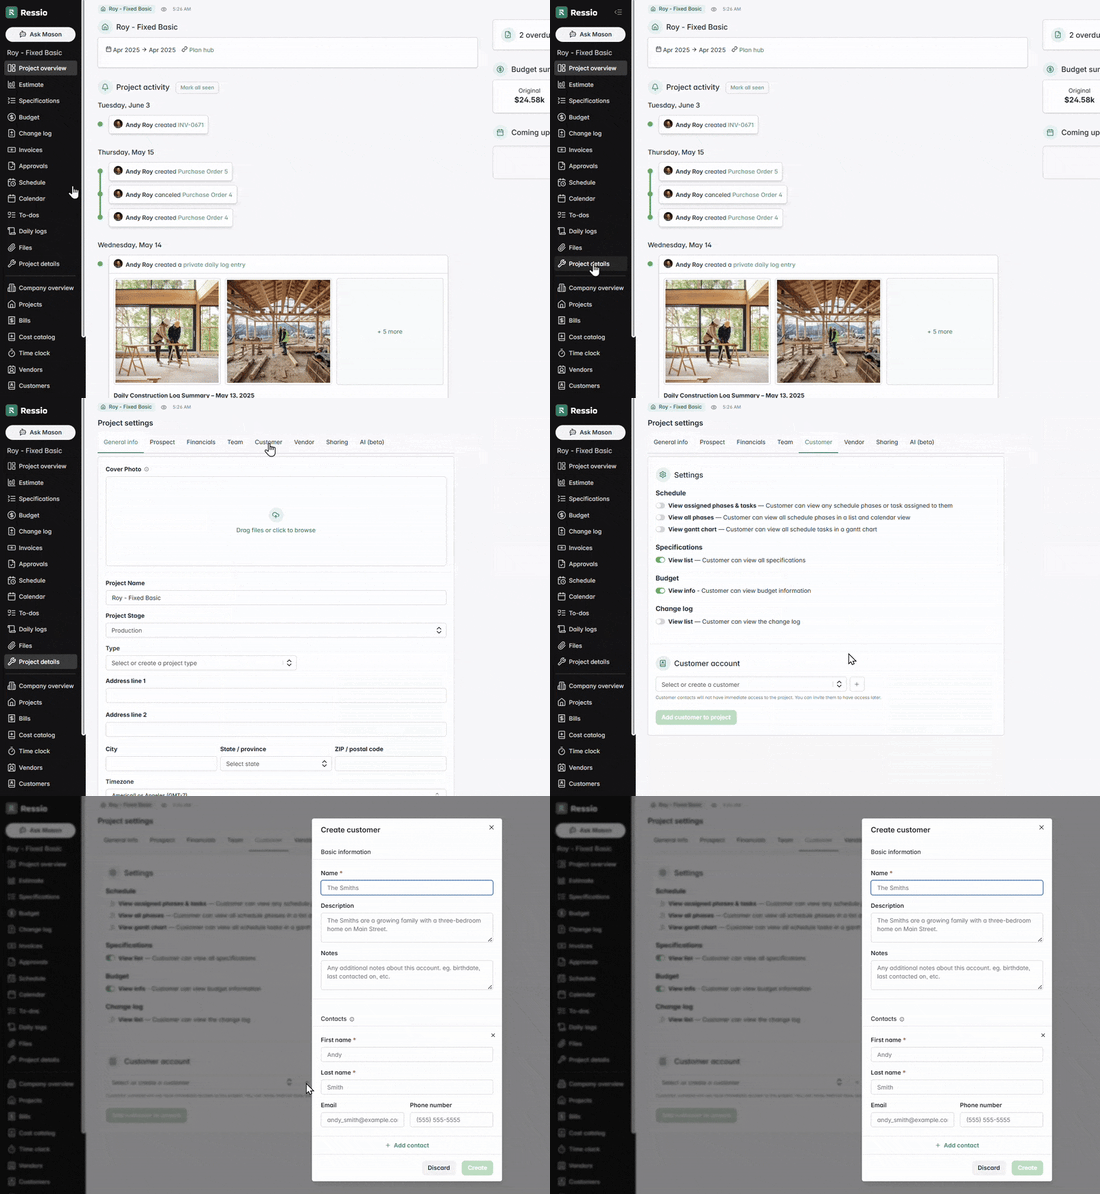
Existing Group/Contact: Add an existing customer group.
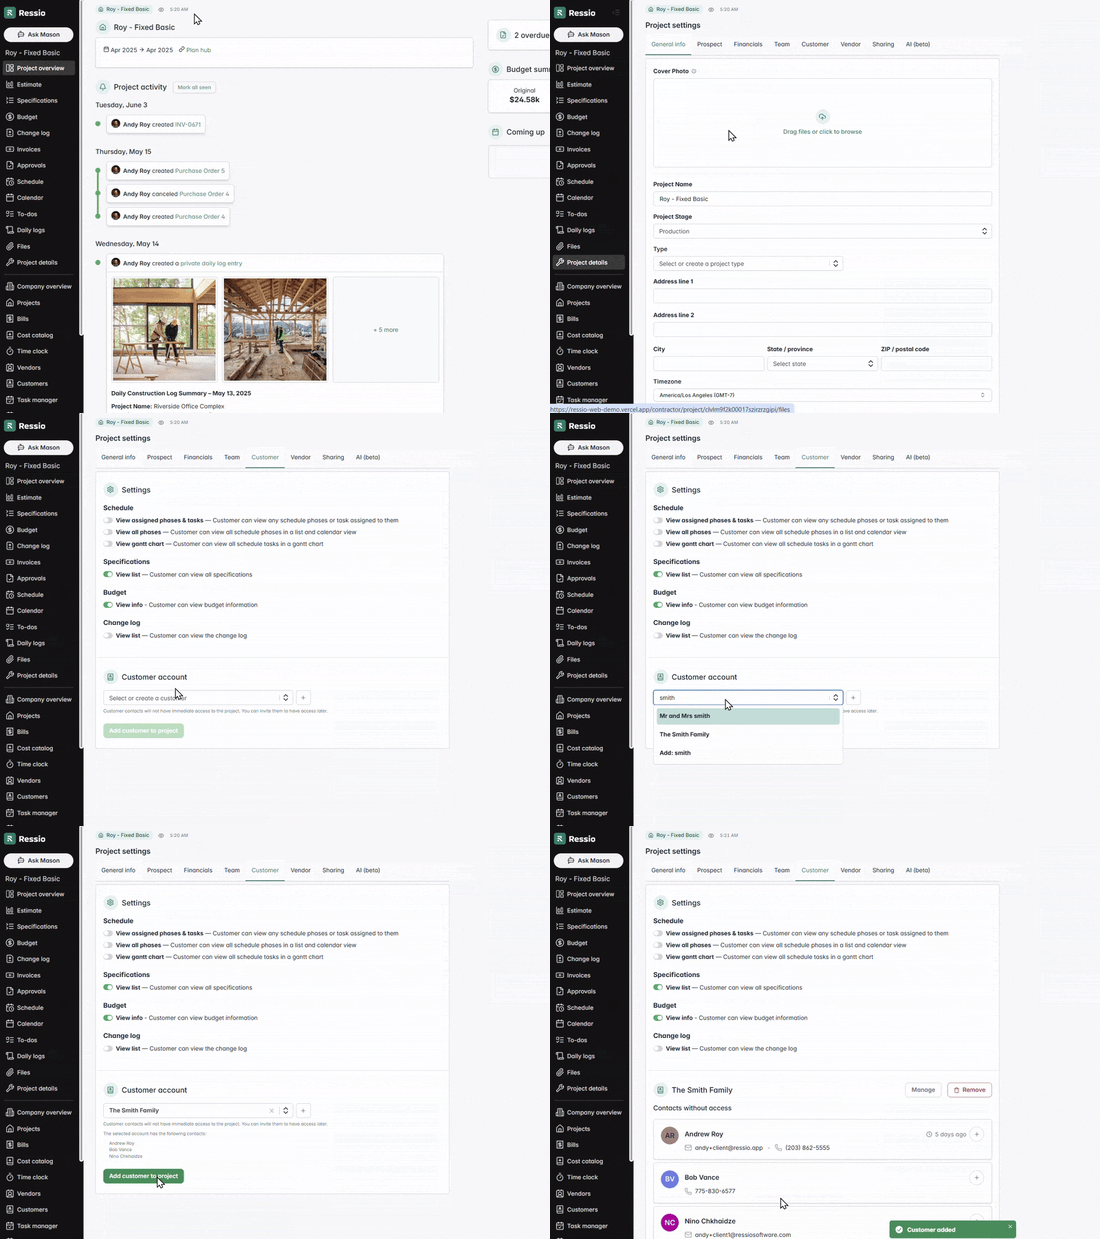
💡 TIP: Add customers to projects for organization and to facilitate access in the future.
Customer Visibility on Projects
You can control what your customer/homeowner sees on each project. Visibility settings can be found under each project by going to Projects Settings -> Customer tab.
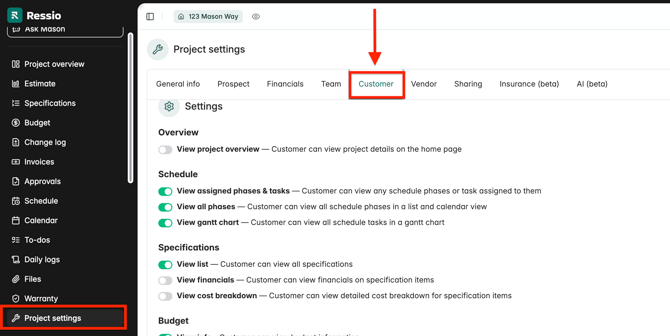
Depending on the whether your project is fixed priced or cost-plus, you will see different options on your settings. You can control visibility on the following features:
- Overview
- Schedule
- Specifications
- Budget
- Change log
- Approvals
Fixed Price Projects
If your project is fixed priced, you can toggle on or off the following:
- Overview
- View project overview - Customer can view project details on the home page
- Schedule
- View assigned phases & tasks - Customer can view any schedule phases to task assigned to them
- View all phases - Customer Can view all schedule phases in a list and calendar view
- View gantt chart - Customer can view detailed cost breakdown for specification items
- Specifications
- View list - Customer can view all specifications
- View financials - Customer can view financials on specification items
- View cost breakdown - Customer can view detailed cost breakdown for specification items
- Budget
- View info - Customer can view budgets
- Change log
- View list - Customer can view the change log
- View since last lock - Customer only sees change log since last lock
- Approval
- View draft selections - Customer can view draft selections in the approval screen
Cost-Plus Projects
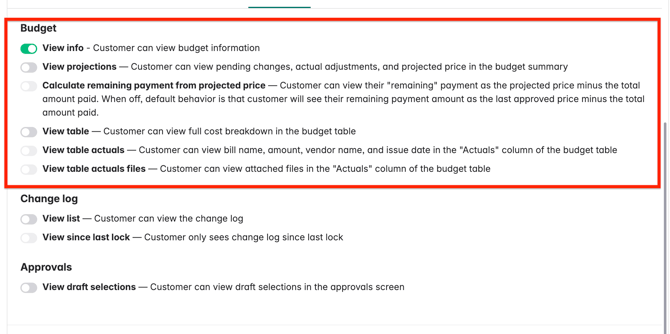
For cost-plus projects there are more options to toggle on and off under the Budget section. Everything else is the same. Under the Budget section you have the option to toggle on and off the following:
-
Budget
- View info - Customer can view budget information
- View projections - Customer can view pending changes, actual adjustments, and projected price in the budget summary
- Calculate remaining payment from projected price - Customer can view their "remaining" payment as the projected price minus the total amount paid. When off, default behavior is that customer will see their remaining payment amount as the last approved price minus the total amount paid.
- View table - Customer can view full cost breakdown in the budget table
- View table actuals - Customer can view bill name, amount, vendor name, and issue date in the "Actuals" column of the budget table
- View table actuals files - Customer can view files in the "Actuals" column of the budget table
🎓 To learn more about project settings, read "Understanding Project Settings".
Assigning Customers / Granting Access
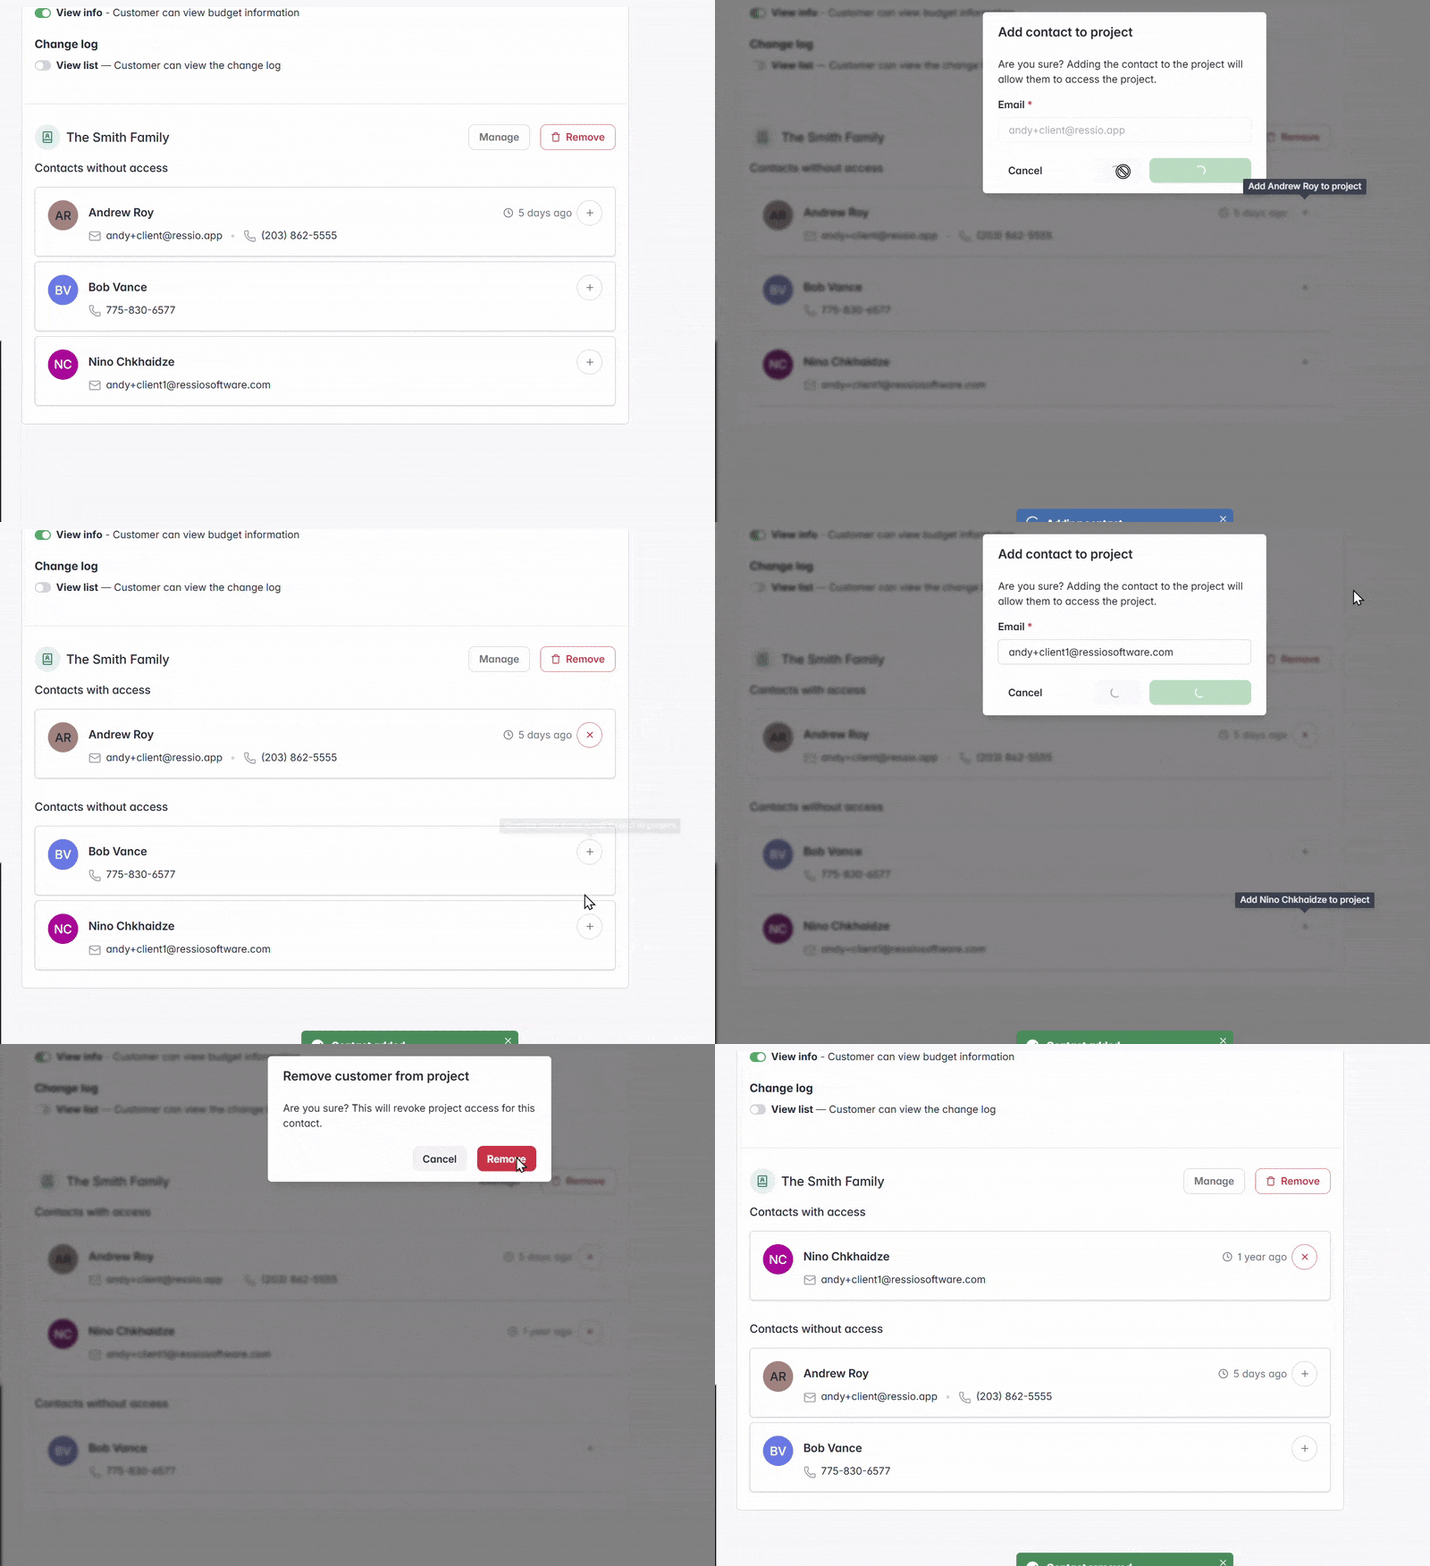
Adding a customer to a project does not automatically give them access to it.
⚠️You must grant access to send clients Approval documents like Proposals and Change Orders.⚠️
To grant access:
-
Click the + button next to their name
-
Choose whether to:
-
Invite and Notify (they’ll get a link to log in and view the project)
-
Invite (no email is sent)
-
To remove access:
- Select the red X next to their name
💡 TIP: If it's the client's first experience in Ressio, grant access without notification - the Proposal will be the first thing they see.
Client Access Scenarios
Scenario 1: Full Client Portal Access
Best For:
-
Design / Pre-Construction clients
-
Tech-savvy, highly engaged clients
-
Long-term projects
-
Cost Plus or Open Book contracts
Invite and Notify:
-
Proactively invite clients into Ressio to access the full Client Portal.
-
Clients are encouraged to log in regularly to view updates, documents, and selections.
Scenario 2: Document-Only Access
Best For:
-
Tech-averse or less involved clients
-
Short-duration projects
-
Fixed-price contracts
Invite Only:
-
Clients are not notified they have access but receive email links when documents (e.g., proposals, change orders) require approval.
-
Logins are reactive—clients only sign in when prompted by an email notification.
If you have any questions or need further assistance, contact our support team at support@ressiosoftware.com. We're here to help!