Unlock the power of Estimate Versioning in Ressio to send clients multiple proposals with different combinations of areas and costs. This guide shows how to quickly create, release, and apply proposal versions to keep your estimates accurate and aligned with client approvals.
Benefits of Estimate Versioning
-
Provide clients with tailored proposal options, quickly and easily.
-
Instantly update your estimate based on the approved proposal version.
-
Stay organized by grouping estimate items into customizable categories.
-
Accelerate your workflow with efficient, side-by-side proposal management.
Table of Contents
-
Releasing Multiple Proposal Versions
Estimate Versioning starts in the Estimate section. Access your estimate, then use the proposal creation feature to build versions based on the categories you want to include.
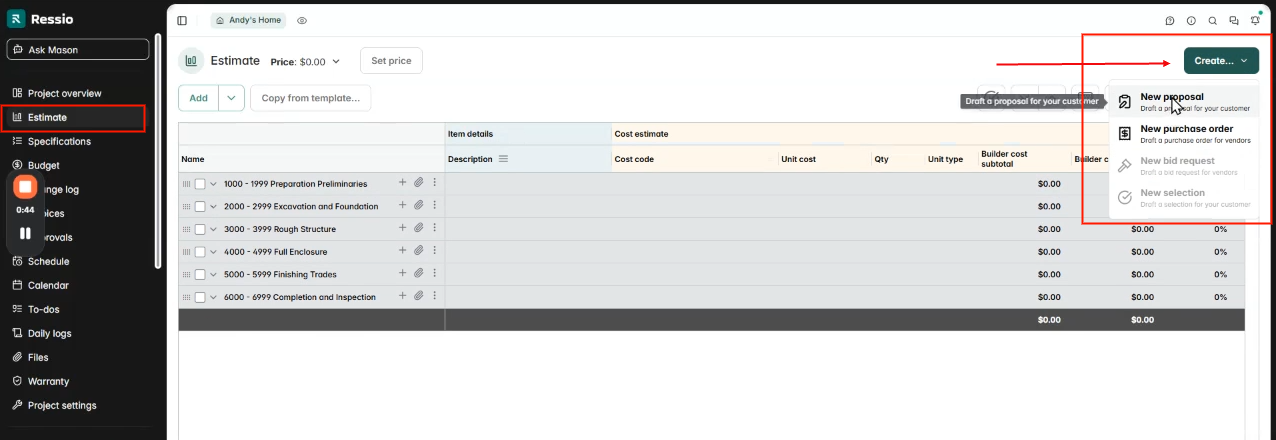
✅ Organize estimate items into clear, labeled categories—such as "Basement," "Kitchen," or "Pool"—to make versioning straightforward.
After hitting 'New proposal' a window will pop up.
-
Select the areas or categories from your estimate to include in the proposal by checking or unchecking the boxes.
-
Choose only the relevant items for each version.
Each selection represents a new versioned proposal.
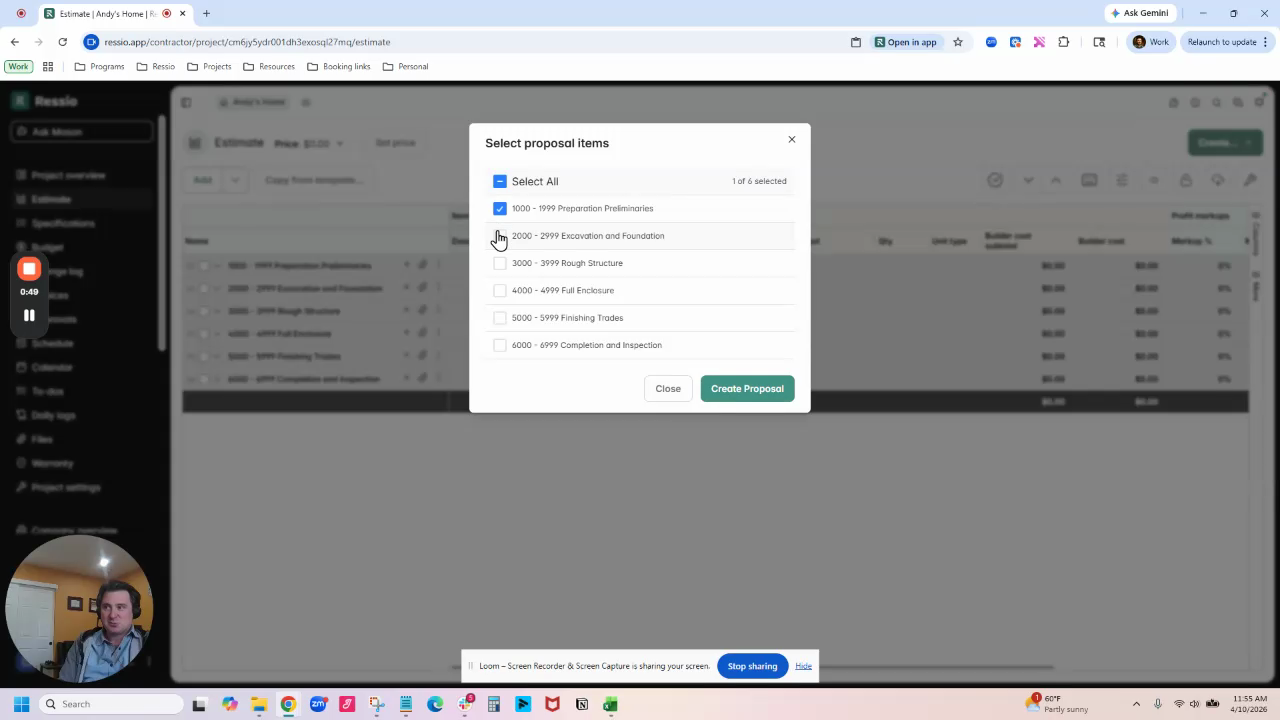
Example: Select the top three areas for the first proposal version.
After you made your selections, hit 'Create Proposal'.
🎗️ Be aware of what you are titling your proposals and their versions.
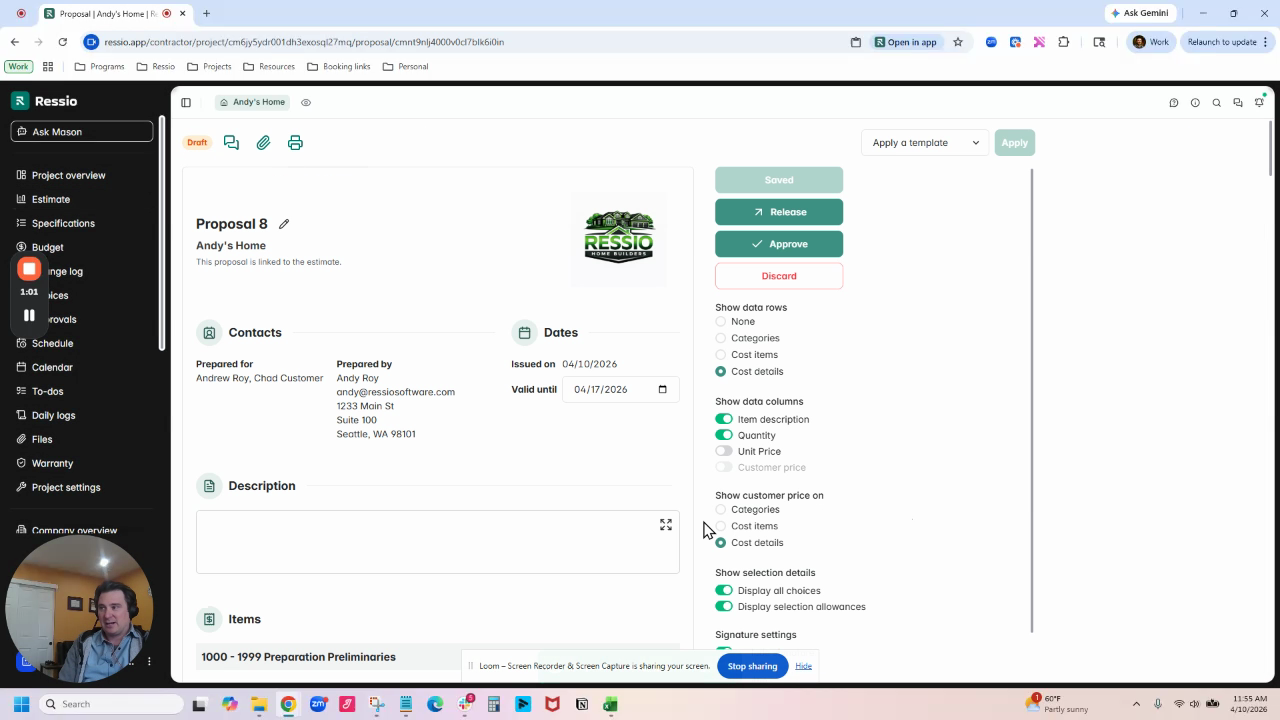
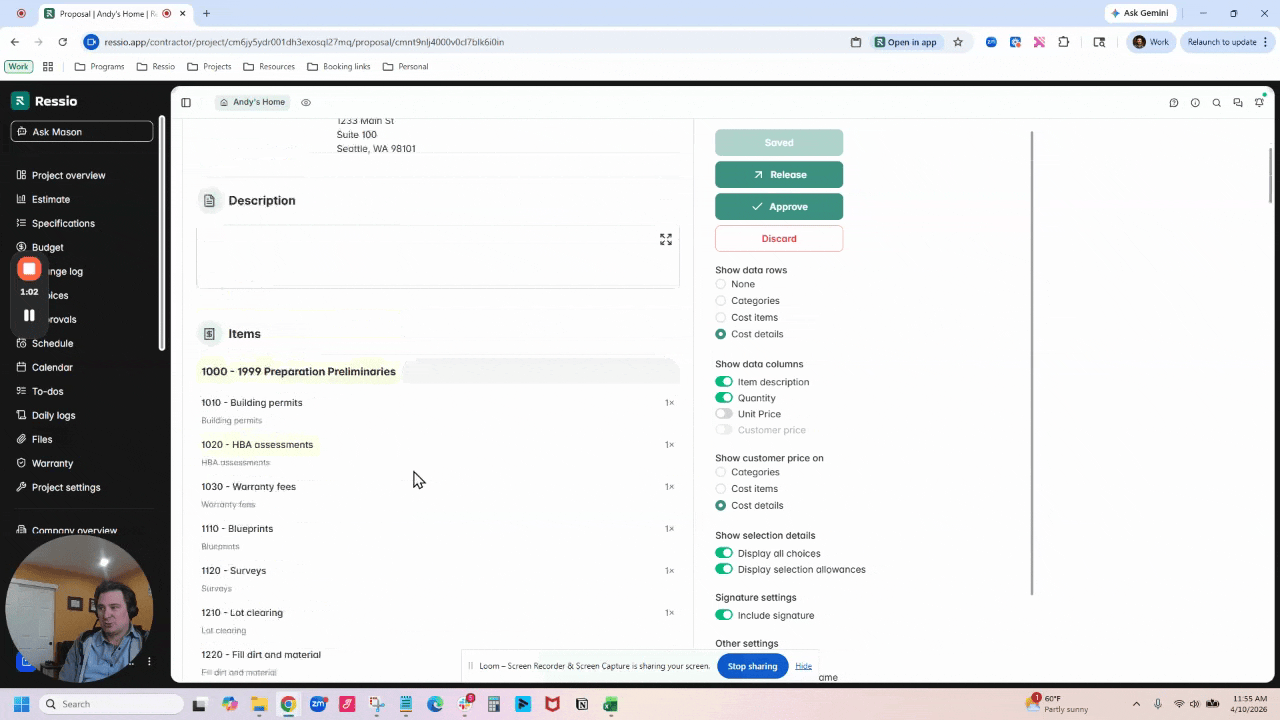
After creating a proposal, release it to your client.
-
Repeat the process to create additional proposal versions with alternative combinations of areas or costs.
-
Send out multiple proposal versions for client consideration, making sure to release after each proposal version.
Example: Provide a second proposal that includes different categories, such as adding a pool or remodeling the basement.
Applying an Approved Proposal to an Estimate
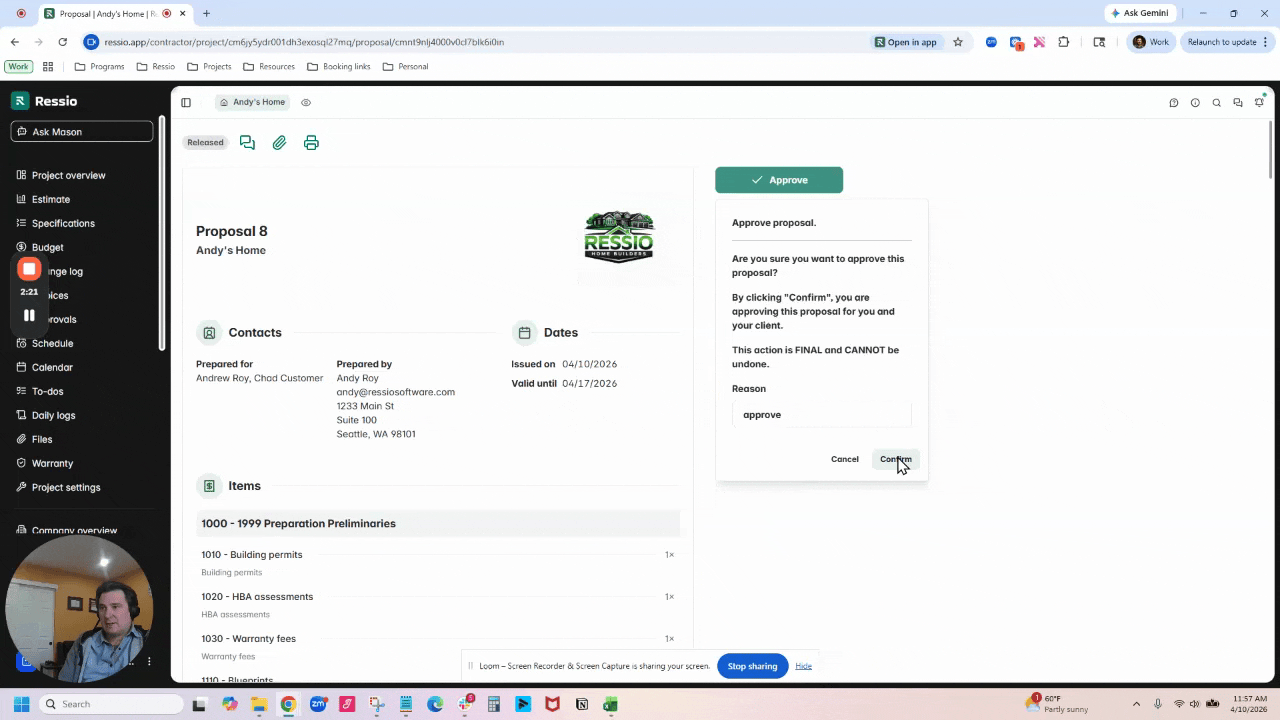
Once you have created your proposal versions, released them to the client. Before moving forward, they have approve one. After they have approved the version, open the approved proposal.
As the builder, you must hit 'Approve' before applying it to the estimate. Approve and hit 'Confirm'. Once you hit confirm, the 'Apply to Estimate' button will appear.
-
Select the 'Apply to Estimate' option.
-
Ressio updates your estimate by including only the approved areas or categories.
Excluded categories are removed, and the total estimate cost updates automatically.
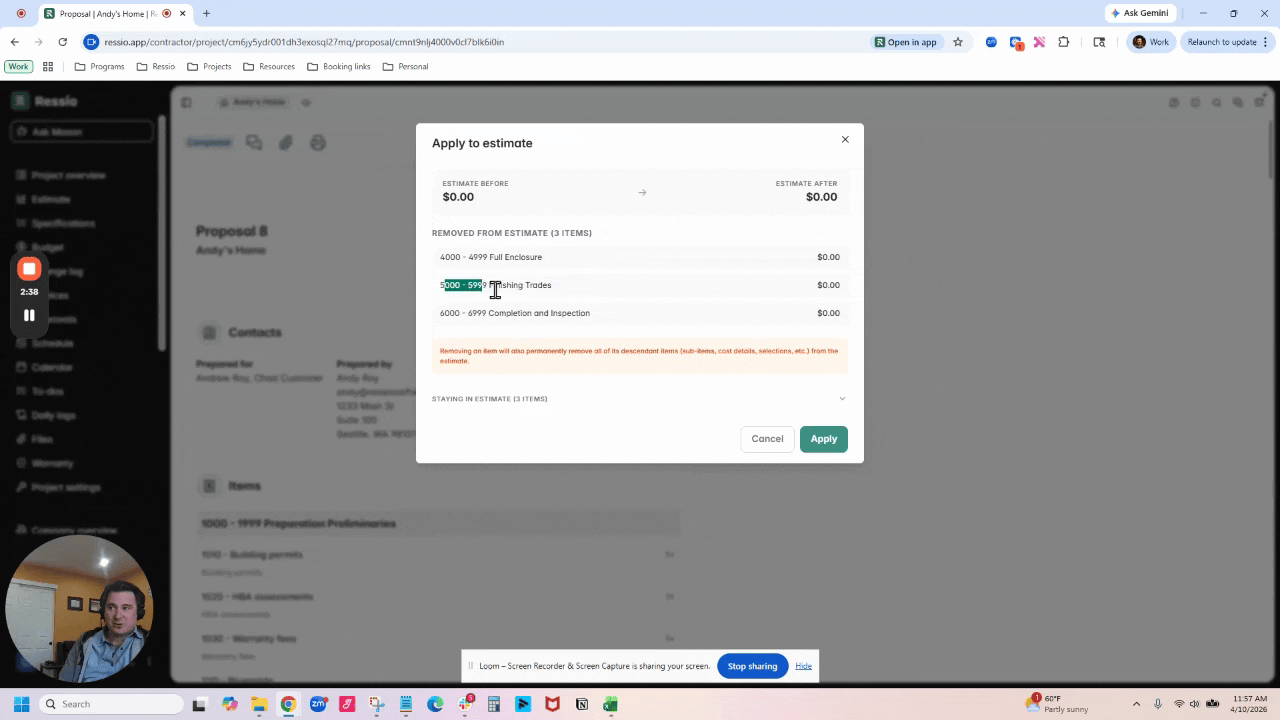
The "Apply to estimate" window will appear listing what will be applied to the estimate and what will be removed. What is being removed from the estimate will be listed first under the price and what is staying will be listed at the bottom. Review and hit 'Apply'.
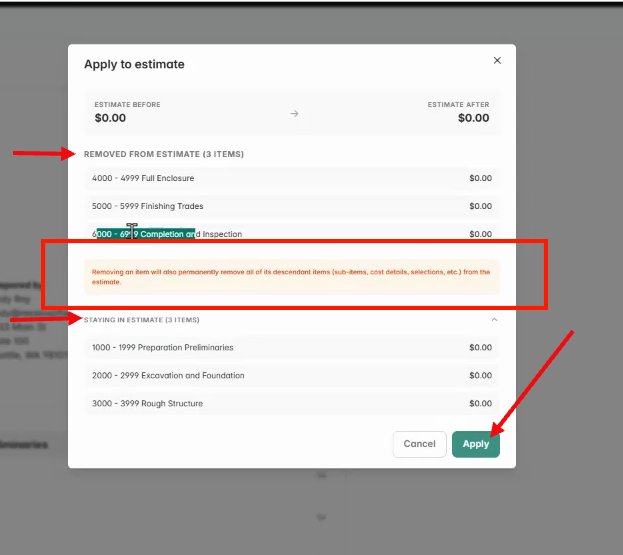
🚨 Removing an item also permanently remove all of its descendant items (sub-items, cost details, selections, etc.) from the estimate.
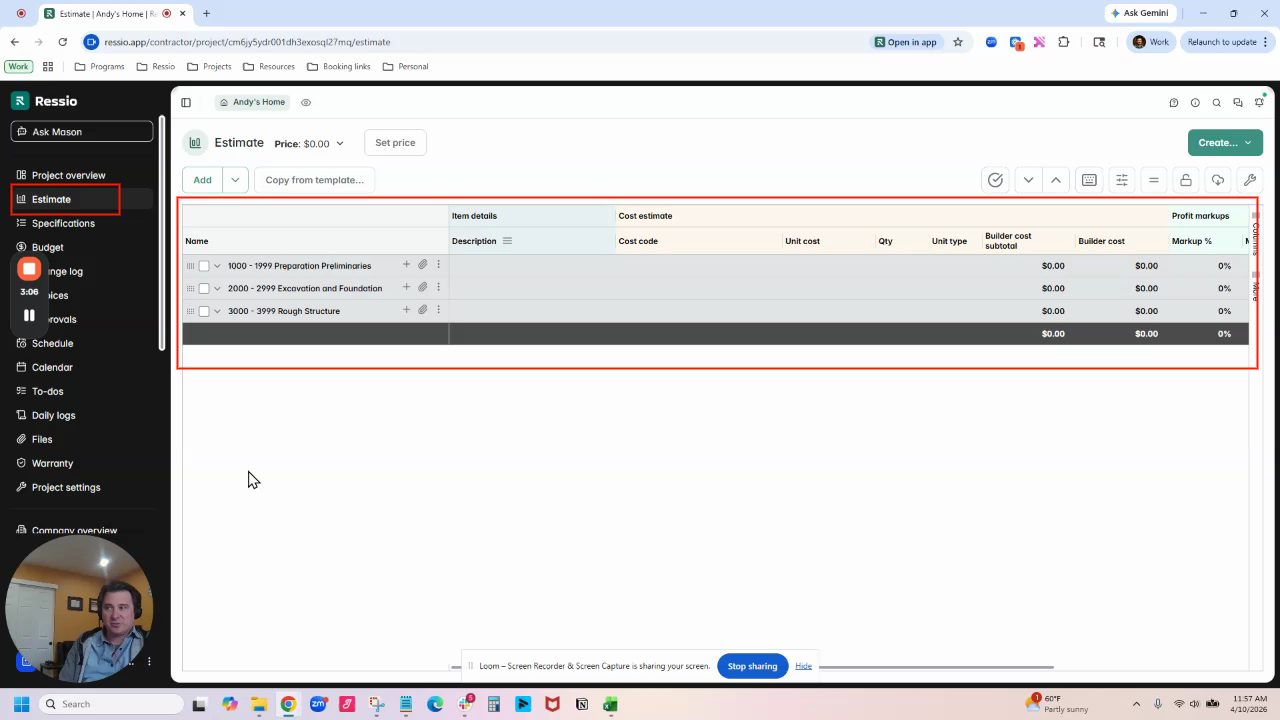
Navigate to your estimate to view the changes.
Best Practices for Categorizing Estimate Items
-
Assign each item in your estimate to a category.
-
Use clear naming for each category to simplify versioning.
-
Only categories (not sub-items) can be toggled in or out for proposal versions.
🚨 Breaking out or merging individual line items within a category is not currently supported.
If you have any questions or need further assistance, contact our support team at support@ressiosoftware.com. We're here to help!