Learn how to configure cost code permissions for time clock use in Ressio, including bulk updates and project-based options.
Benefits:
- 🕘 Enhance your team's productivity by allowing them to clock in and out under specific cost codes.
- 🎮 Gain control over the cost codes used for clocking in and out.
- 👊 Simplify the process for your team by setting default cost codes.
Table of Contents:
- Navigating to Company Settings
- Understanding Cost Code Statuses
- Using Bulk Actions
Navigating to Company Settings
To begin, navigate to your company settings within Ressio. Click on the 'Cost codes' tab and look for the the column labeled 'Show in time clock'. This column allows you to select when specific cost codes can be used for clocking in or out on projects.
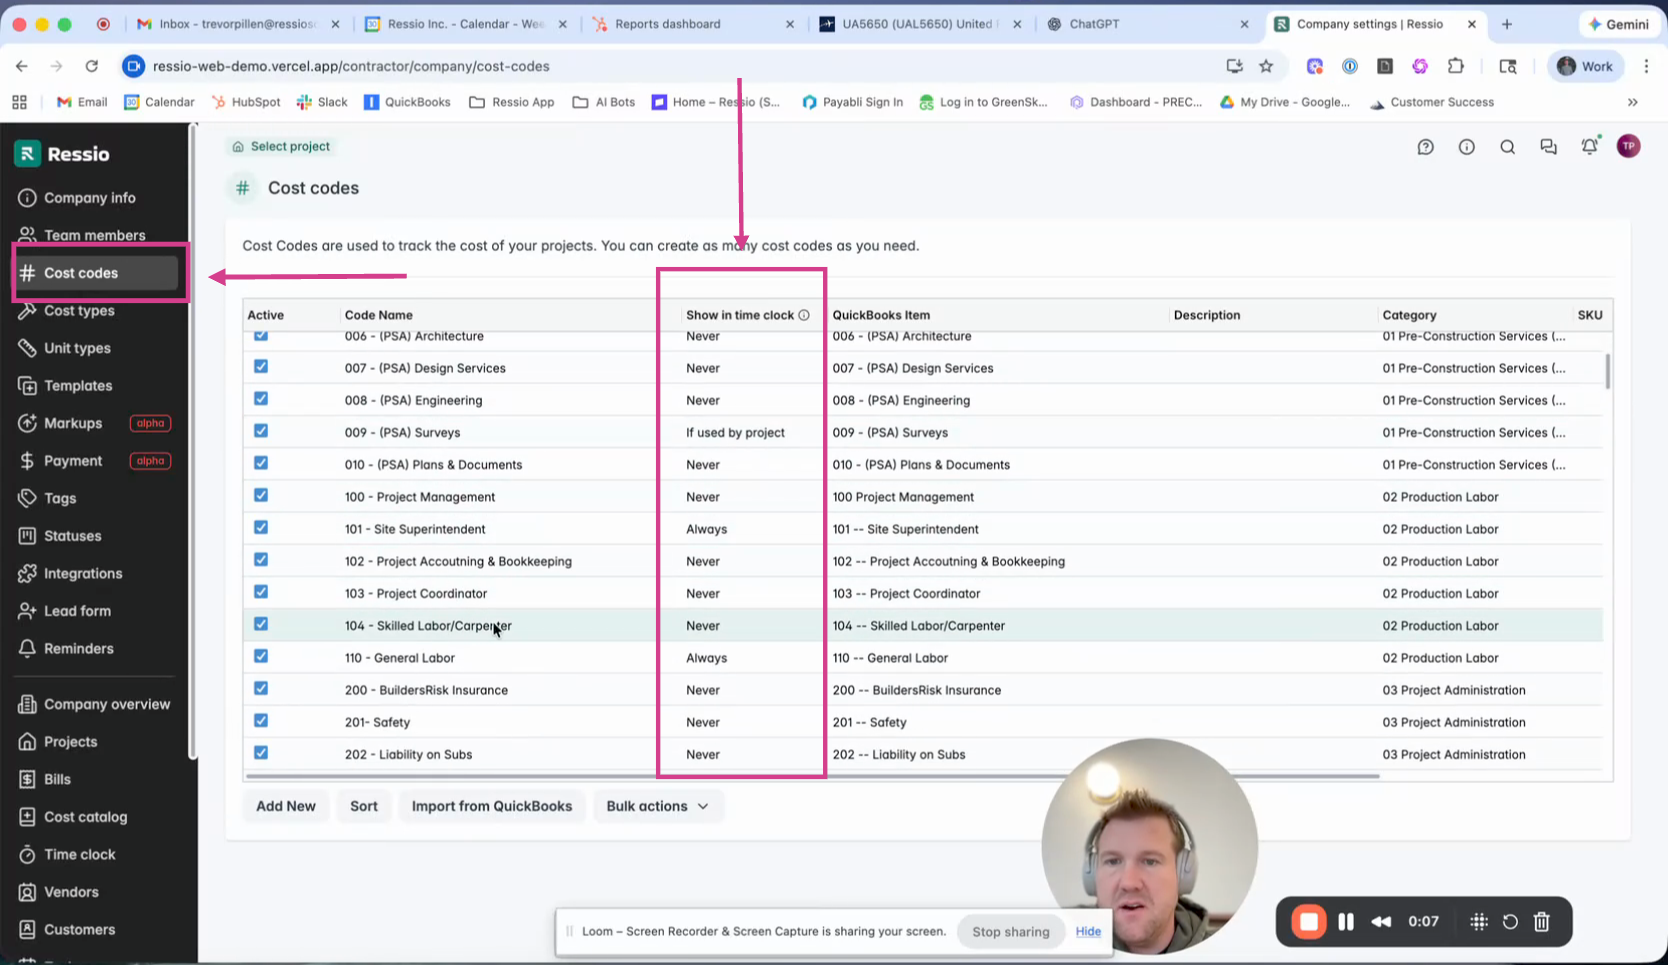
Understanding Cost Code Statuses
There are three statuses for cost codes:
- If used by project: This is the default status. If a cost code is used on an estimate, your team can clock in under this cost code.
- Never: This status means the cost code will never be an option for clocking in or out.
- Always: With this status, your team can always choose the cost code, regardless of whether it's used on an estimate.
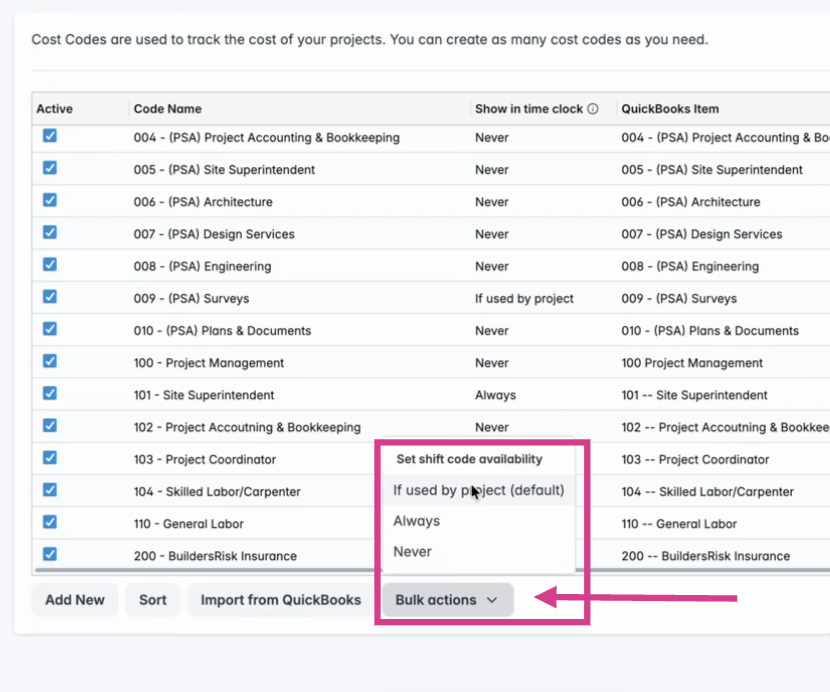
Using Bulk Actions
You can also set default cost codes in bulk. At the bottom of the screen, select 'Bulk Actions'. Choose the desired status, and then update specific cost codes as needed.
If you have any questions or need further assistance, contact our support team at support@ressiosoftware.com. We're here to help!