This guide walks through turning invoices or receipts into digital bills in Ressio, including matching vendors or projects and integrating approval workflows. You can use receipt capture on both your desktop and mobile device.
Why Use Bill Capture?
-
Reduces manual data entry and errors
-
Speeds up processing & approvals for project finances
-
Keeps bills, vendors, and budgets organized and up-to-date
-
Can use it both your mobile and desktop devices
Table of Contents
2. Uploading and Extracting a Bill
3. Reviewing and Editing Extracted Bill Data
4. Bill Approval and Budget Integration
5. Uploading Bills from the Budget Page
Overview & Navigation
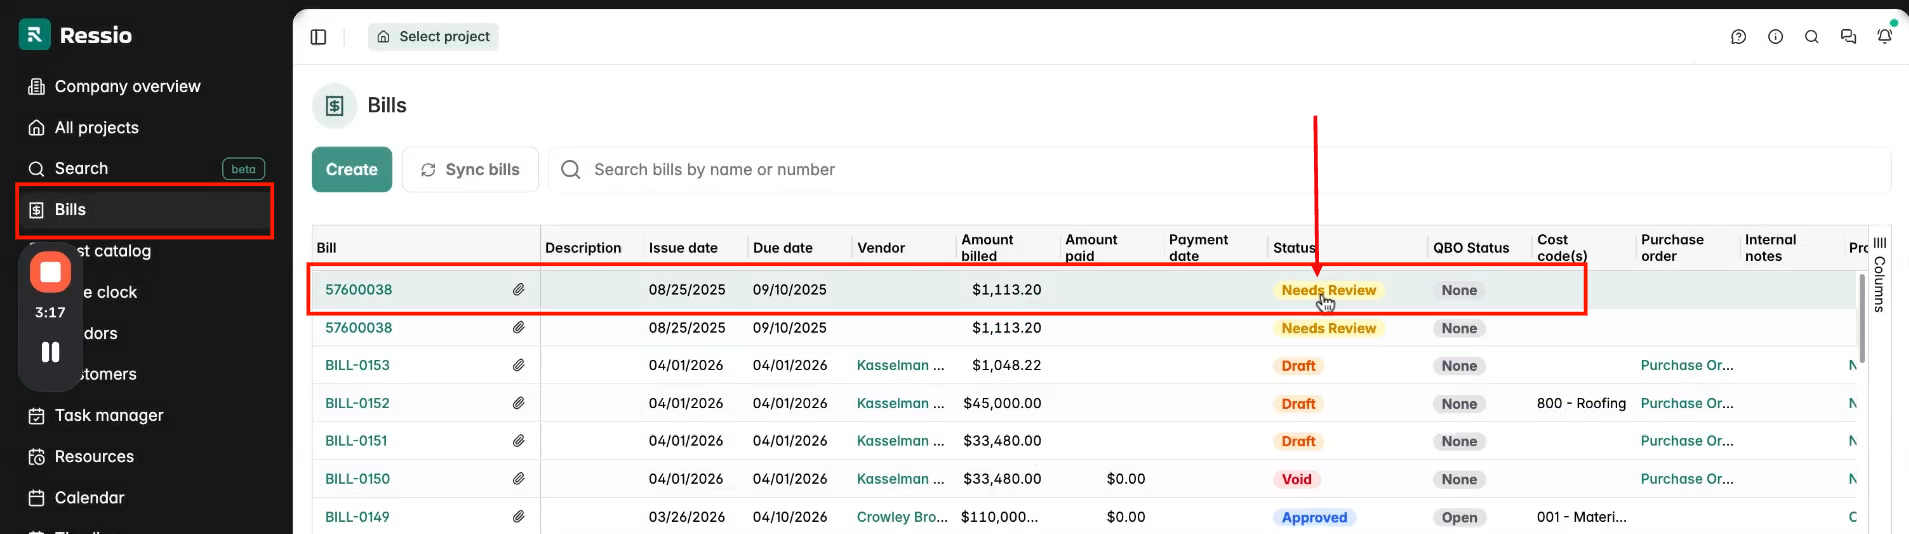
Ressio’s bill capture feature is available from both the Bills page and the Budget page.
Mobile
You can also create a bill on your mobile phone, uploading a file to extract information for a bill. Follow the same steps you would on your desktop.

📄 Start from Bills for general additions or from Budget to track costs against a project.
Uploading and Extracting a Bill
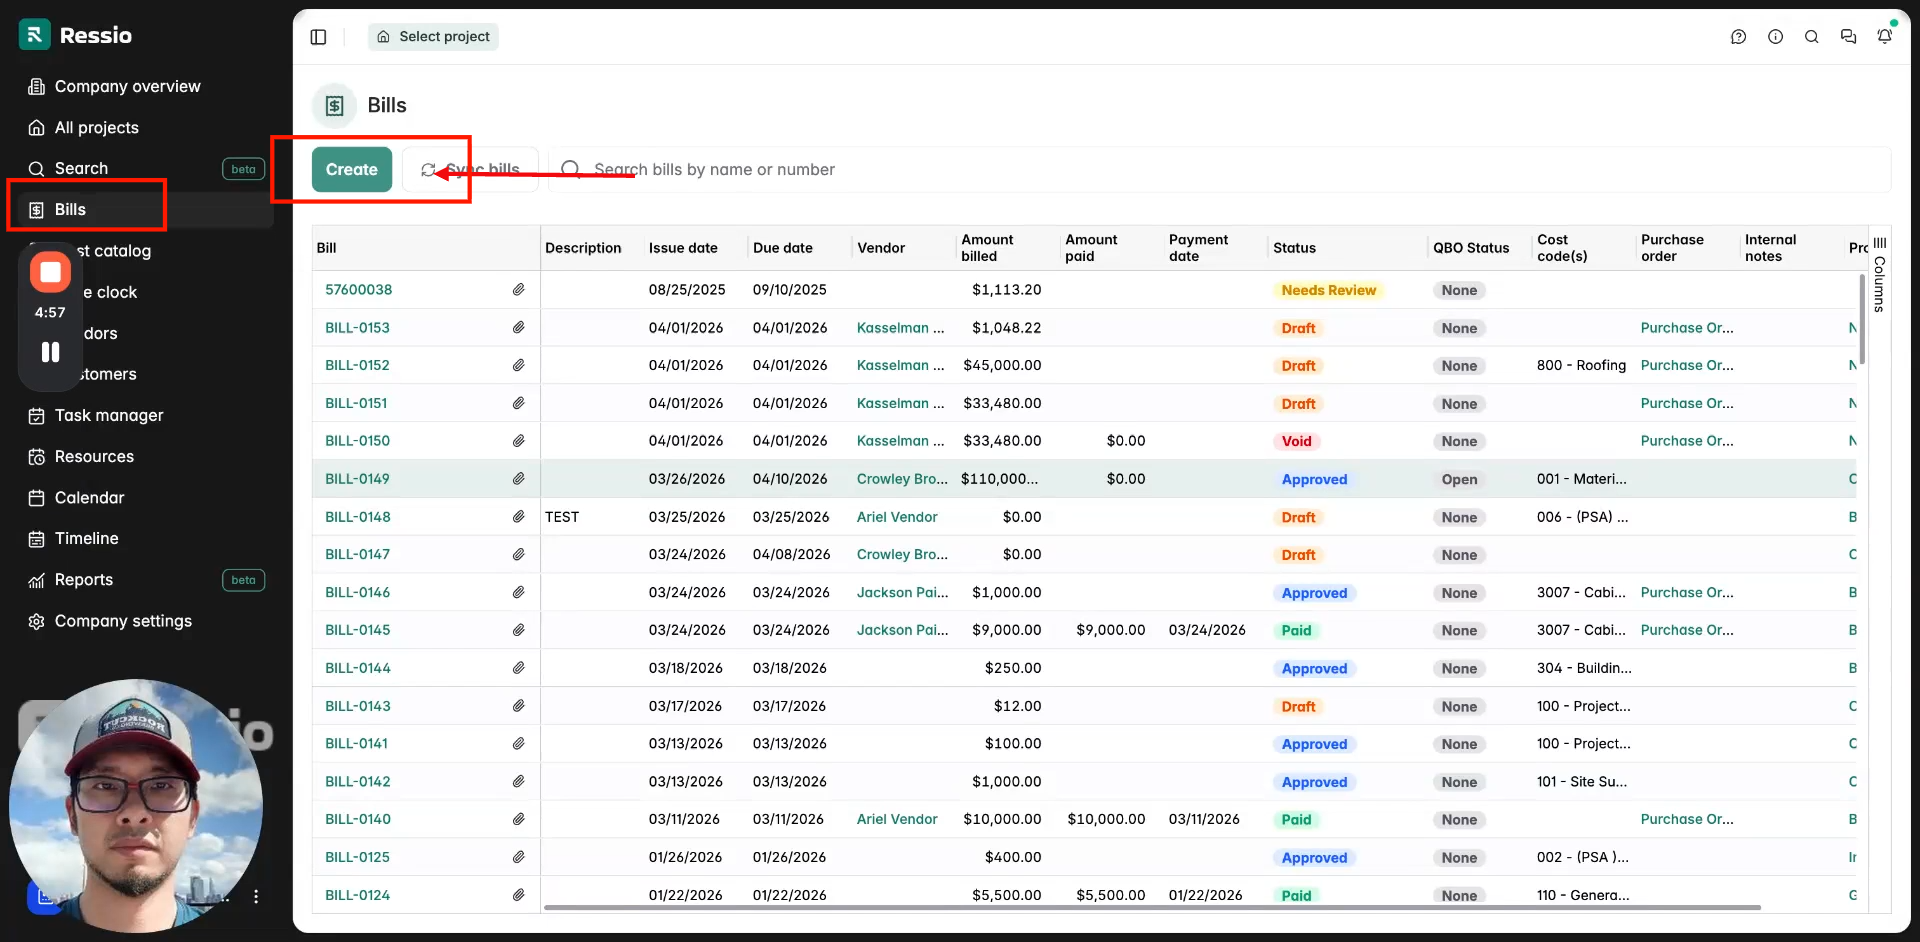
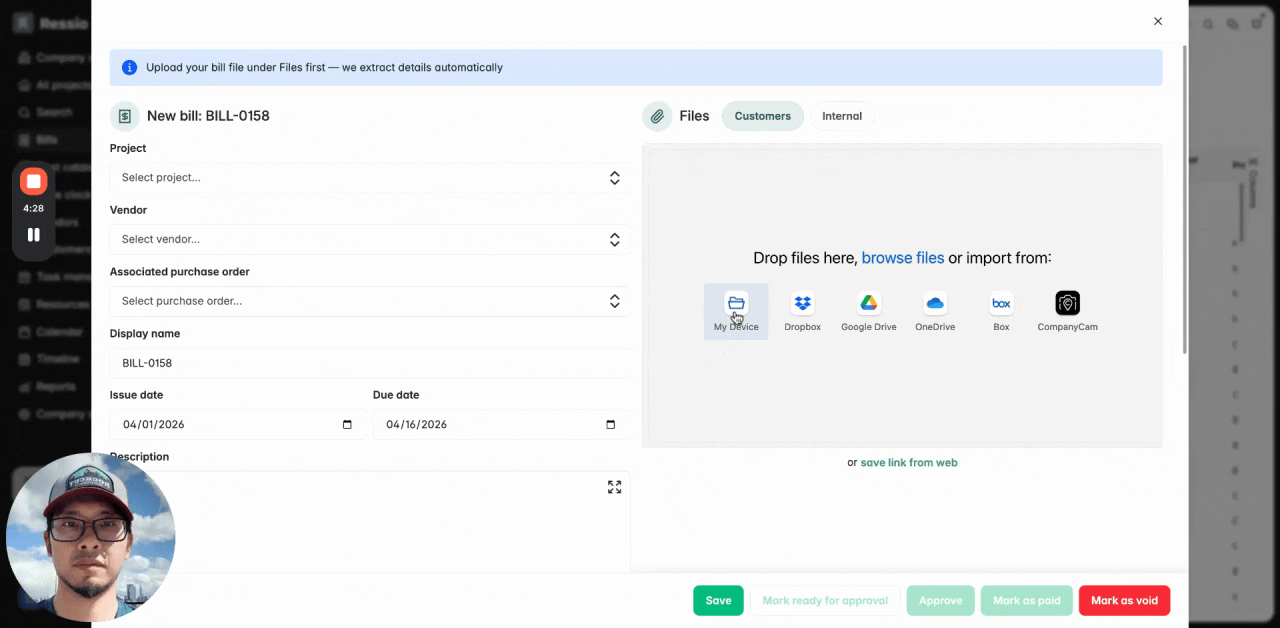
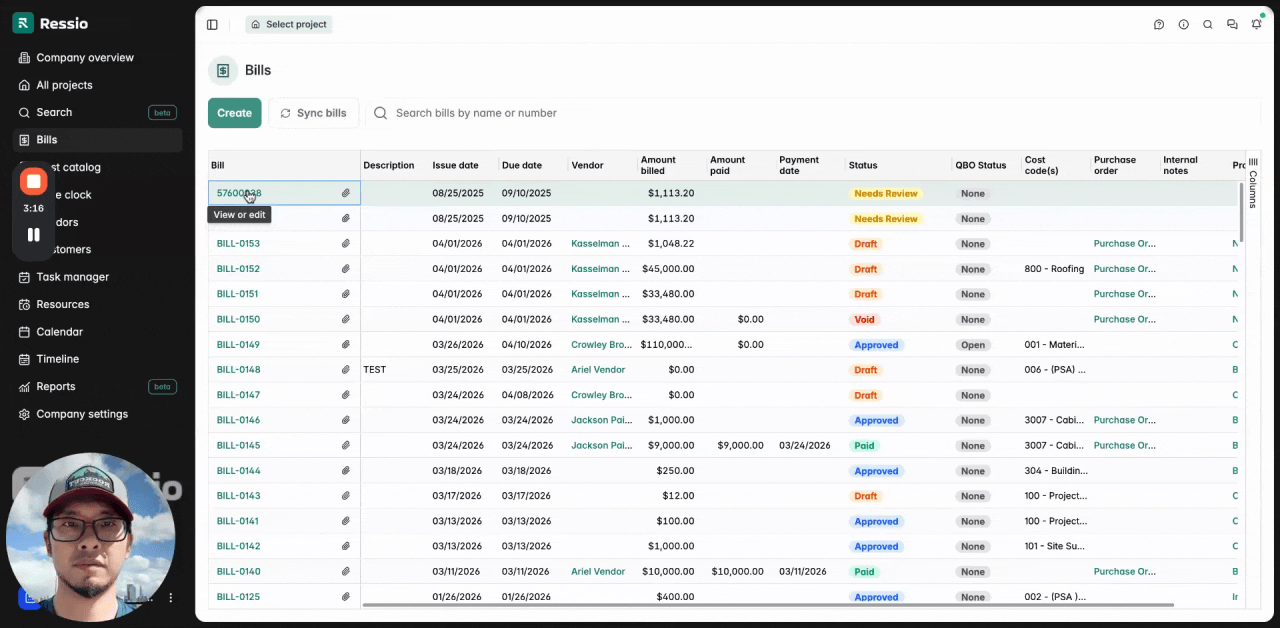
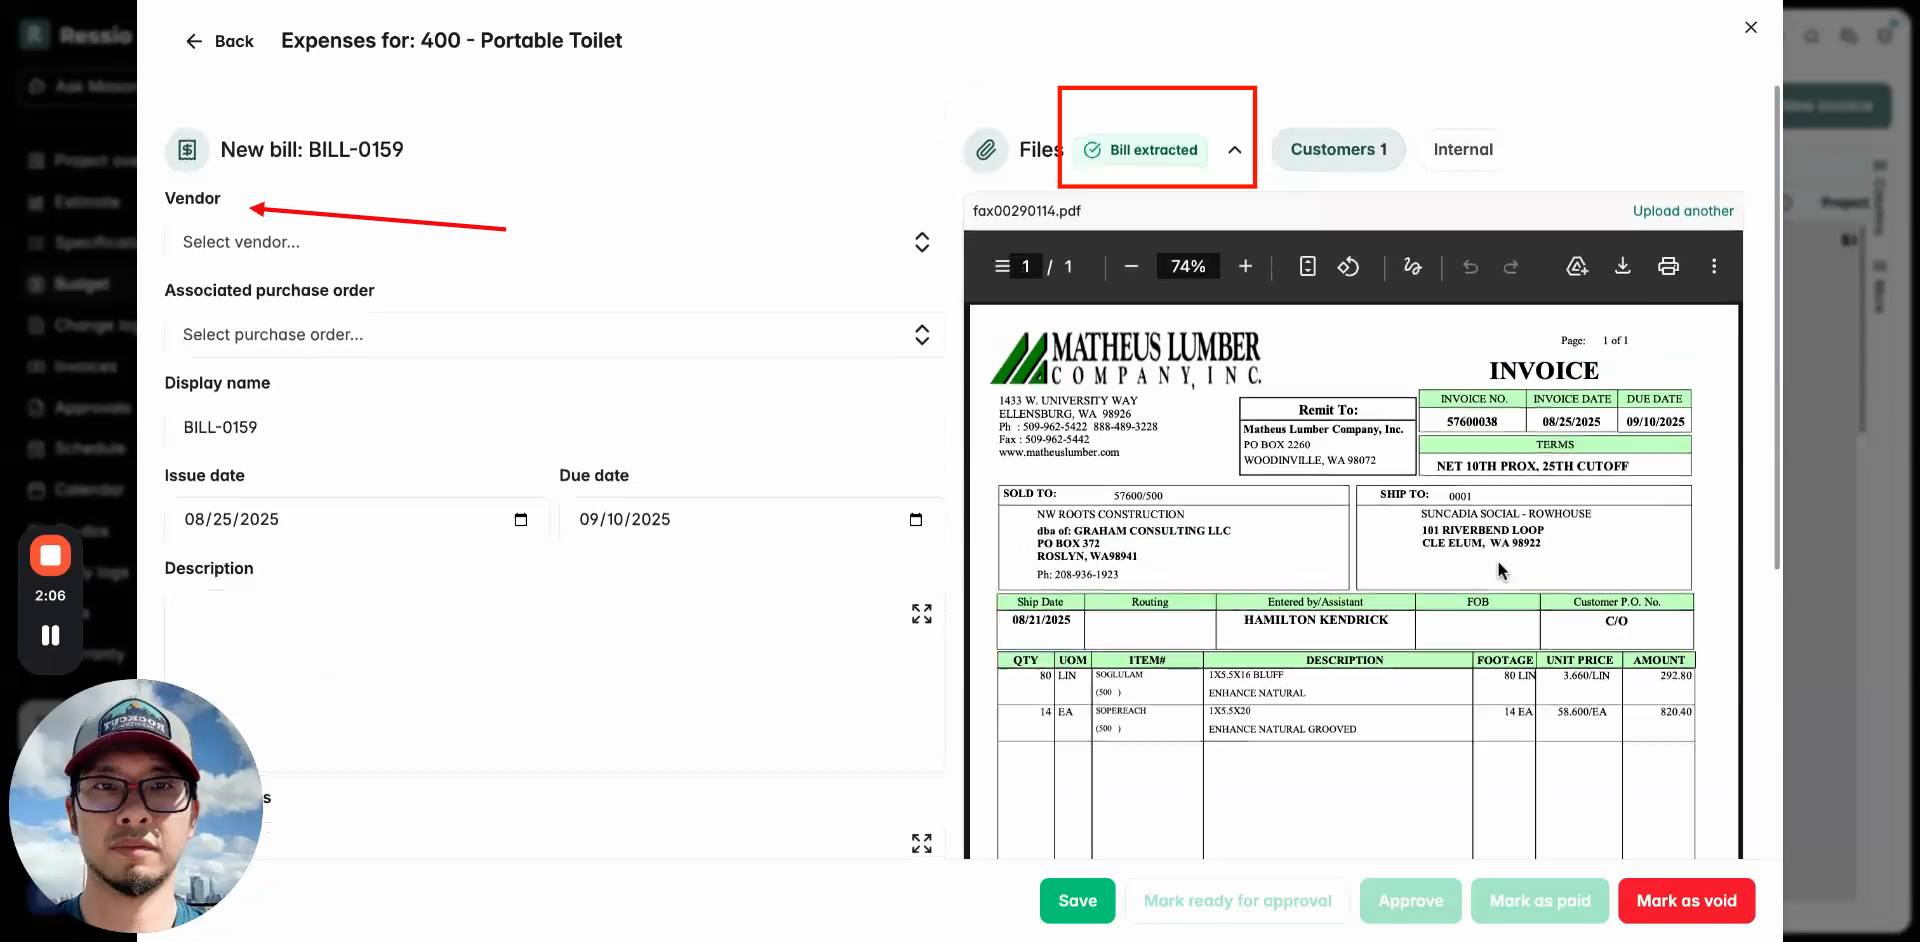
You will want to begin by creating your bill in the top right hand corner by clicking 'Create' on the Bills page. When the window opens, there will be a disclaimer at the top letting you know: "Upload your bill file under Files first — we extract details automatically".
You can decide wether or not you want to extract the information by switching the toggle on or off. If you don't want to extract information, keep it off.

Select your file to be uploaded on the right hand side and hit "Upload File".
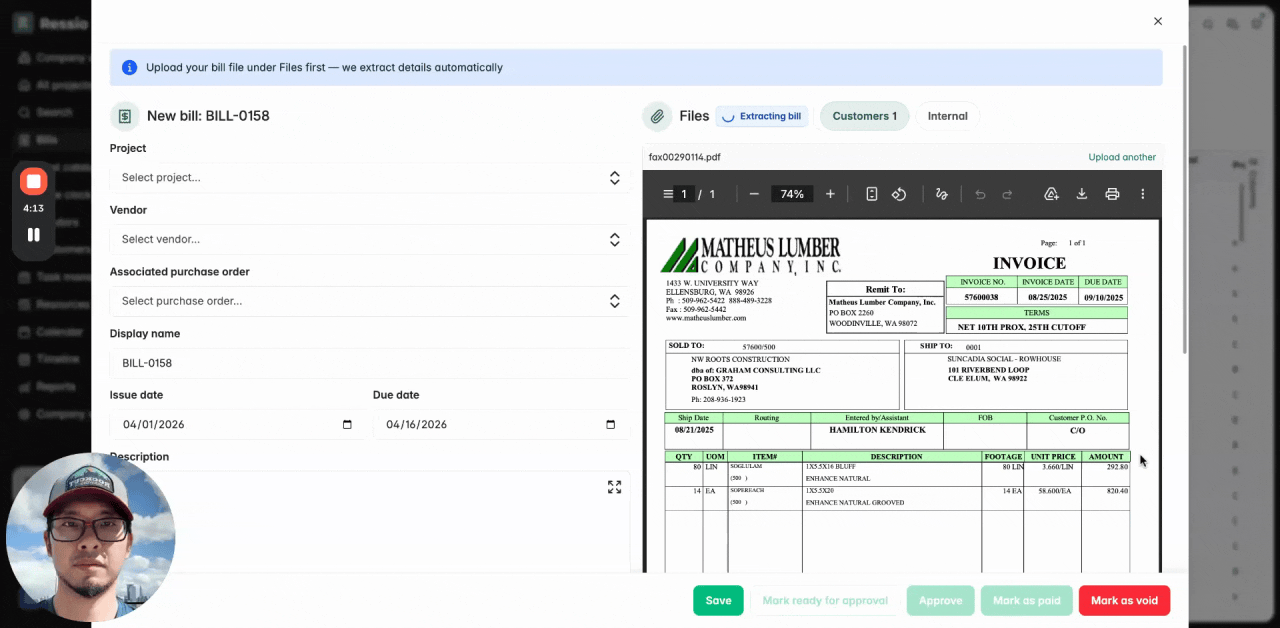
While it is being uploaded, if you have the toggle switched on, you will see at the top "Extracting bill" in blue as it is pulling data. When the upload is complete it will switch to "Bill extracted" in green when complete.
After uploading, preview the file beside the extraction area for easy reference.
Reviewing and Editing Extracted Bill Data
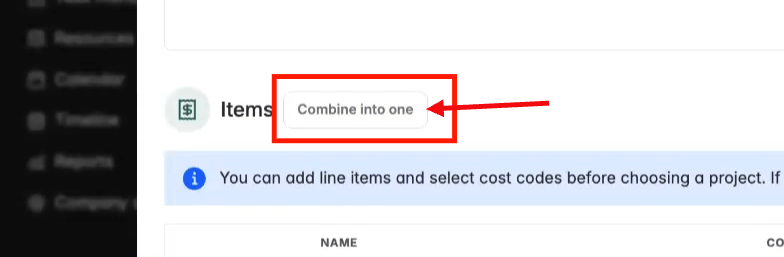
Check and adjust the extracted items as needed. Scroll down to see the line items listed.
Note the disclaimer in blue: "You can add line items and select cost codes before choosing a project. If you select a project with cost item budgeting, this will switch to cost item selection."
-
Extracted items display exactly as listed on the original bill.
-
You have the option of combining you line items into one if you don't want to show every single line. The button, "Combine into one" is located to the right of "Items".
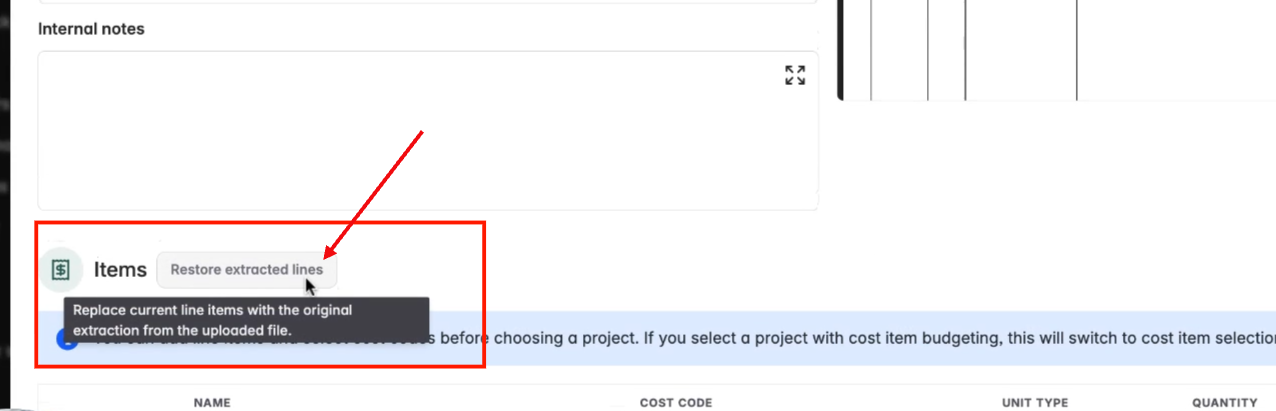
❗You also have the option of reverting back to the original line items if you don't like combining into one. This has to be done before approving.
Ressio attempts to match vendors and projects automatically using AI. Review the bill data for accuracy before moving forward.
Bill Approval and Budget Integration
Assign and approve bills through existing approval workflows in Ressio. Make sure you have the right Project and Vendor assigned.
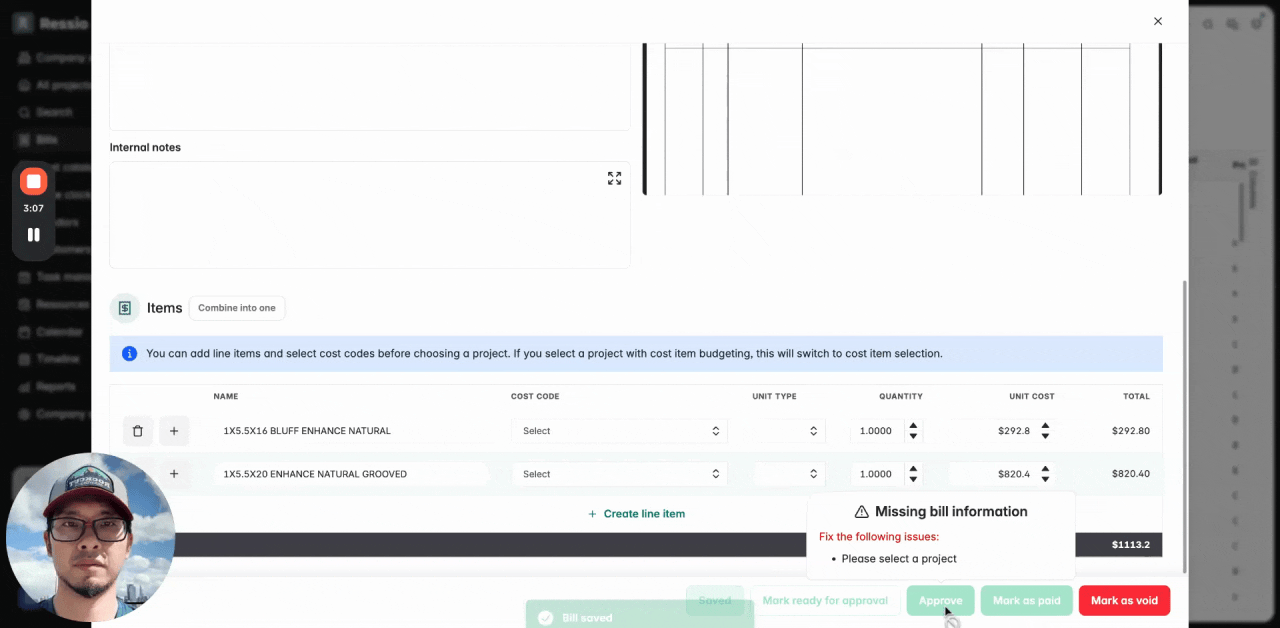
Approve as part of the normal process. Once approved, the bill will be tracked against your project budget.
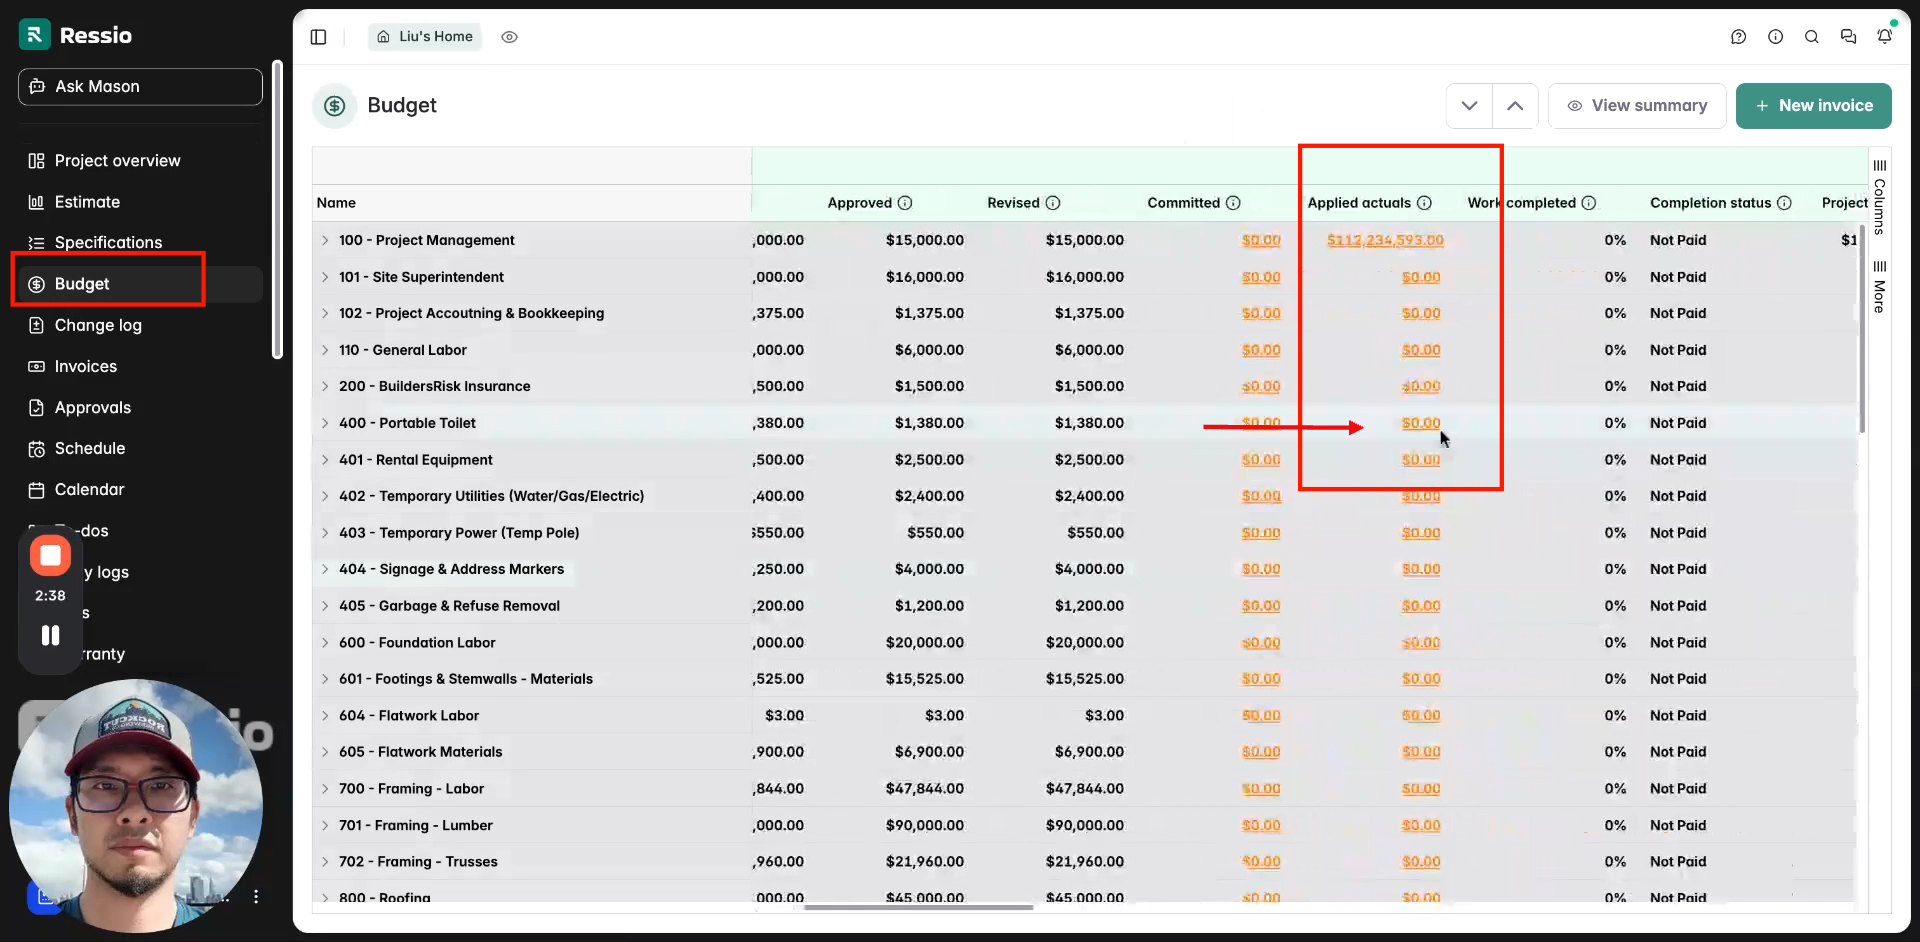
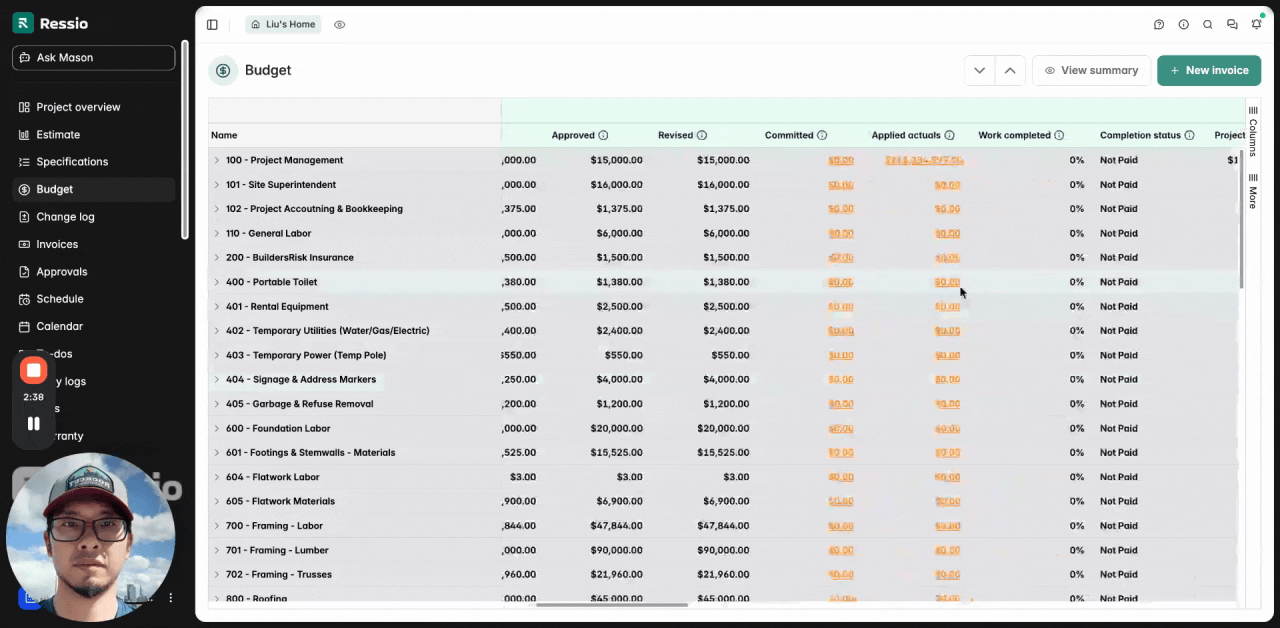
Uploading Bills from the Budget Page
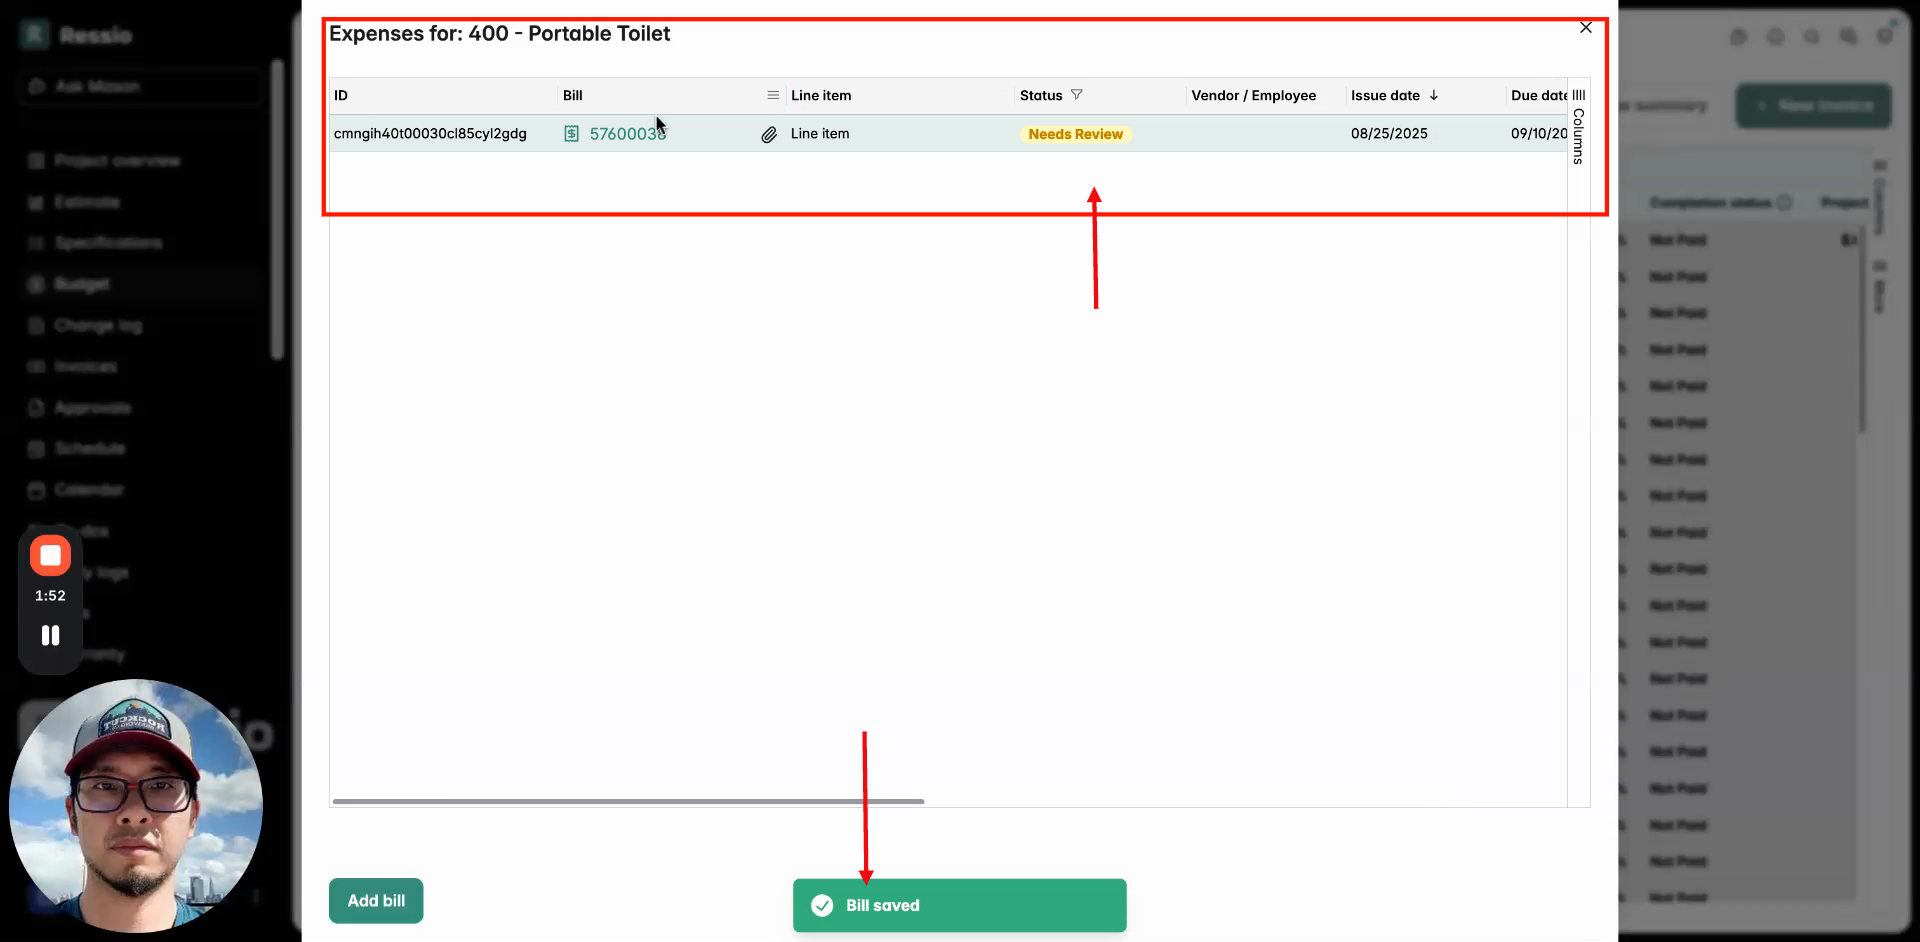
Add bills directly from the Budget page of a specific project to ensure they map to the correct project and cost line. Find the line item on the budget page, go to actuals and hit "Add bill".
The extraction and item controls work exactly as they do on the Bills page.
Combine items if needed, save, and assign vendors. Make sure to review before saving and approving.
Approved bill amounts sync directly to your budget.
Mobile Overview
Open the “More” section at the bottom right and select "Bills."

Go through the same process you would on desktop. Make sure to review before approving.
If you have any questions or need further assistance, contact our support team at support@ressiosoftware.com. We're here to help!