Creating Invoices from Changes
Creating an invoice from approved changes is a quick and efficient way to bill your customer for modifications made after the original contract was set. This guide walks you through the steps to generate an invoice directly from project changes.
✅ Tips & Best Practices
-
Always confirm that all changes are approved before invoicing.
-
Use the View Summary button on the Budget page to confirm totals after invoicing.
Step 1: Navigate to the Invoices Page
-
Open your project in Ressio.
-
From the side navigation bar on the chosen project, select Invoices.
-
You’ll see a list of all invoices for this project, including any drafts, released, or paid invoices.
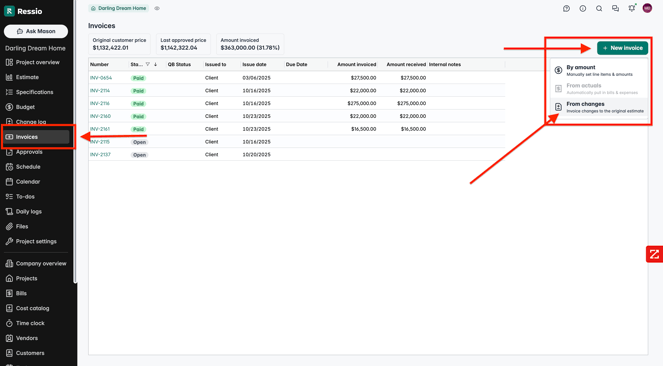
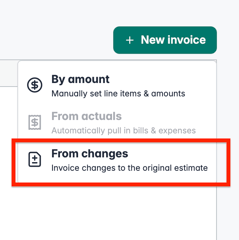
Step 2: Choose “New Invoice” and Select “By Changes”
-
In the top-right corner, click New Invoice.
-
From the available options, select From Changes.
-
This tells Ressio that you’d like to invoice based on invoice changes to the original estimate.
Step 3: Select the Approved Changes
-
A list of approved change orders will appear.
-
Check the box next to each change you’d like to include in the invoice.
-
You can preview details such as description, cost code, and total value before proceeding.
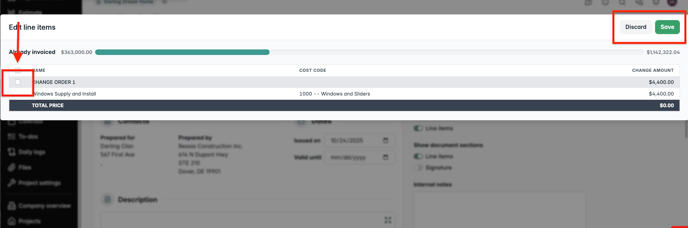
Step 4: Review and Adjust Invoice Details
-
Once selected, Ressio will automatically generate a draft invoice containing those change items.
-
Review line items, amounts, and taxes.
-
If needed, edit any fields such as:
-
Invoice Name / Number
-
Terms & Conditions
-
Notes to Customer
-
Attachments (supporting files, images, or documents)
-
🎓 To learn more about creating invoices from start to finish, read Creating Invoices.
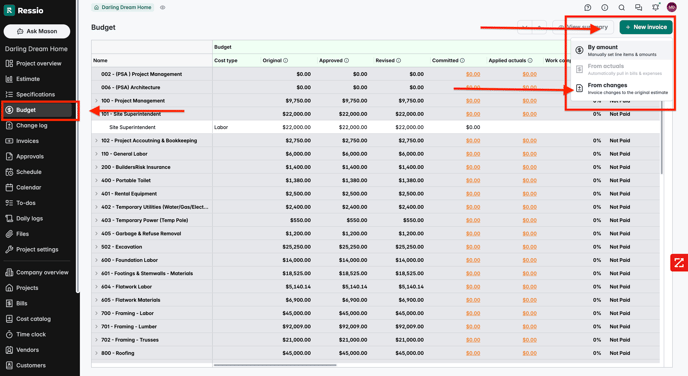
Creating an Invoice from Changes on the Budget Page
You can also create an invoice from changes directly within the Budget page:
-
Open your project and go to the Budget tab.
-
In the top-right corner, click New Invoice.
-
Choose From Changes when prompted.
-
Select the approved change items you’d like to include, review the totals, and then continue the invoicing process as outlined above.
💡 Why use this method?
This is perfect when you’re already reviewing project totals — it lets you bill changes immediately without switching screens.
Step 5: Release the Invoice to the Customer
-
When ready, click Release to Customer in the top-right corner.
-
Once released, the invoice appears in the customer’s portal under Budget → Invoices, and the customer will be notified.
Step 6: Track and Mark Payments
After the invoice is released:
-
Mark as Paid once full or partial payment is received.
-
Void the invoice if it was created in error.
-
Review all invoiced and outstanding amounts on the Invoices page.
📈 Note: The total invoiced amount and any unpaid balance are automatically reflected in your budget summary.
[back-to-top]
If you need help or have any questions about invoicing from changes, please contact your Customer Success Coach — we’re happy to assist you!