.png?width=75&height=75&name=Untitled%20design%20(22).png)
The Warranty feature in Ressio allows homeowners, builders, and vendors to track and resolve post-construction warranty issues in one place. Warranty claims can be submitted through the Homeowner Portal, assigned to vendors or team members, and tracked through completion.
Benefits:
-
Centralizes homeowner, vendor, and builder communications
-
Automates notifications and status updates for all parties
-
Allows attachment of evidence (photos/descriptions) to claims
-
Integrates appointments with project calendars and task manager
-
Streamlines resolution and verification steps
Table of Contents
-
-
Accepting or Rejecting Appointment Times
-
Warranty Claim Roles and Permissions
Before You Start
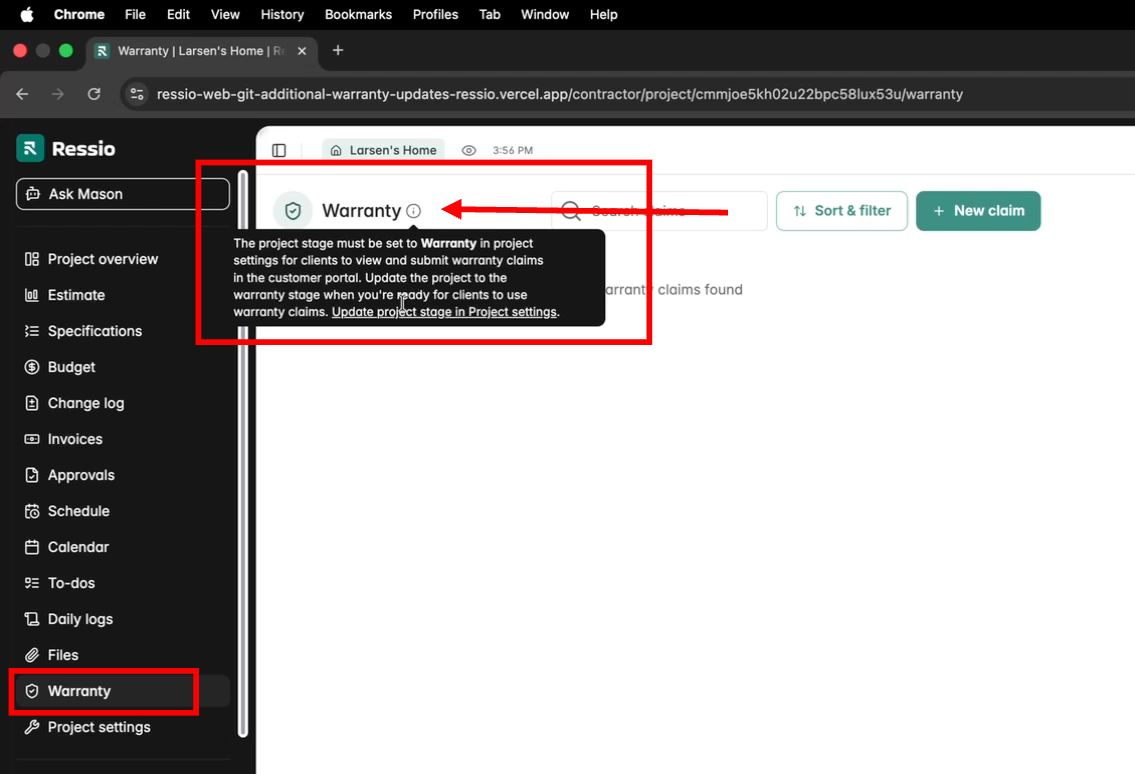
Warranty claims can only be submitted if the project is in the Warranty stage. If you go to the Warranty tab, you can click the "i" icon next to "Warranty" and click the link in the message, "Update project state in Project settings". Clicking that will bring you to the Project settings.
Set a Project to Warranty Stage
-
Open the Project.
-
Click Project Settings.
-
Change the Project Status to Warranty.
-
Save your changes.
✏️ Once the project is in Warranty status, the Warranty section will appear in the Homeowner Portal, allowing customers to submit claims.
Once in the correct stage, the restriction disappears and claims may proceed.

[back-to-top]
Navigation and Layout
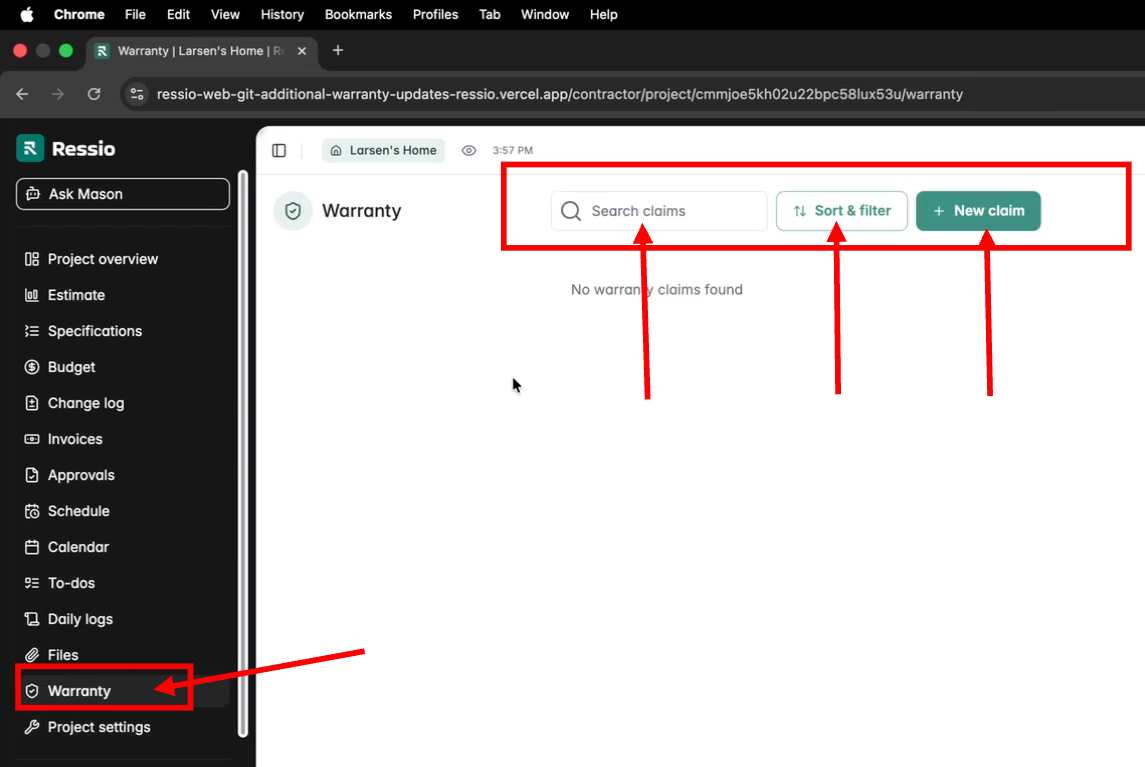
The 'Warranty' tab is located underneath the 'Files' tab in Ressio. The warranty feature is also both in the contractor (vendor) portal and the homeowner portals.
Builder View
Vendor portal on the left and homeowner portal is on the right.
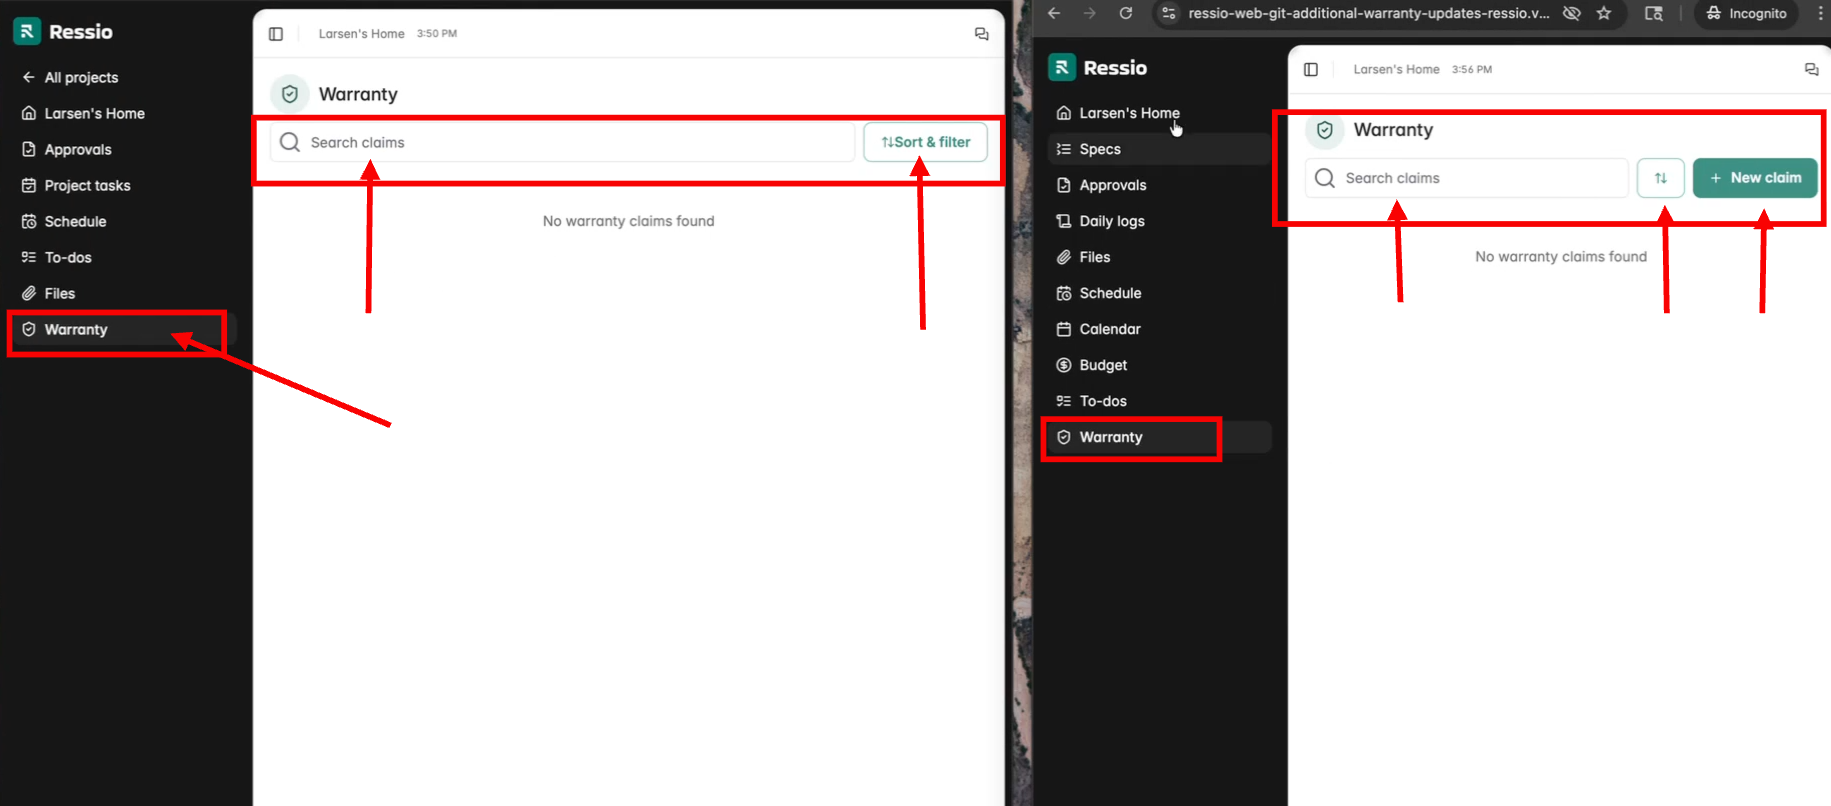
Separate views and controls exist for contractors/builders vs homeowners/vendors.
In both the builder and homeowner views, you can search, filter and + New Claim. In the vendor portal, you can just search and sort/filter.
Submitting a Warranty Claim
Both homeowners or contractors can submit warranty claims.
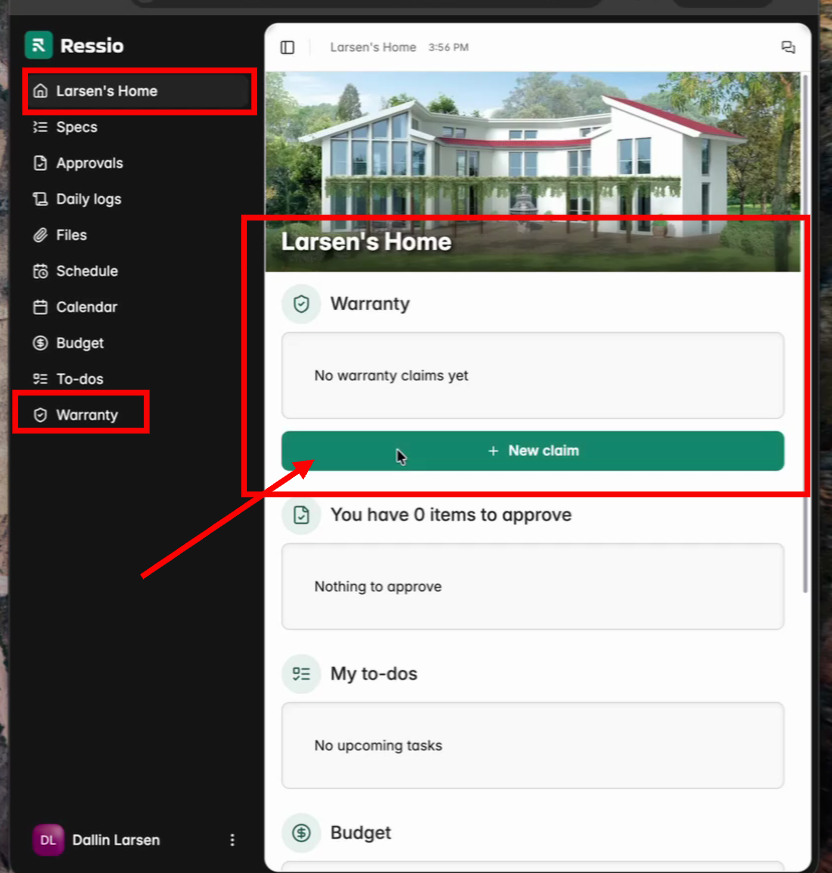
How Homeowners Submit a Warranty Claim
-
Open the Homeowner Portal.
-
The homeowner can either add a claim from the Home page or Navigate to the Warranty section.
-
Click + New Claim.
-
Enter a title and description of the issue.
-
Add photos or files if needed.
-
Click Submit Claim.
If the claim is started but not submitted, it will remain saved as a Draft.
Once submitted, the builder and assigned team members will receive a notification.
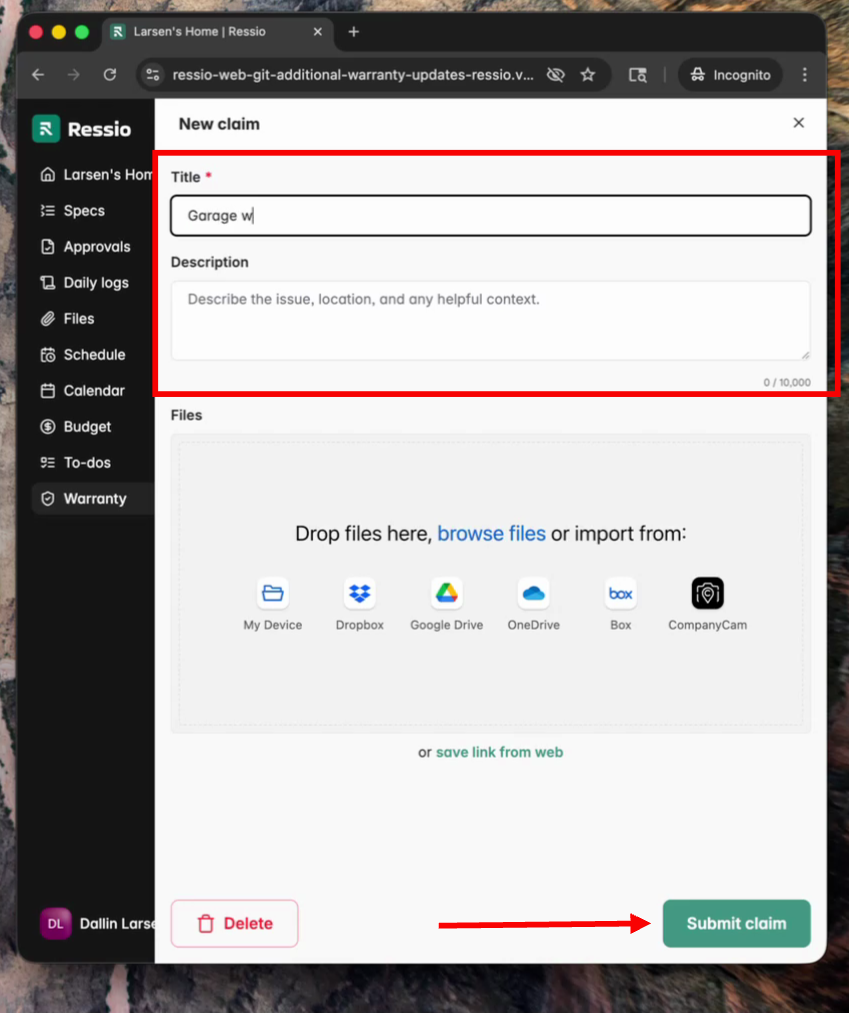
🎗️ If the homeowner wants to just save as draft, they can close without submitting. To submit the claim for processing hit 'Submit Claim'.
After submission, the claim appears in your (builder's) Warranty dashboard, and notifications are sent.
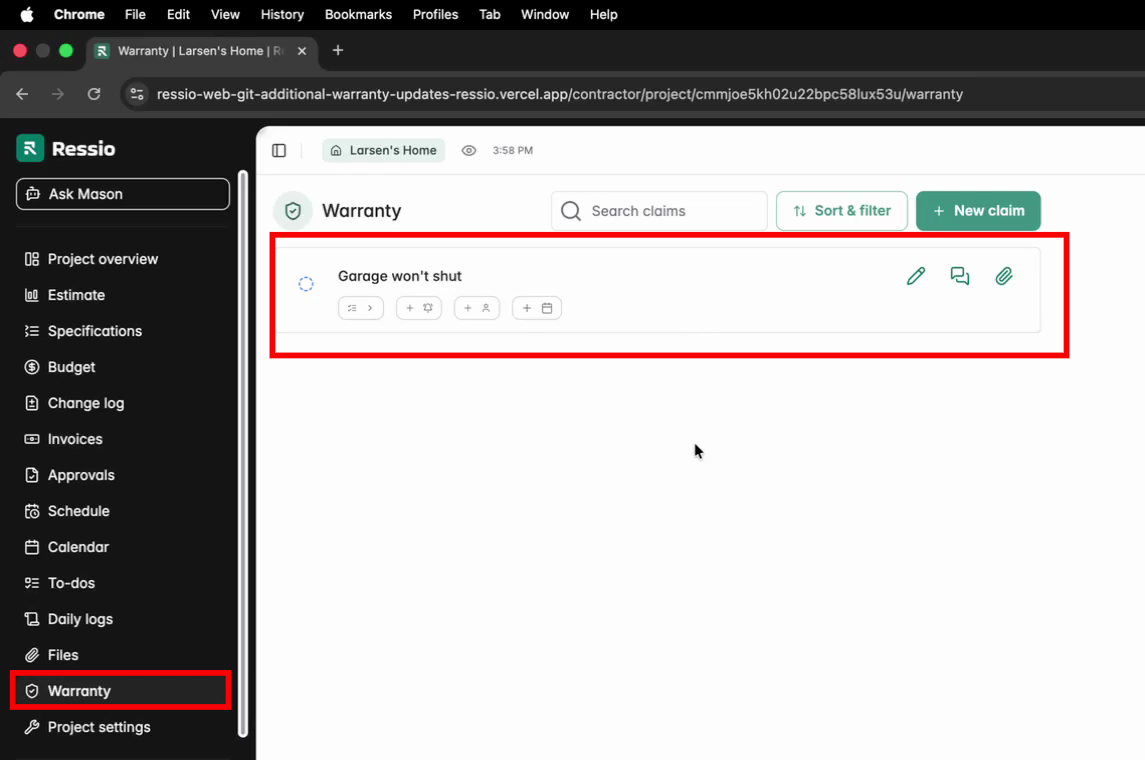
Manage Warranty Claims
Builders review claim information, attached files, and assign responsible parties.
-
Go to the Warranty page in the project.
-
Click the claim you want to review.
-
Review the description, photos, and details.
-
You can also suggest time for work to be completed.
-
Change the status to To Do to begin working the claim and assigning.
-
Assign using the drop down after the status has been changed. The claim can be assigned to:
-
A vendor, or
-
A team member
-
-
Use messages to communicate with the homeowner or vendor.
-
Change status.
When all information has been reviewed and assigned, hit 'Submit claim'. All assigned users will receive notifications.

💬 Engage in public messaging for transparent communication.
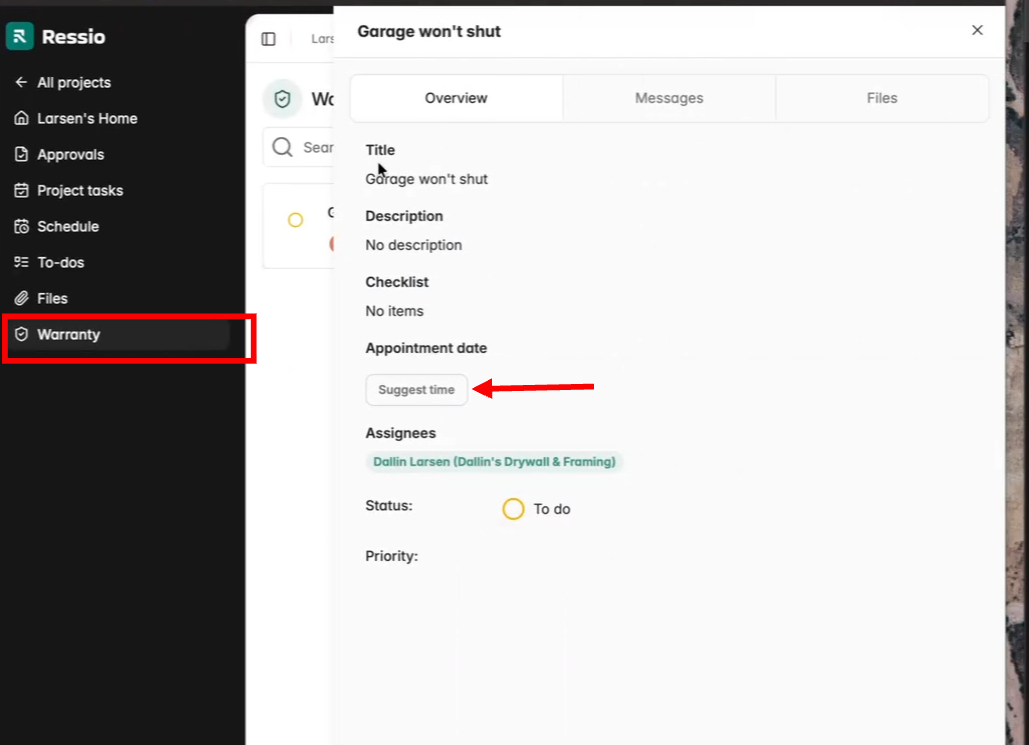
Scheduling Warranty Appointments
Vendors can suggest an appointment time for warranty work and change the status.
-
Vendor opens the assigned Warranty Claim.
-
Adjust the Status to 'Accepted'.
-
Click Suggest Time.
-
Enter a date and time.
-
Submit the suggestion.
⚠️ Appointment times are displayed in the project's time zone, even if the vendor is in another time zone.
✏️ Vendors cannot adjust claim priority or edit details, but may suggest appointment times.
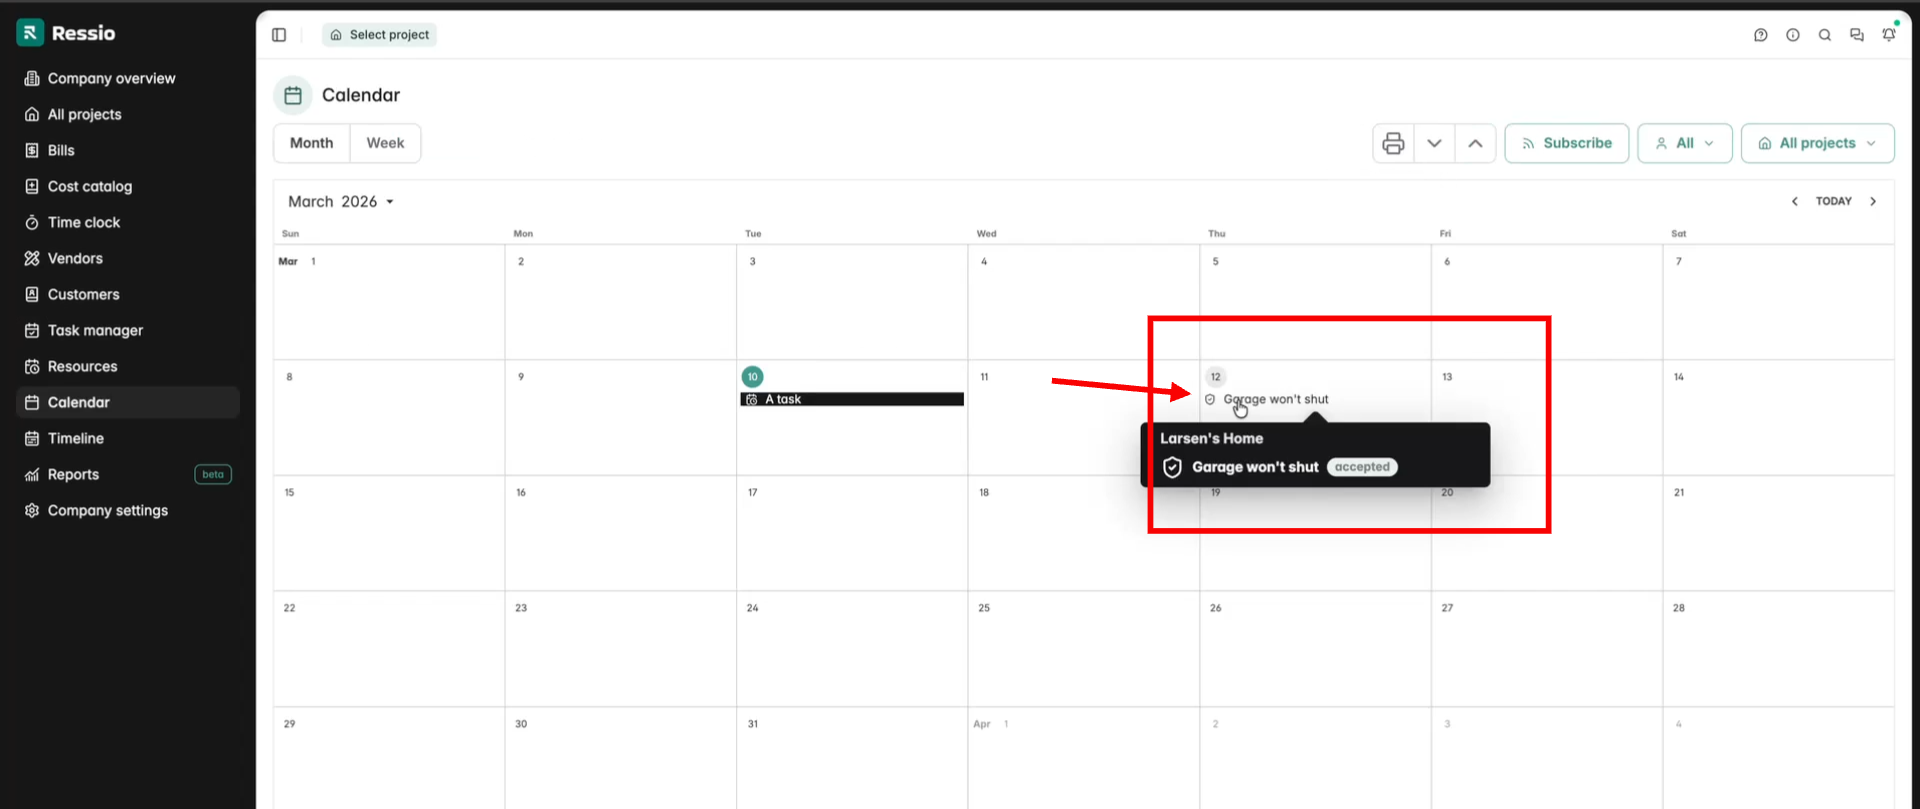
Notifications will be sent to the builder and homeowner. When the appointment is accepted it will also appear in:
-
Task Manager
-
Company Calendar

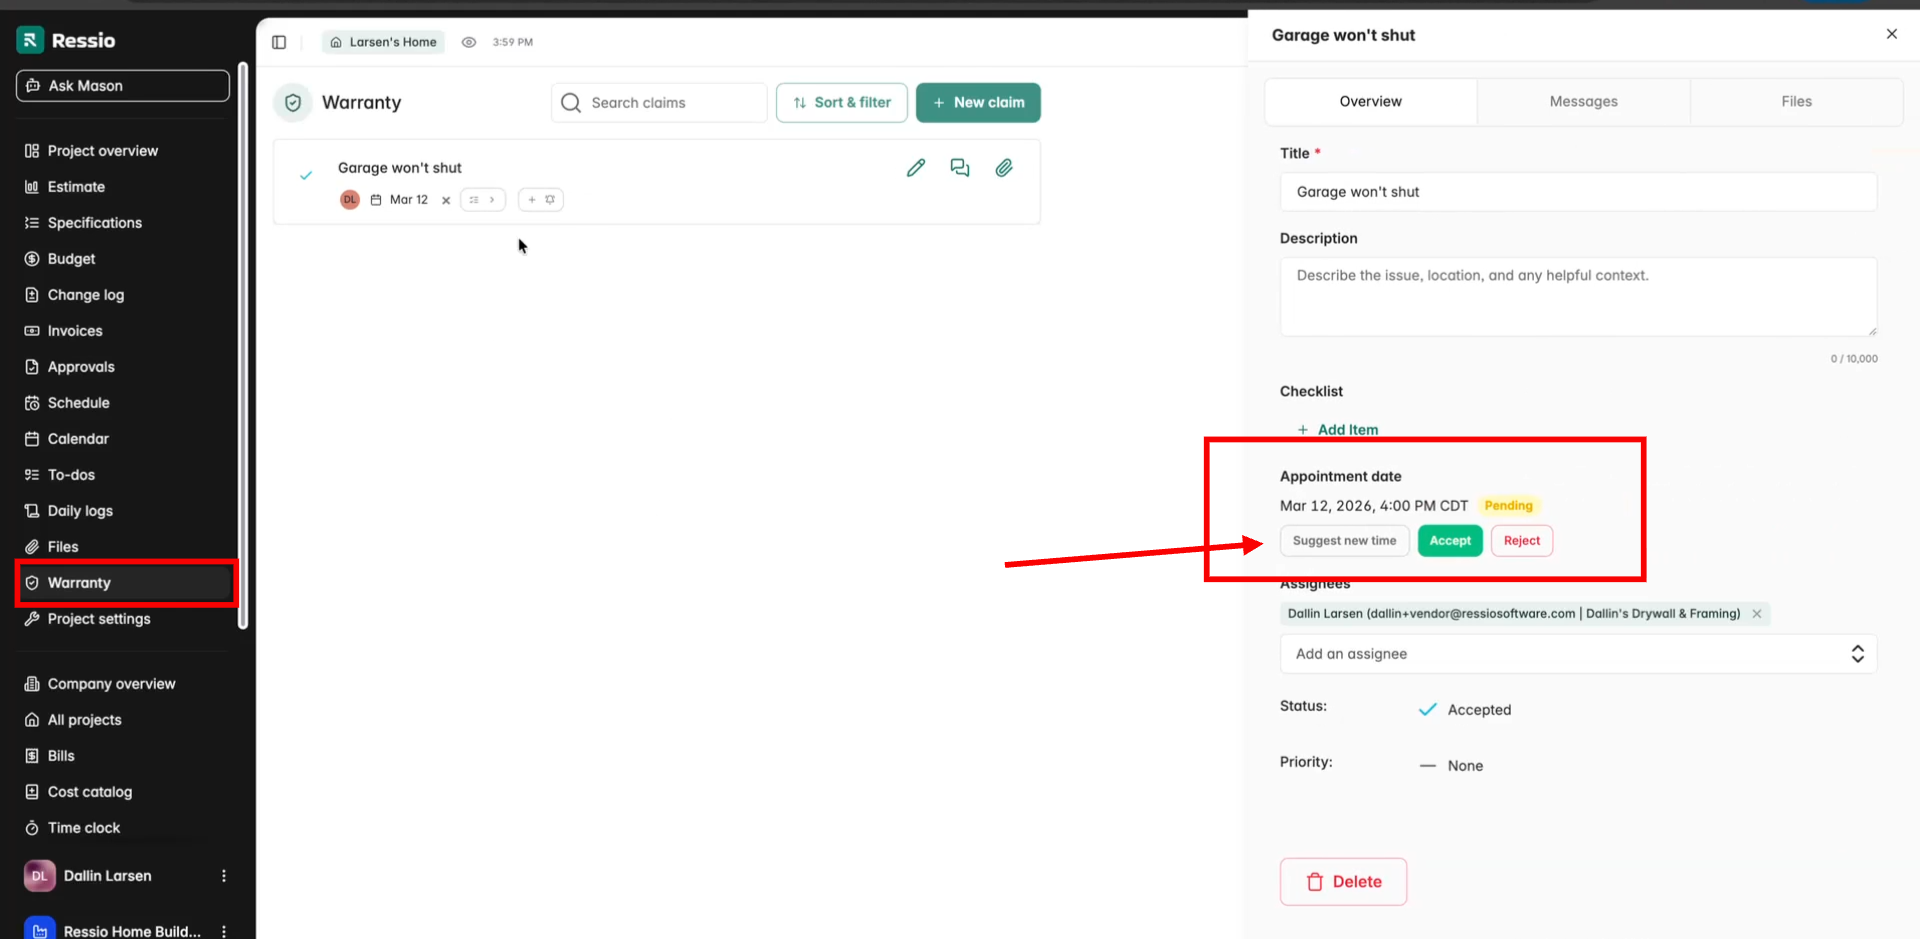
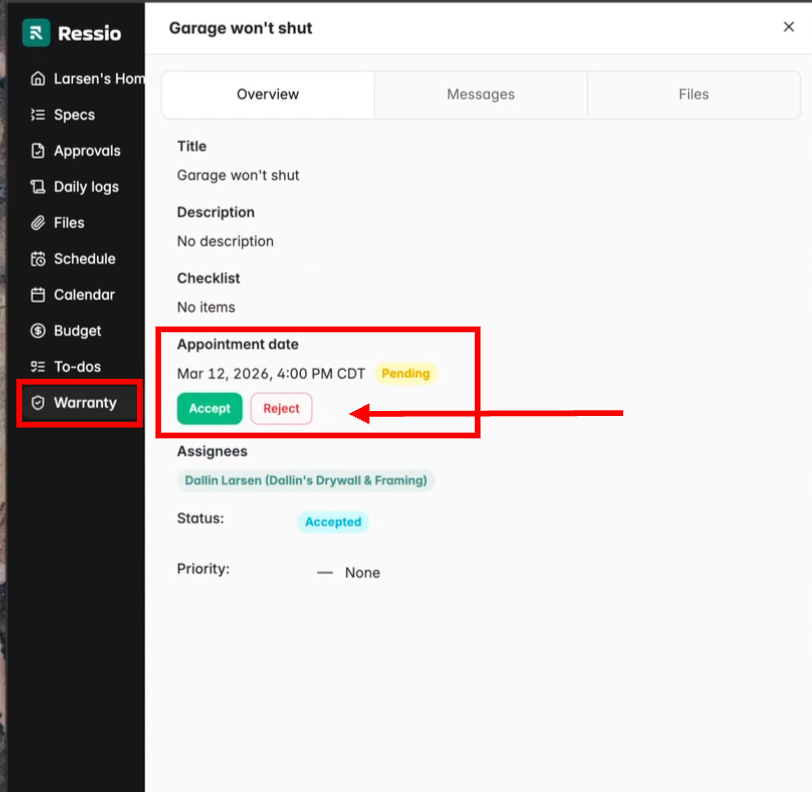
Accepting or Rejecting Appointment Times
After a vendor suggests a time:
-
Builder: Can accept, reject, or reschedule.
-
Homeowner: Can accept or reject.
If the time is rejected:
-
Everyone receives a notification.
-
A message thread is created so participants can coordinate a new time.
Builder View:
Vendor View:

Homeowner View:
When appointments are rejected or rescheduled, a message is sent to all parties and messaging continues for coordination. Example below shows the vendor portal on the left and the homeowner portal on the right.
Completing a Warranty Claim
After work is completed, status changes notify everyone and close out the claim.
-
Vendor completes the work and updates the status to Completed.
-
The homeowner or builder reviews the repair.
-
The claim can then be marked Verified by the builder or homeowner.
This confirms the issue has been resolved.
Marking a Claim as Not Covered
If a warranty request is outside the coverage scope:
-
Open the Warranty Claim.
-
Change the status to Not Covered.
-
Add a message explaining the reason (recommended).
This informs the homeowner that the issue is not included under the warranty.
Warranty Claim Roles and Permissions
| Action | Builder | Homeowner | Vendor / Contractor |
|---|---|---|---|
| Submit warranty claim | ✔ | ✔ | |
| View claim details | ✔ | ✔ | ✔ |
| Upload photos/files | ✔ | ✔ | ✔ |
| Assign claim to vendor or team | ✔ | ||
| Send messages | ✔ | ✔ | ✔ |
| Suggest appointment time | ✔ | ||
| Accept appointment time | ✔ | ✔ | |
| Reject appointment time | ✔ | ✔ | |
| Update limited claim status | ✔ | ||
| Mark work completed | ✔ | ||
| Verify completed work | ✔ | ✔ | |
| Mark claim Not Covered | ✔ |
Warranty Claim Statuses
Warranty claims move through several statuses as they are reviewed, scheduled, and resolved. Understanding these statuses helps builders track progress and communicate clearly with homeowners and vendors.
| Status | What It Means |
|---|---|
| Submitted | The homeowner has submitted the warranty claim through the Homeowner Portal. |
| Open | The builder has reviewed the claim and confirmed it is valid (triaged). |
| To-do | The builder has assigned the work to a specific assignee (vendor or team member) |
| In Progress | Work has started on the claim. This may be performed by the builder or an assigned vendor. |
| Completed | The repair work has been finished and is ready for builder verification. |
| Verified | The builder has confirmed the issue is resolved and the claim is fully closed. |
[back-to-top]
If you have any questions or need further assistance, contact our support team at support@ressiosoftware.com. We're here to help!