Adding multiple signers ensures that all decision-makers are included in the proposal approval process — improving transparency and reducing approval delays. In Ressio, you can easily generate a proposal from your estimate and require signatures from multiple customers before the agreement is considered approved.
Benefits of Multiple Signers:
- ✅ Ensures accountability - every listed decision-maker must sign before approval, preventing miscommunication.
- 🏡 Capture all homeowners - Perfect for projects involving couples or multiple owners.
- 🔒 Reduce risk - Protects your business by ensuring all parties formally agree to the proposal terms.
- 💬 Improves transparency - clients can see which signature are still pending in Client Portal
- ⚡ Streamline approval - Once all signatures are collected, the proposal automatically moves to "Approved".
Table of Contents:
- Overview
- Step 1: Open the Estimate
- Step 2: Generate the Proposal
- Step 3: Add Multiple Signers
- Send the Proposal for Approval
Overview
Client proposals in Ressio are generated directly from your Estimate. Once your estimate is ready, you can create a proposal, choose the level of detail shown, and define who needs to sign.
If your project has multiple customer contacts, you can require that each contact must sign before the proposal is marked as approved.
⚠️ Only the contacts listed under the project's Customer Tab will appear as singers. To read about how to add and manage customers, read "Adding and Managing Customers".
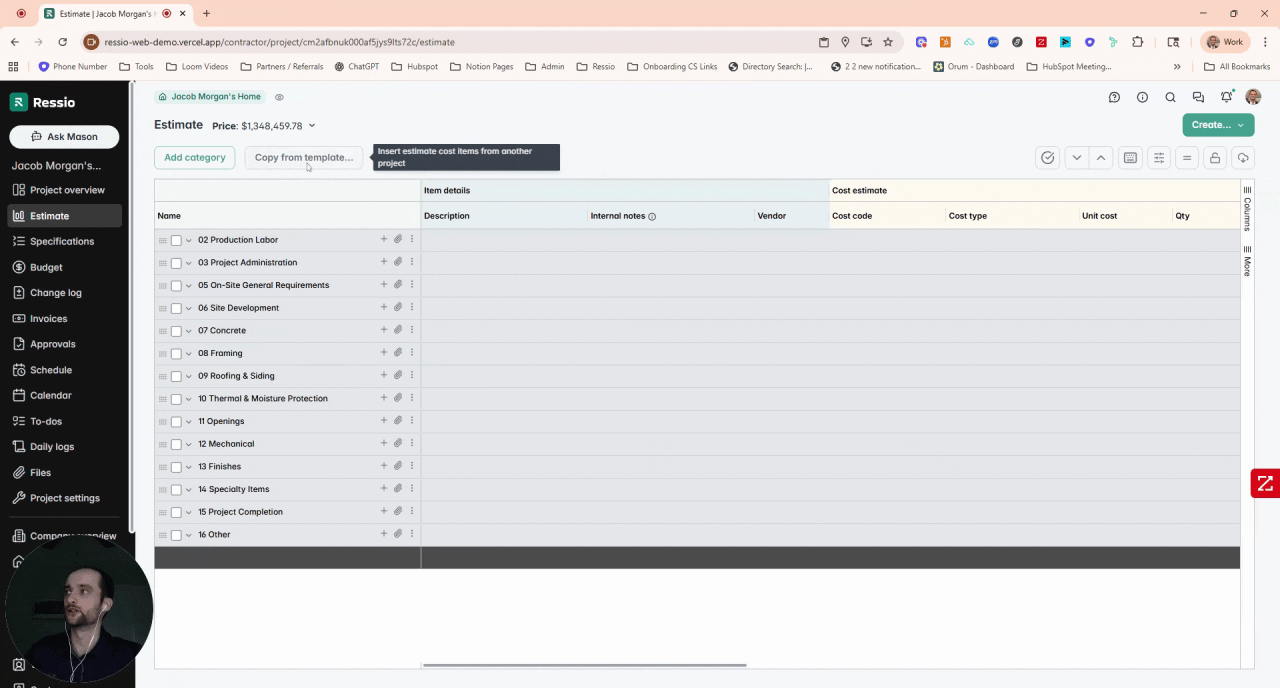
Step 1: Open the Estimate
-
Navigate to your Project and open the Estimate tab. Review the estimate to ensure all details are correct. You can expand or collapse categories for more or less detail.

-
Stack multiple estimate templates onto one estimate (for example, adding a Bathroom Remodel template to an existing one).
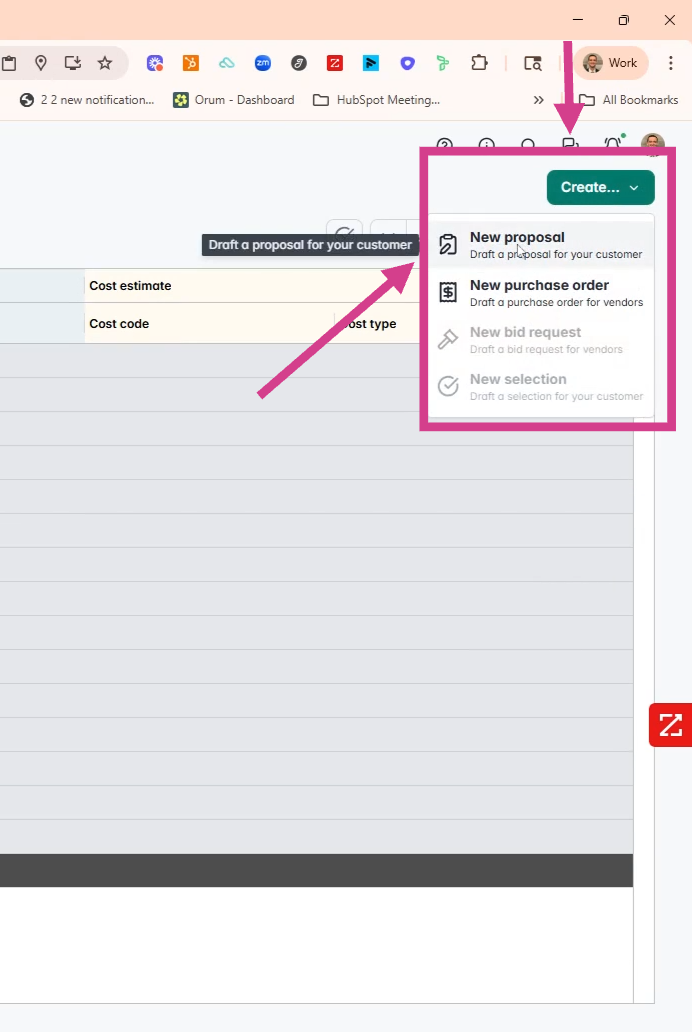
Step 2: Generate the Proposal
-
In the top-right corner, click Create → New Proposal.
-
Give your proposal a name (optional).
-
Use the toggles on the right to decide what level of detail to include:
-
Fixed Price: Show only total project cost.
-
Cost-Plus: Include detailed breakdowns and builder fee transparency
-
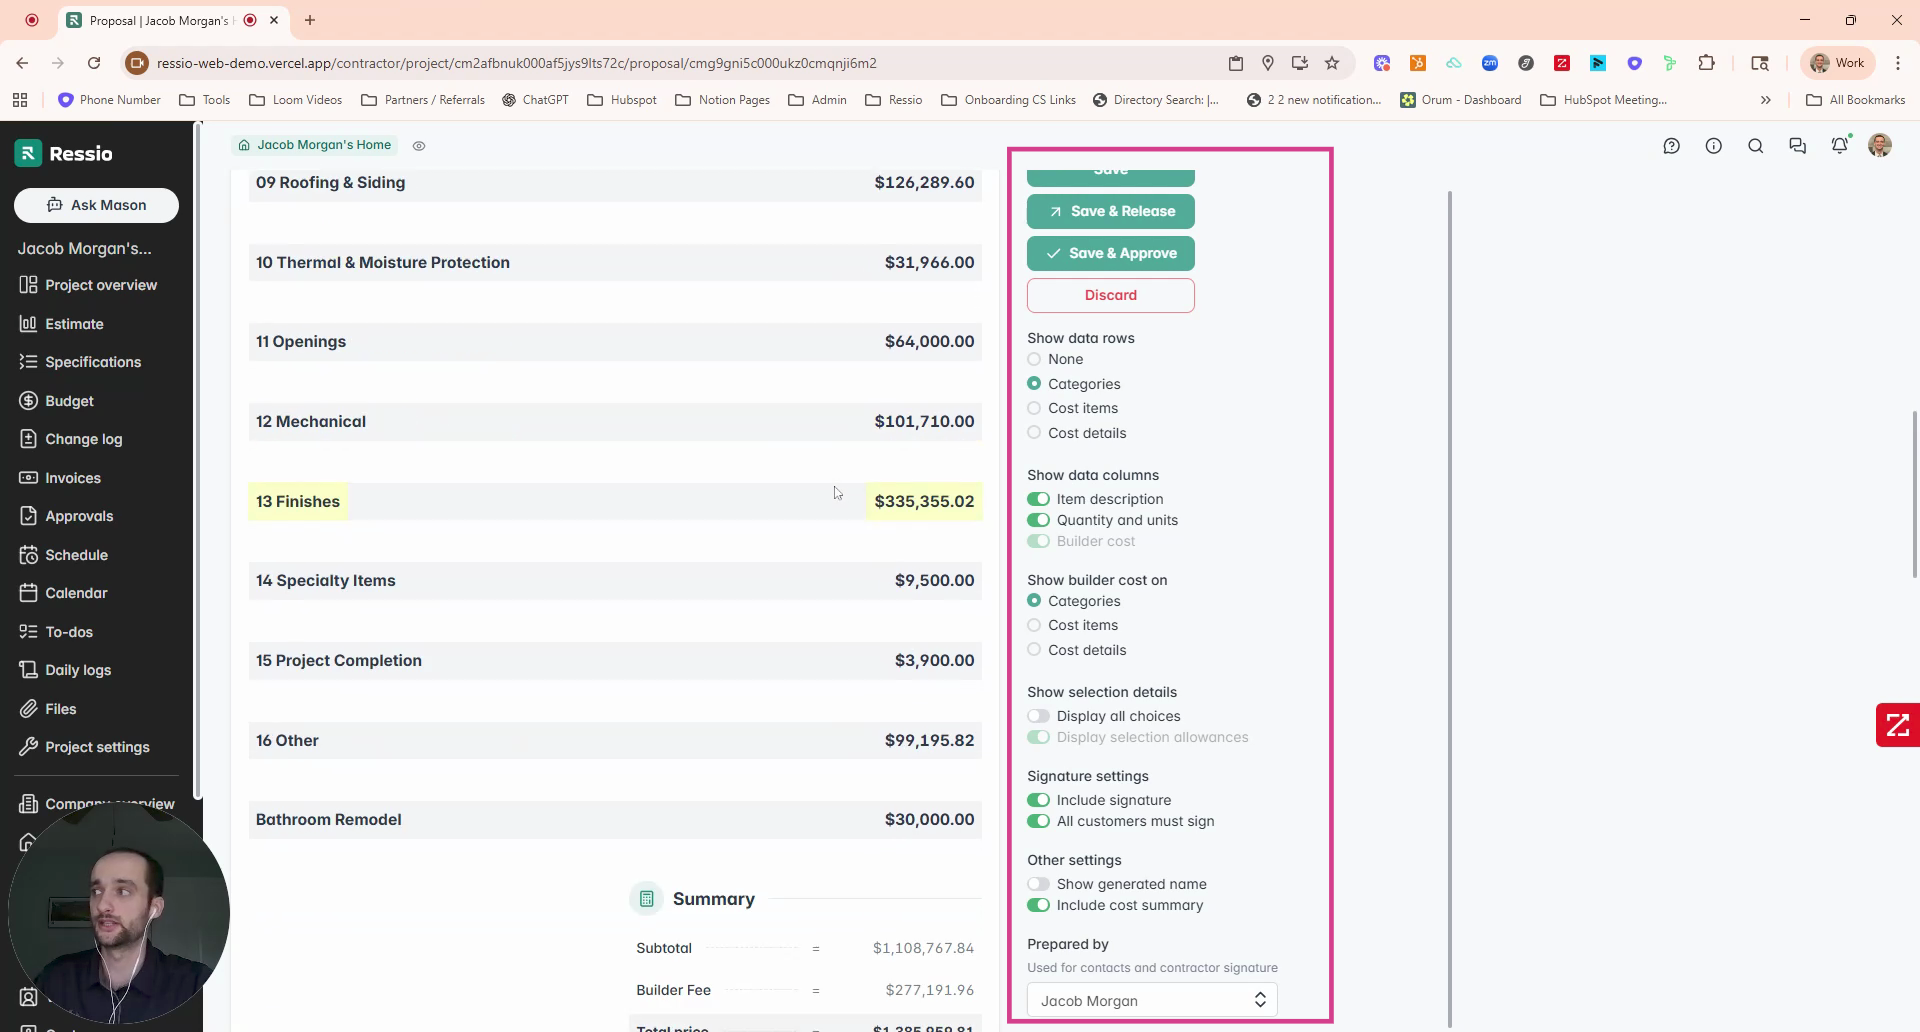
4. Add terms and conditions, signature lines, or attachments as needed
🔈You can turn the "Require all signers" setting on or off for each proposal.
Step 3: Add Multiple Signers
-
In the "Signature Settings"section, you’ll see all customer contacts listed for the project.
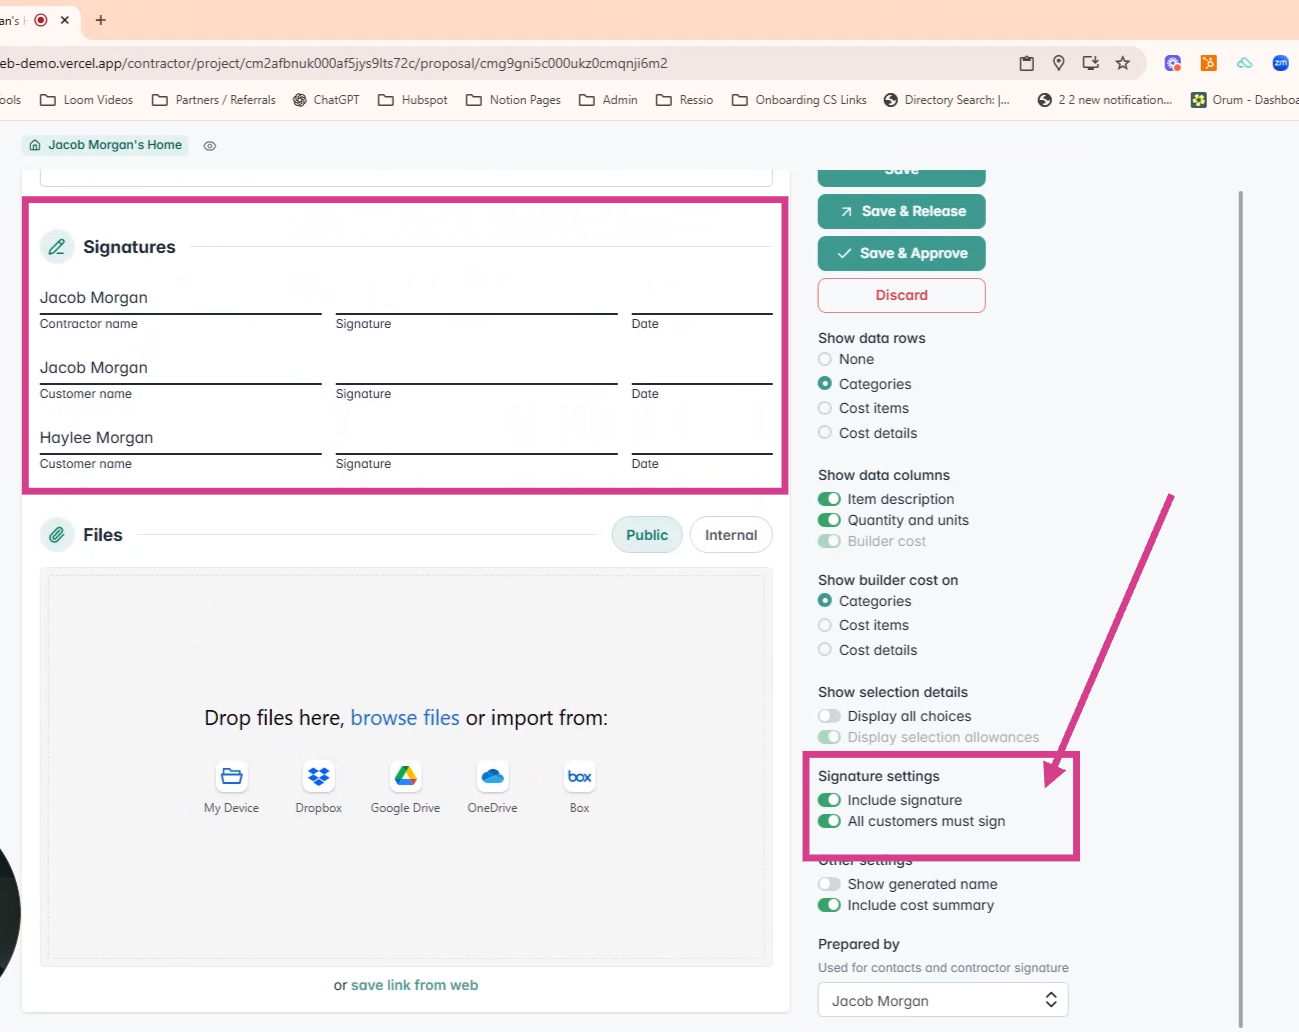
2. Toggle "All customers must sign" to ensure all contacts must approve the proposal before it’s marked as accepted.
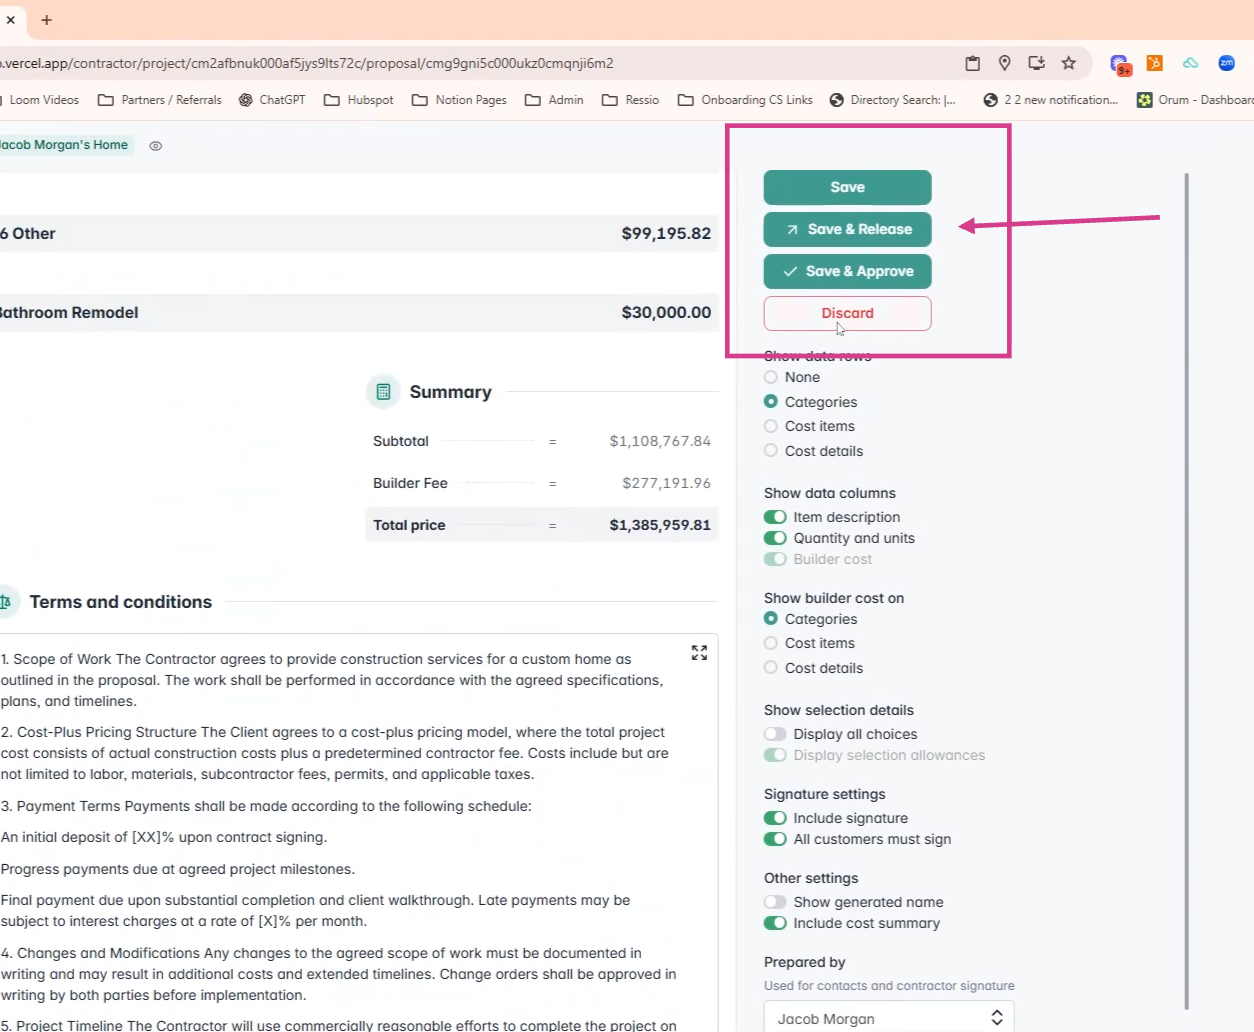
3. Save your settings when finished.
[back-to-top]
Step 4: Send the Proposal for Approval
-
Click Save & Release to send the proposal for signature.
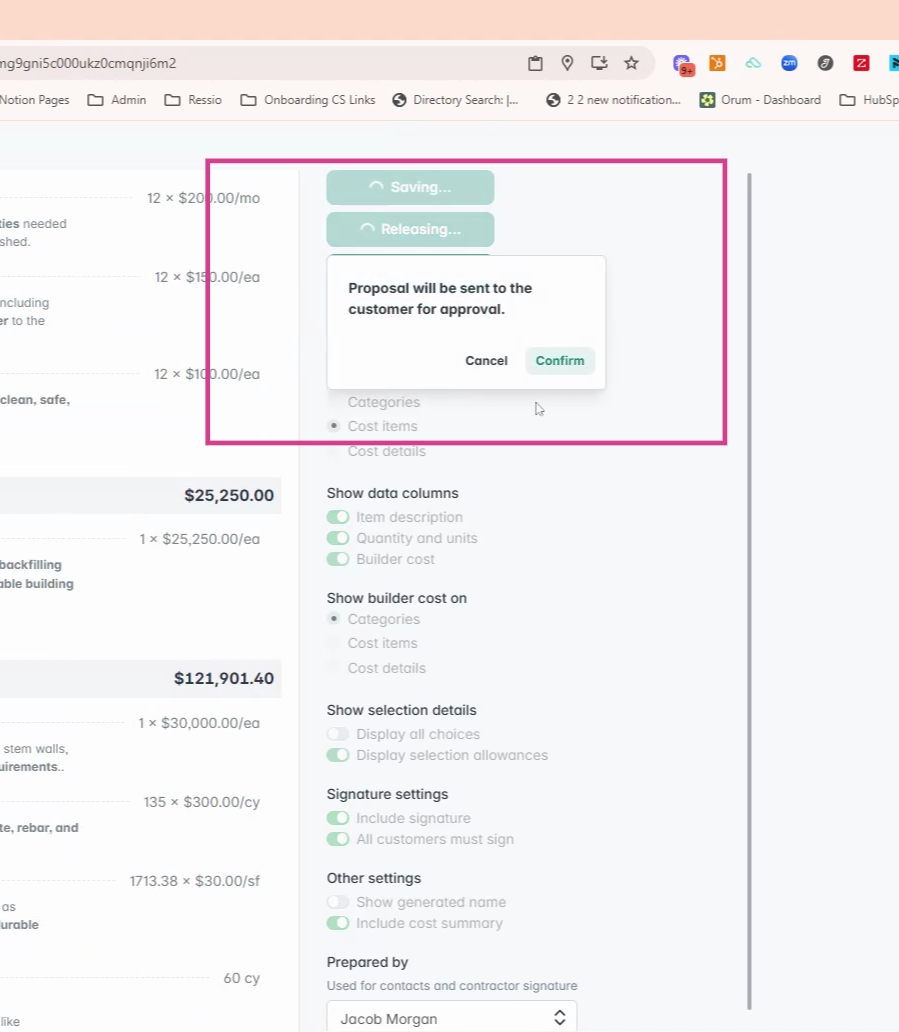
2. Each signer receives an email notification and can open the proposal in the Client Portal.
3. Clients can:
- View proposal details
- Message you with questions
- Print or download the document
- Approve it electronically
🔄 Approvals automatically sync to the project's Approvals tab for easy tracking. To learn more about Approvals, read Approvals Overview.
If you have any questions or need further assistance, contact our support team at support@ressiosoftware.com. We're here to help!