The schedule is the backbone of any project. Control your project timeline with ease—create schedules from templates or existing projects, and view them as a list, calendar, or Gantt chart.
Key Features:
⏱️ Time Saving: Copy schedules from templates or existing projects. Use task dependencies to automate timelines.
⚙️ Flexible Views: Switch between list, calendar, and Gantt chart views to fit your workflow.
📱 Mobile Access: Make updates on the go with your phone.
👥 Team Visibility – Share tasks with your team, vendors, and clients.
📊 Track Progress: Schedule deliverables, monitor the critical path, and set a baseline to track changes over time.
Table of Contents
3. Tracking and Maintaining a Schedule
b. Baseline
Company-Wide Schedule Tab Settings
Before diving into your project schedule, you can decided wether you want to include weekends in your schedule and how your tasks appear. You can find the Schedule tab under Company Settings.

The two toggles can be turned on and off and will be applied to all projects.
- Include weekends in schedule - affects date calculations
- Use individual schedule task colors on company-level calendar, resources, and timeline pages - affects display only
🎓 To learn and under more, read "Manage Weekend Scheduling and Task Colors".
Navigation and Layout
Find the Schedule in the left menu bar of any project.
Schedule Buttons

First row:
➕ Create: Add a new task to the bottom.
✏️ Edit: Open the selected task’s details.
📧 Notify: Send task notifications to assigned users.
👥 Assign: Assign and bulk assign team members, customers and vendors to tasks
↶ ↷ Undo/Redo: Revert or reapply changes (Shortcut: Ctrl+Z).
🔍 Search bar: Filter tasks by name.

Second row from left to right:
🔒 Save baseline: Takes a snapshot of the current schedule at that moment, so later date changes can be compared against the saved plan
👁️ Toggle baseline: show/hide toggle for baseline lines on the schedule chart.
∧ ∨ Expand or Collapse
Zoom: Zoom in and out by day, week, month, year, and quarter
🖨️ Print: Print your schedule - use default settings for best results
Download: Export schedule to excel
🌴 Holidays: Manage project holidays
⏱️ Remove constraints: Click to remove constraints on all task with predecessors
📆 Sync task dates to Calendar
✅ Jump to today
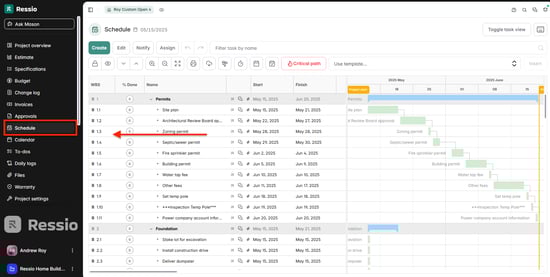
📈 Critical path: Click to view the critical path
Template search: Search for schedule templates from other projects and hit insert when ready
Schedule Start Date
The top-left start date defines the earliest date a task can occur.

Change the Target Start Date in Project settings.
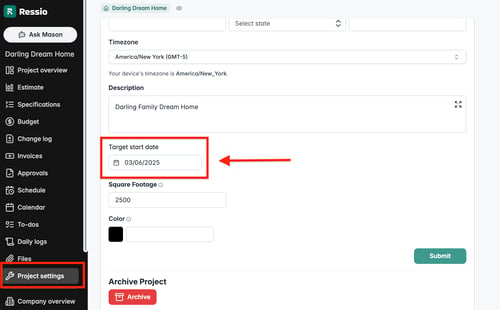
⚠️Tasks cannot be scheduled before this date. ⚠️
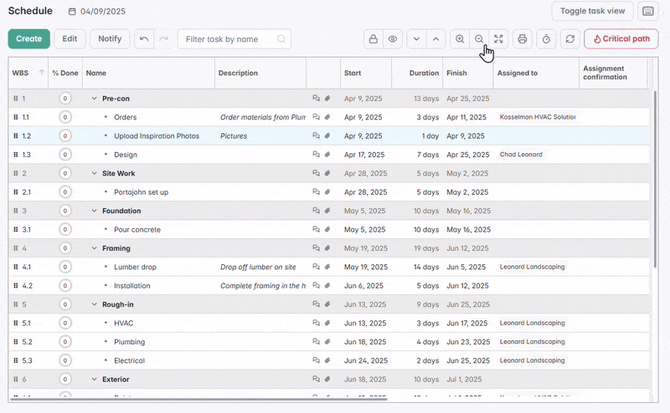
Types of Tasks
The schedule supports several types of tasks.
| Task | The basic unit with a start/end date, description, and assignee. Tasks can include files and messages. |
| Phase | A task that contains nested sub-tasks. Right-click a task to add a sub-task and create a phase. A phase’s duration is defined by its sub-tasks. |
| Sub-Task | Sub-tasks live inside a phase and often include a defined responsibility over a short duration. |
| Milestone | A zero-day task used to mark significant events like inspections, draws, or invoices. |
| Successor | A task that starts after another task is completed. Adjusting the predecessor reschedules the successor. |
| Predecessor | A task that controls when a dependent task starts. Useful for managing project delays. |
Schedule Views
View and interact with the schedule in multiple ways:
✏️ Use List or Gantt View for building schedules.
🗓️ Use Calendar or Task (mobile) view for reviewing and editing.
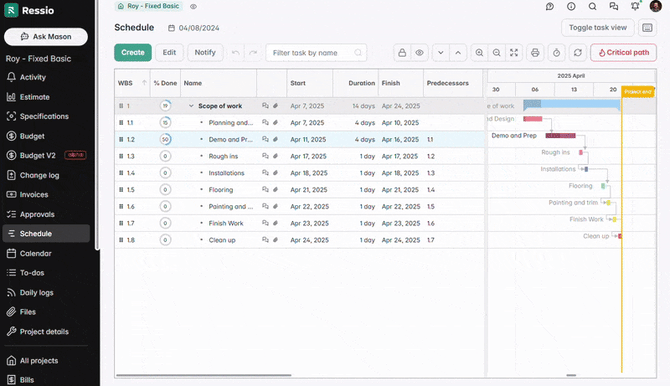
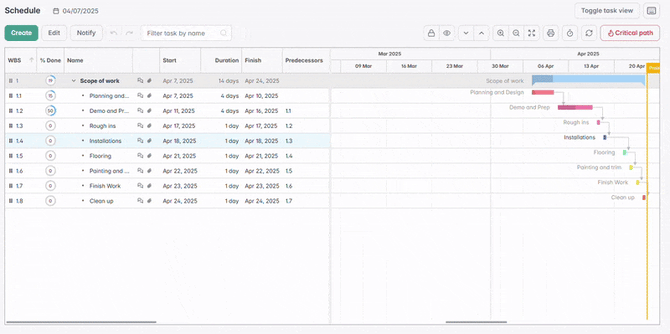
List View or Gantt Chart
Drag the center bar left or right to adjust your layout.

💡TIP: Click the center arrows to snap to full screen or split screen.
Calendar or Task (mobile) view
Select Calendar from the left menu (desktop) / top menu (mobile), or Toggle task view from the upper right toggle (desktop) / Schedule (mobile)
List View
The left panel shows tasks in a spreadsheet format. Select any cell to edit.
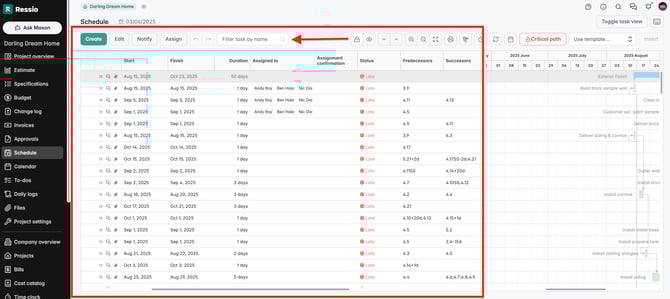
When a task is moved or edited in the schedule, any downstream tasks will automatically adjust. A red tab appears on the task that was last edited, providing a visual indicator of where the change occurred.
✏️ The red tab will disappear when you navigate away from the page or refresh your browser.
Customizing Columns
Dragging: Reorder tasks or columns by dragging.

Right-click column headers: Add/remove columns, sort data, or apply filters.

Gantt Chart View
The right panel is an interactive Gantt chart.

Gantt Chart buttons
∧ ∨ Expand/Collapse: Show or hide phases and tasks.
🔎 Zoom in/Zoom out: Switch between daily, weekly, monthly, quarterly, or yearly views.
![]() Zoom to fit: Adjust view to show the full schedule range.
Zoom to fit: Adjust view to show the full schedule range.
Editing and Navigation
Like the list view, the Gantt view can be used to edit and customize you schedule.
✏️ Double click tasks to open Edit window.
🗓️ Select List view tasks to center Gantt view.
🔍 Double-click date headers to zoom.
🖱️ Right-click to open the option menu.
Calendar View
Use this view to see the schedule in a calendar format (available on desktop and mobile).

Buttons and Features
📅 Month/Week/Day: Adjust the view down to day, week, and month for the month shown.
🗓️ Month/Year: Adjust the month/year in the upper left. Skip between months on the right.
∧ ∨ Expand/Collapse: Expand or collapse tasks and milestones.
🖨️ Print: Print the calendar or save as PDF.
➕ Add Event: Create a new task.
🔗 Subscribe: Link your Ressio calendar to an external calendar like Google or Microsoft. Click HERE to learn more.
🖱️ Double-Click: Double-click a task to make edits
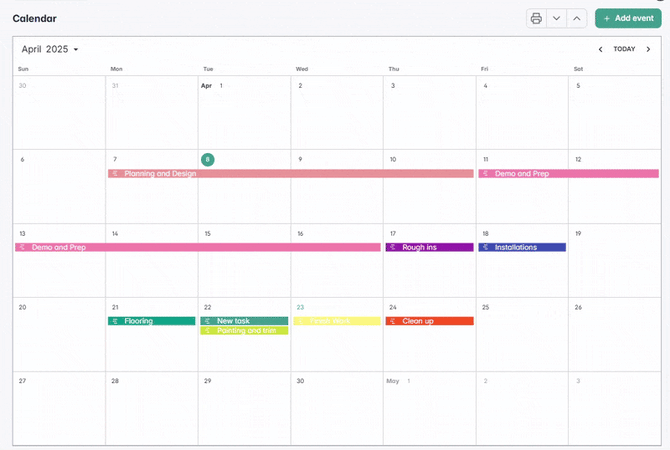
❗By default, you will not be able to schedule tasks on weekends. If you would like weekends to be enabled, please reach out to you customer success coach or email support@ressiosoftware.com.
Task (Mobile) View
This is the default view on mobile, but it’s also available on desktop via Toggle task view..

Features
🔃 Sort by phase, status, date, and assignee.
🔍 Search tasks by name or assignee.
✅ Change task completion status.
✏️ Edit task details.
![]() View and send messages to team members, vendors, and clients.
View and send messages to team members, vendors, and clients.
📎 Upload and view files or photos.

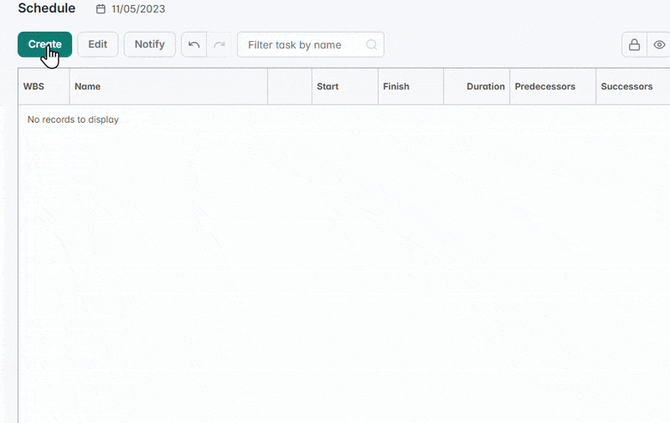
Building a Schedule
Create schedules using one of the following:
🆕 New to Ressio? Send your coach a schedule or template to import.
📋 Copy an existing Ressio project or template.
🛠️ Build from scratch in List or Gantt View.
Use Templates
Templates allow you to quickly apply a predefined schedule.
-
In List View, open the Use Template dropdown.
-
Select a template and click Insert.
.gif?width=670&height=377&name=ezgif.com-video-to-gif-converter%20(2).gif)
⚠️ Templates can only be added to BLANK schedules.⚠️
Add New Tasks
Add tasks in several ways:
-
List View: Click Create to add tasks at the bottom.
-
List/Gantt View: Right-click a task → + Add Task Above/Below.
-
List View: Press Enter when editing the last task.
-
Calendar View: Click + Add Event in the top right.
💡TIP: Adding tasks above/below is often easier than dragging them into place.
Copy and Paste Schedule Tasks and Descriptions
Ressio now supports copy and paste functionality in the project schedule, making it easier to update task details and duplicate schedule work.
Copy and Paste Task Names or Descriptions
- Open the project.
- Go to the Schedule.
- Select the task you want to update.
- Click into the Name or Description field.
- Paste your text into the field.
- Save or click out of the field to apply the update.

Copy and Paste Tasks or Phases
- Open the project Schedule.
- Select the task or phase you want to duplicate.
- To select multiple tasks, hold Shift and select the tasks you want to copy.
- Right click and select Copy.
- Select the task where you want the copied items to be added.
- Right click and select Paste.
The copied task or phase will be added below the selected task.
Using Keyboard Shortcuts
You can also use keyboard shortcuts:
Ctrl+C to copy
Ctrl+V to paste
✅ Copied tasks and phases are duplicates, so names may include a number or added text. You can rename or edit them after pasting.
🎓 To watch a video on how to copy and paste task, click here.
Edit tasks
Tasks can be edited in the following ways:
- List View: Double-click a cell to edit it inline.
- List View: Highlight a task and click Edit in the top left.
- List/Gantt View: Right-click a task → Edit.
- Gantt Chart: Double-click a task.
- Calendar View: Select a task to edit.
- Task view: Select the ✏️ icon on a task
.gif?width=670&height=371&name=Recording2025-04-09212346-ezgif.com-optimize%20(1).gif)
💡TIP: In the List View, use the Tab key or 🖱️ double-click a cell to move to the next one.
Delete tasks
Tasks can only be deleted from the List/Gantt View.
- Edit: Highlight a task, select Edit, then choose Delete.
- Right-click: Right-click a task and select Delete from the menu.
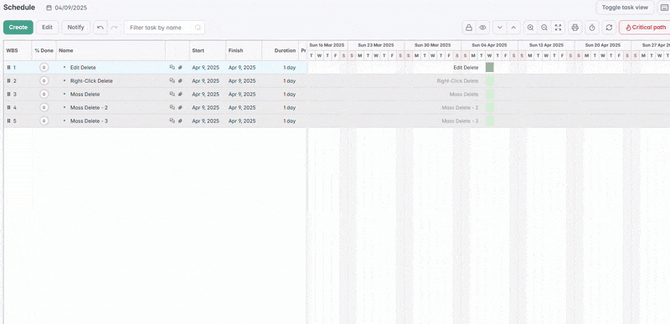
🗑️ Tip: To delete multiple tasks at once, hold Shift or Ctrl to highlight them, then right-click and select Delete.
Save and Undo changes
The schedule saves automatically as you work.
List/Gantt View: Undo changes:
-
Use the ↶ Undo button
-
Or press Ctrl+Z to step back through changes

🚫 Note: Exiting the schedule page resets undo history. Any unwanted changes must be manually reversed upon returning.
Create Phases / Sub-Tasks
A task becomes a Phase when it has nested Sub-tasks.
List/Gantt View: Create sub-tasks in two ways:
-
Right-click a phase task → Add → Sub-task
-
Indent: Select tasks under the phase, then right-click → Indent

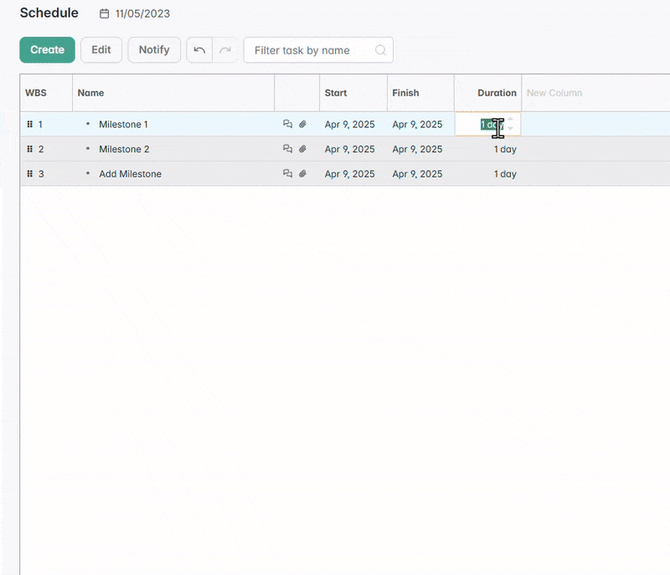
Milestones
Milestones are zero-day tasks used for reminders or to mark important events.
Create milestones by:
-
In any view: Setting the task duration to 0
-
List/Gantt View: Right-click → Convert to Milestone
-
List/Gantt View: Right-click → Add → Milestone
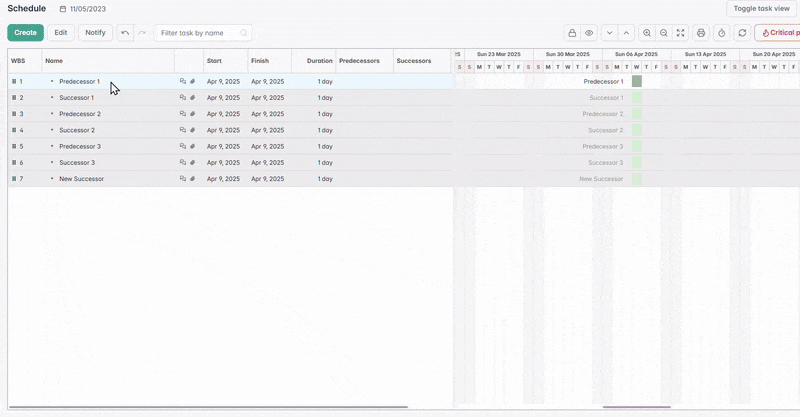
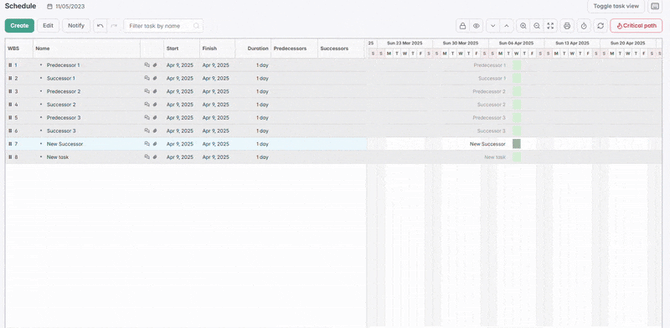
Predecessors and Successors
Create dependencies between tasks using predecessors and successors.
Types of Relationships
| Finish to Start (FS) | Task A must finish before Task B starts (default) |
| Start to Start (SS) | Use SS to create two or more tasks that start at the same time. |
| Finish to Finish (FF) | Use FF to create two or more tasks that end at the same time. |
| Start to Finish (SF) | SF is often used in event planning and allows working backward from a desired completion date. Ex. Inspection set on a hard date, installation must occur before inspection, materials must be ordered before installation. |
💡 Tip: In List View, type initials next to the WBS number to assign relationship types. Ex: 1SS, 2FF. Note that no initials are needed for FS tasks.
Create Predecessors/Successors
Use the WBS number to build predecessor/successor relationships. Typically, predecessor relationships are created from the later task, e.g. the second task is linking to the first. Conversely, use the Successor field in the first task to link to the second.
Predecessors/Successors can only be created from the List/Gantt View.
-
Edit Task Window: Open Predecessor/Successor tabs and use the green ➕ to link
-
List View: Type WBS number in the Predecessor/Successor column
-
Gantt View: Drag from a task’s edge circle to another task
-
Right-click: Select Add Predecessor (adds a dependent task above) or Add Successor (adds a dependent task below)
Bulk Add: Highlight tasks, right-click → Add Dependencies
Lag/Lead Time
Adjust time between dependent tasks using Lag (positive delay) or Lead (negative delay).
Used when time is needed between tasks—for example, to let paint dry, concrete set, or mid-task inspections to occur.
How to add Lag/Lead time:
- Edit: Adjusting Lag within the Predecessor/Successor tab
- List View: Type +/- and the # of days lag/lead in the predecessor/successor cell.
- Gantt View: Drag dependent tasks to another date.

Constraint dates
Use Constraint Dates to prevent tasks from moving beyond certain dates, especially if they lack dependencies.
✅ Best Practice: Only apply constraints to tasks without dependencies.
⚠️ Troubleshooting: If a task won’t move earlier, a Phase Constraint Date may be preventing it. Remove the constraint to proceed.⚠️
Share Schedule Information
You can share the full schedule—or just selected tasks—with team members, vendors, and clients. Tasks can also include descriptions, private/public files, and messages.
Sharing with Your Team
Use Company Settings - Team member Role to manage access.
-
Admins: Can view all projects
-
Team Members/Field Staff: Must be added to each project
Sharing with Clients
Enable client visibility via Project Details → Visibility
-
Assigned phases & tasks: Allows selective sharing
-
All schedule phases: Shares entire schedule when tasks are indented (even without sub-tasks)

Descriptions, Files, Messages
More detailed information like descriptions, lists, and files can be included within tasks.
Descriptions and Notes-
Descriptions: Public and visible to all task assignees. Add descriptions in any Edit window.
-
Notes: Private and only visible to your internal team. List/Gantt View ONLY

Files
Add files for easy access to documents and images.
📁 Public files: Visible to all assignees
🔒 Private files: Visible only to your team
Ways to Add Files:
-
List View: Select the 📎 icon and upload via the drawer
-
List/Gantt View: Right-click the task → Files
- Task View: Select the 📎 icon


Messages
Use task messages to communicate updates, ask questions, or clarify responsibilities.
Click the 💬 icon in any view to open the message drawer. Messaging in Ressio

To message a client, the client must first be assigned to the task. A Customer tab will appear.
Adding Assignees to tasks
Adding assignees to tasks has many benefits:
- Clear task ownership and visibility
- Searchability by assignee
- Email notifications and reminders
- Activation of Resource calendar and Task Manager
📌 Assignees do not receive emails upon being assigned.
How to Assign:
-
List/Gantt View: Edit → Resources → ➕ to add.
-
List View: Double-click in the Assignee column to select from a dropdown.
- Calendar View: Select task → Assignee field.
- Task View: Select task → Assignee field
- Schedule Page -> 'Assign' button -> Search and select from a dropdown
Bulk Assign for Schedule Tasks
Another place to assign individuals to a task is the 'Assign' button located at the top of the Schedule page, next to the 'Notify' button. You can also now assign multiple schedule tasks to users at the same time.
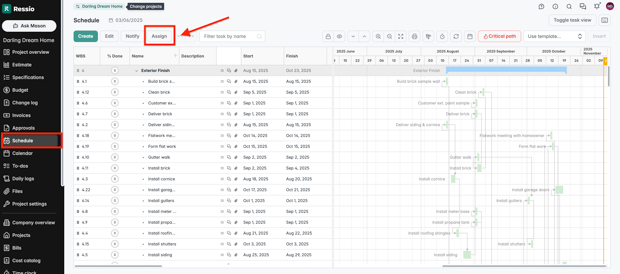
To bulk assign tasks:
-
Go to your project Schedule page.
-
Select one or more tasks you want to update. To select more than one, hold the shift key while clicking each task.
-
Click the Assign button in the toolbar.
-
In the modal, choose one or more users from the dropdown.
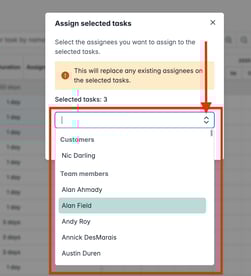
-
Decide whether to replace existing assignees if prompted.
-
Click Assign to apply your changes.
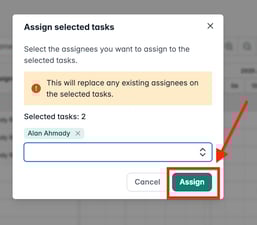
After clicking Assign, they will be automatically added and will show up in the 'Assigned To' column. 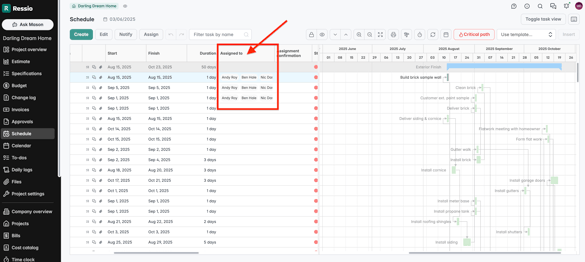
👥 You can add multiple people to a task.
Notify Assignees and Assignment Confirmation
Send an email alert with a magic link for easy access to task details.
To notify assignees, highlight one or more tasks and select Notify.
💡 Hold Shift or Ctrl to select multiple tasks.
Assignment Confirmation
Vendors can confirm they accept the task. See Vendor Welcome Information.

Print Schedule
Schedules can be printed from the List/Gantt View and the Calendar View.
🖨️ Select the Print icon in the upper right.
 |
 |
Tracking and Maintaining a Schedule
Delays are inevitable. Use these tools to identify high-risk tasks and measure impact.
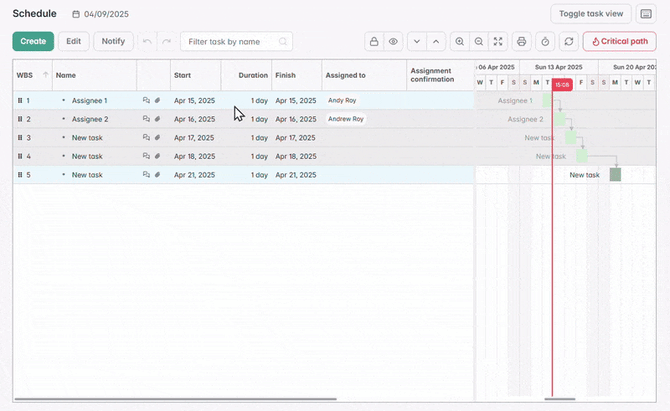
Critical Path
Highlights tasks that directly affect the overall project completion.
Enable via List View → Critical Path toggle.

Dependencies: The Critical path requires predecessors/successors.
Baseline
Capture a snapshot of your schedule to track changes over time.
List View:
-
Click the 🔒 icon to Set Baseline
-
Click the 👁️ icon to Toggle Baseline View
To reset, click the 🔒 again. Only the latest baseline is saved.
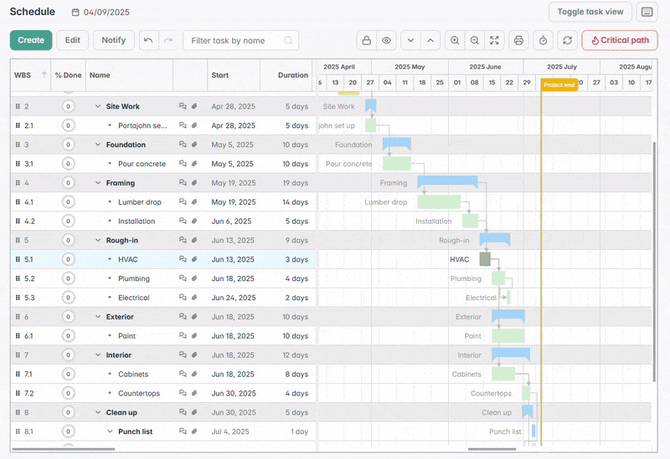
To reset, click the 🔒 again. Only the latest baseline is saved.
Deleting a Schedule
If you need to delete an entire schedule you can do so by:
-
Click the first task
-
Hold the Shift or Control (CRTL)
-
Select the last task to select them all
-
Right click
- Hit Delete
🎓 To to learn how to delete individual tasks or to learn more about managing tasks, ready Marking Schedule Tasks Complete.
If you have any questions or need further assistance, contact our support team at support@ressiosoftware.com. We're here to help!