Learn to navigate and manage the Specifications page in Ressio. This guide covers settings to tailor visibility for vendors and customers, controlling project selections, costs, and decision tracking for smoother project workflows. As a Contractor, this is where you track decisions, confirm details, and keep the project moving.
What You Can Do as a Contractor
-
Review all cost items and selections in one place.
-
Track selection statuses (for example: Draft, Released, Completed).
-
Open item details to view choices, notes, and related files.
-
Use filters to quickly focus by item type or status.
Table of Contents
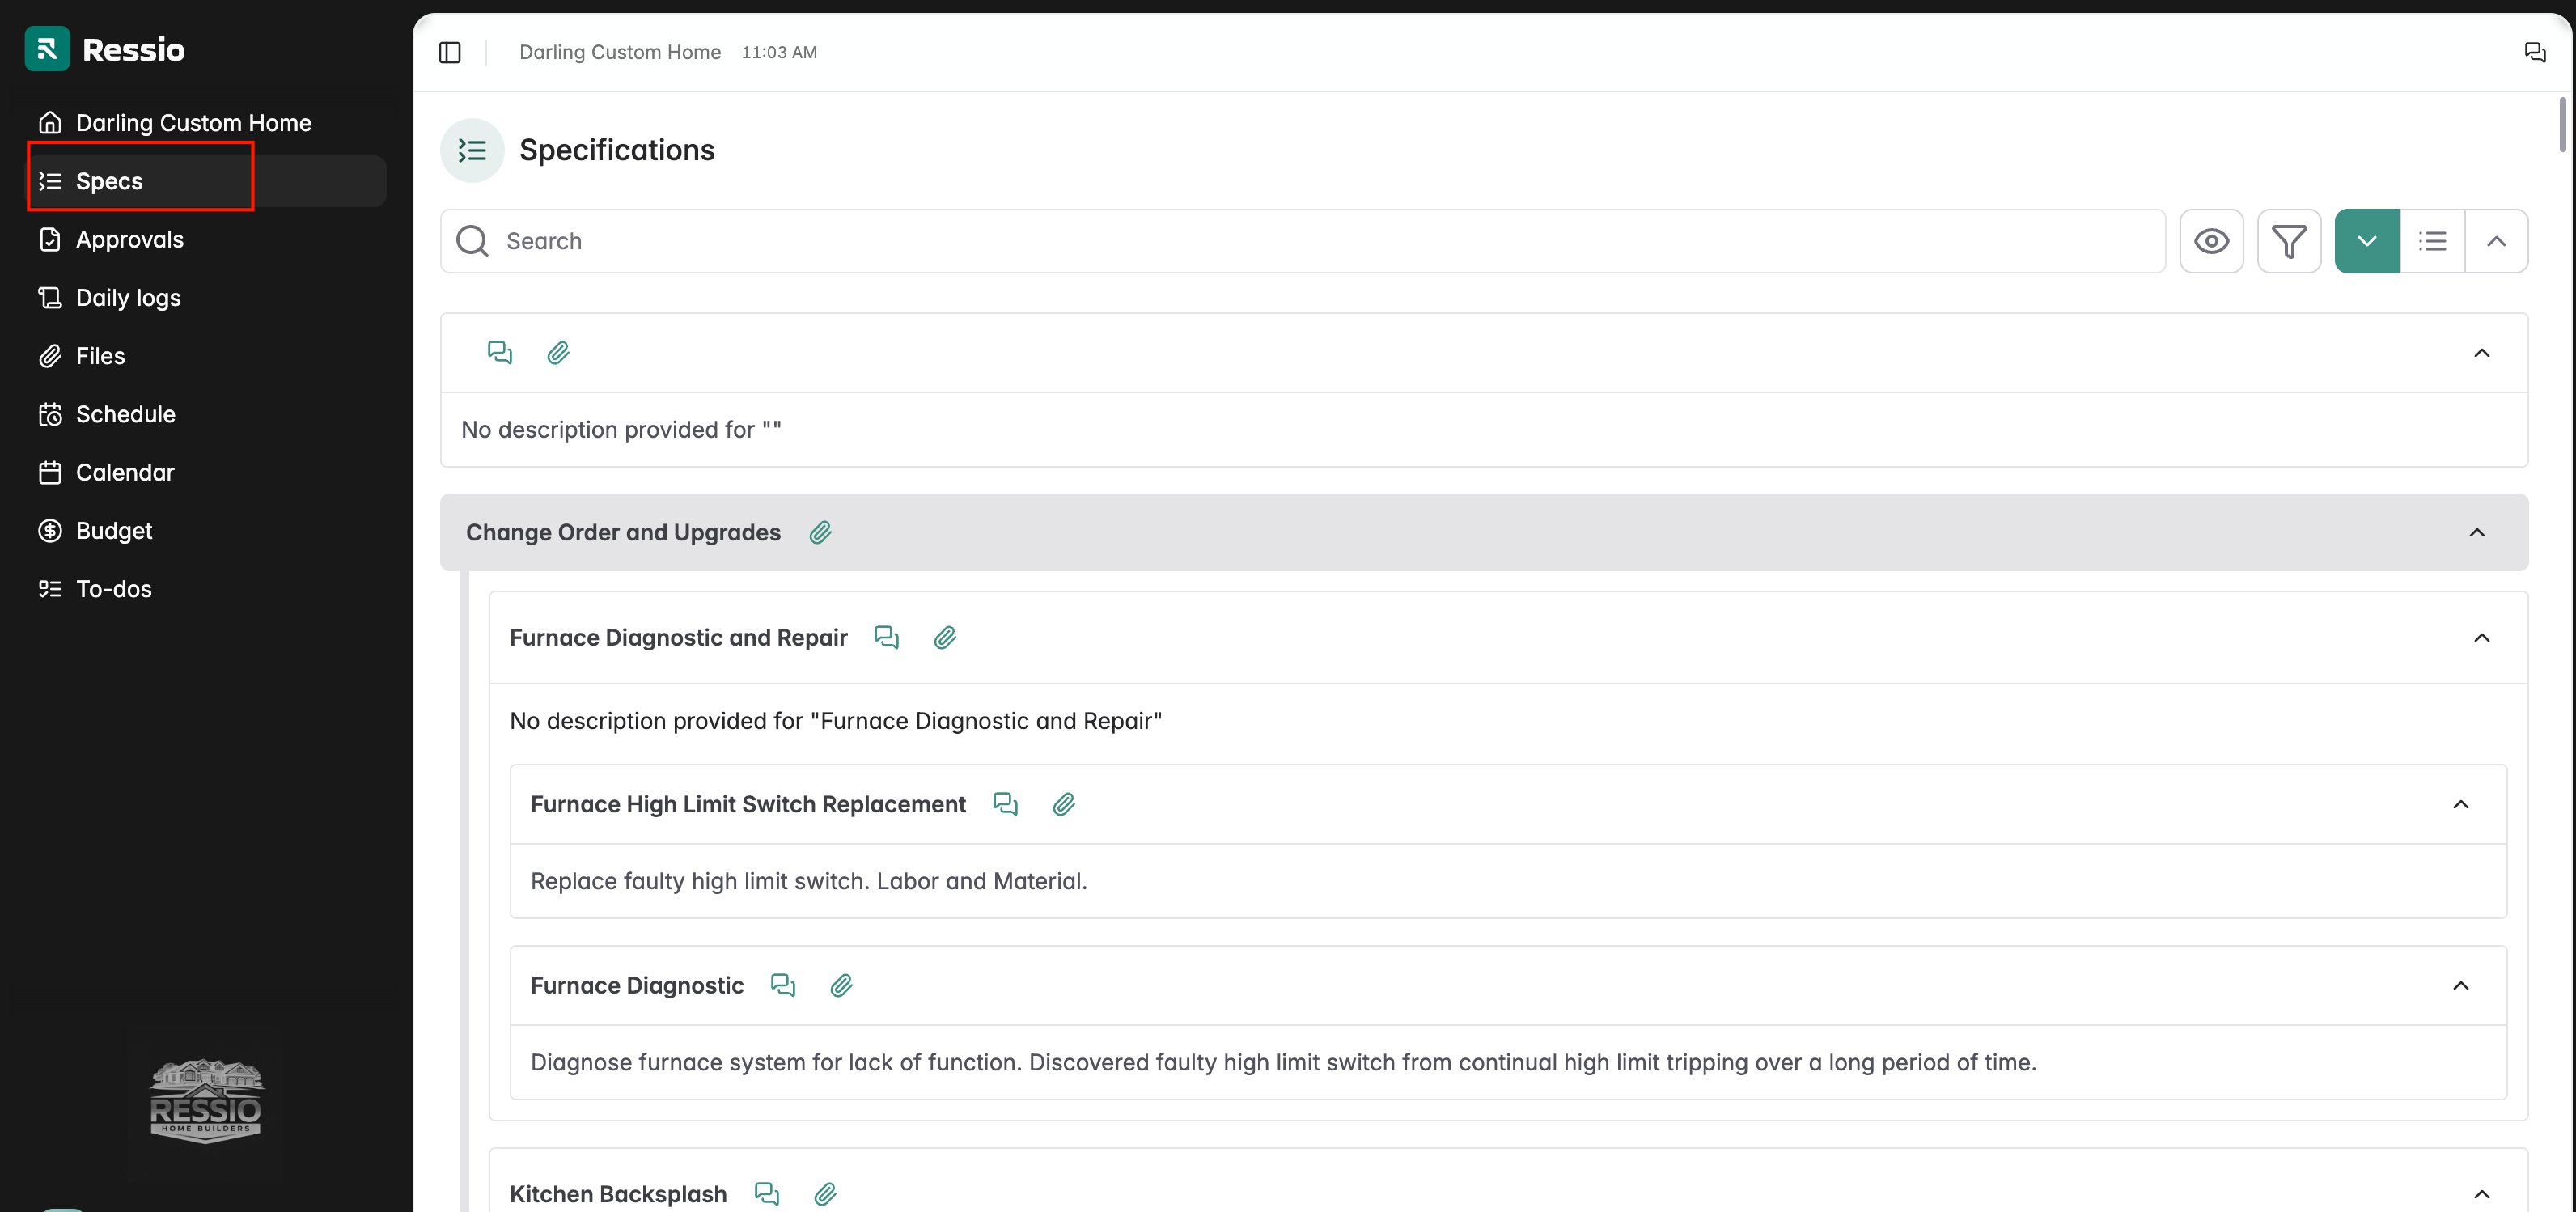
Access the Specifications page from the navigation panel on the left. This workspace centers all tracking for scope, selections, and costs.
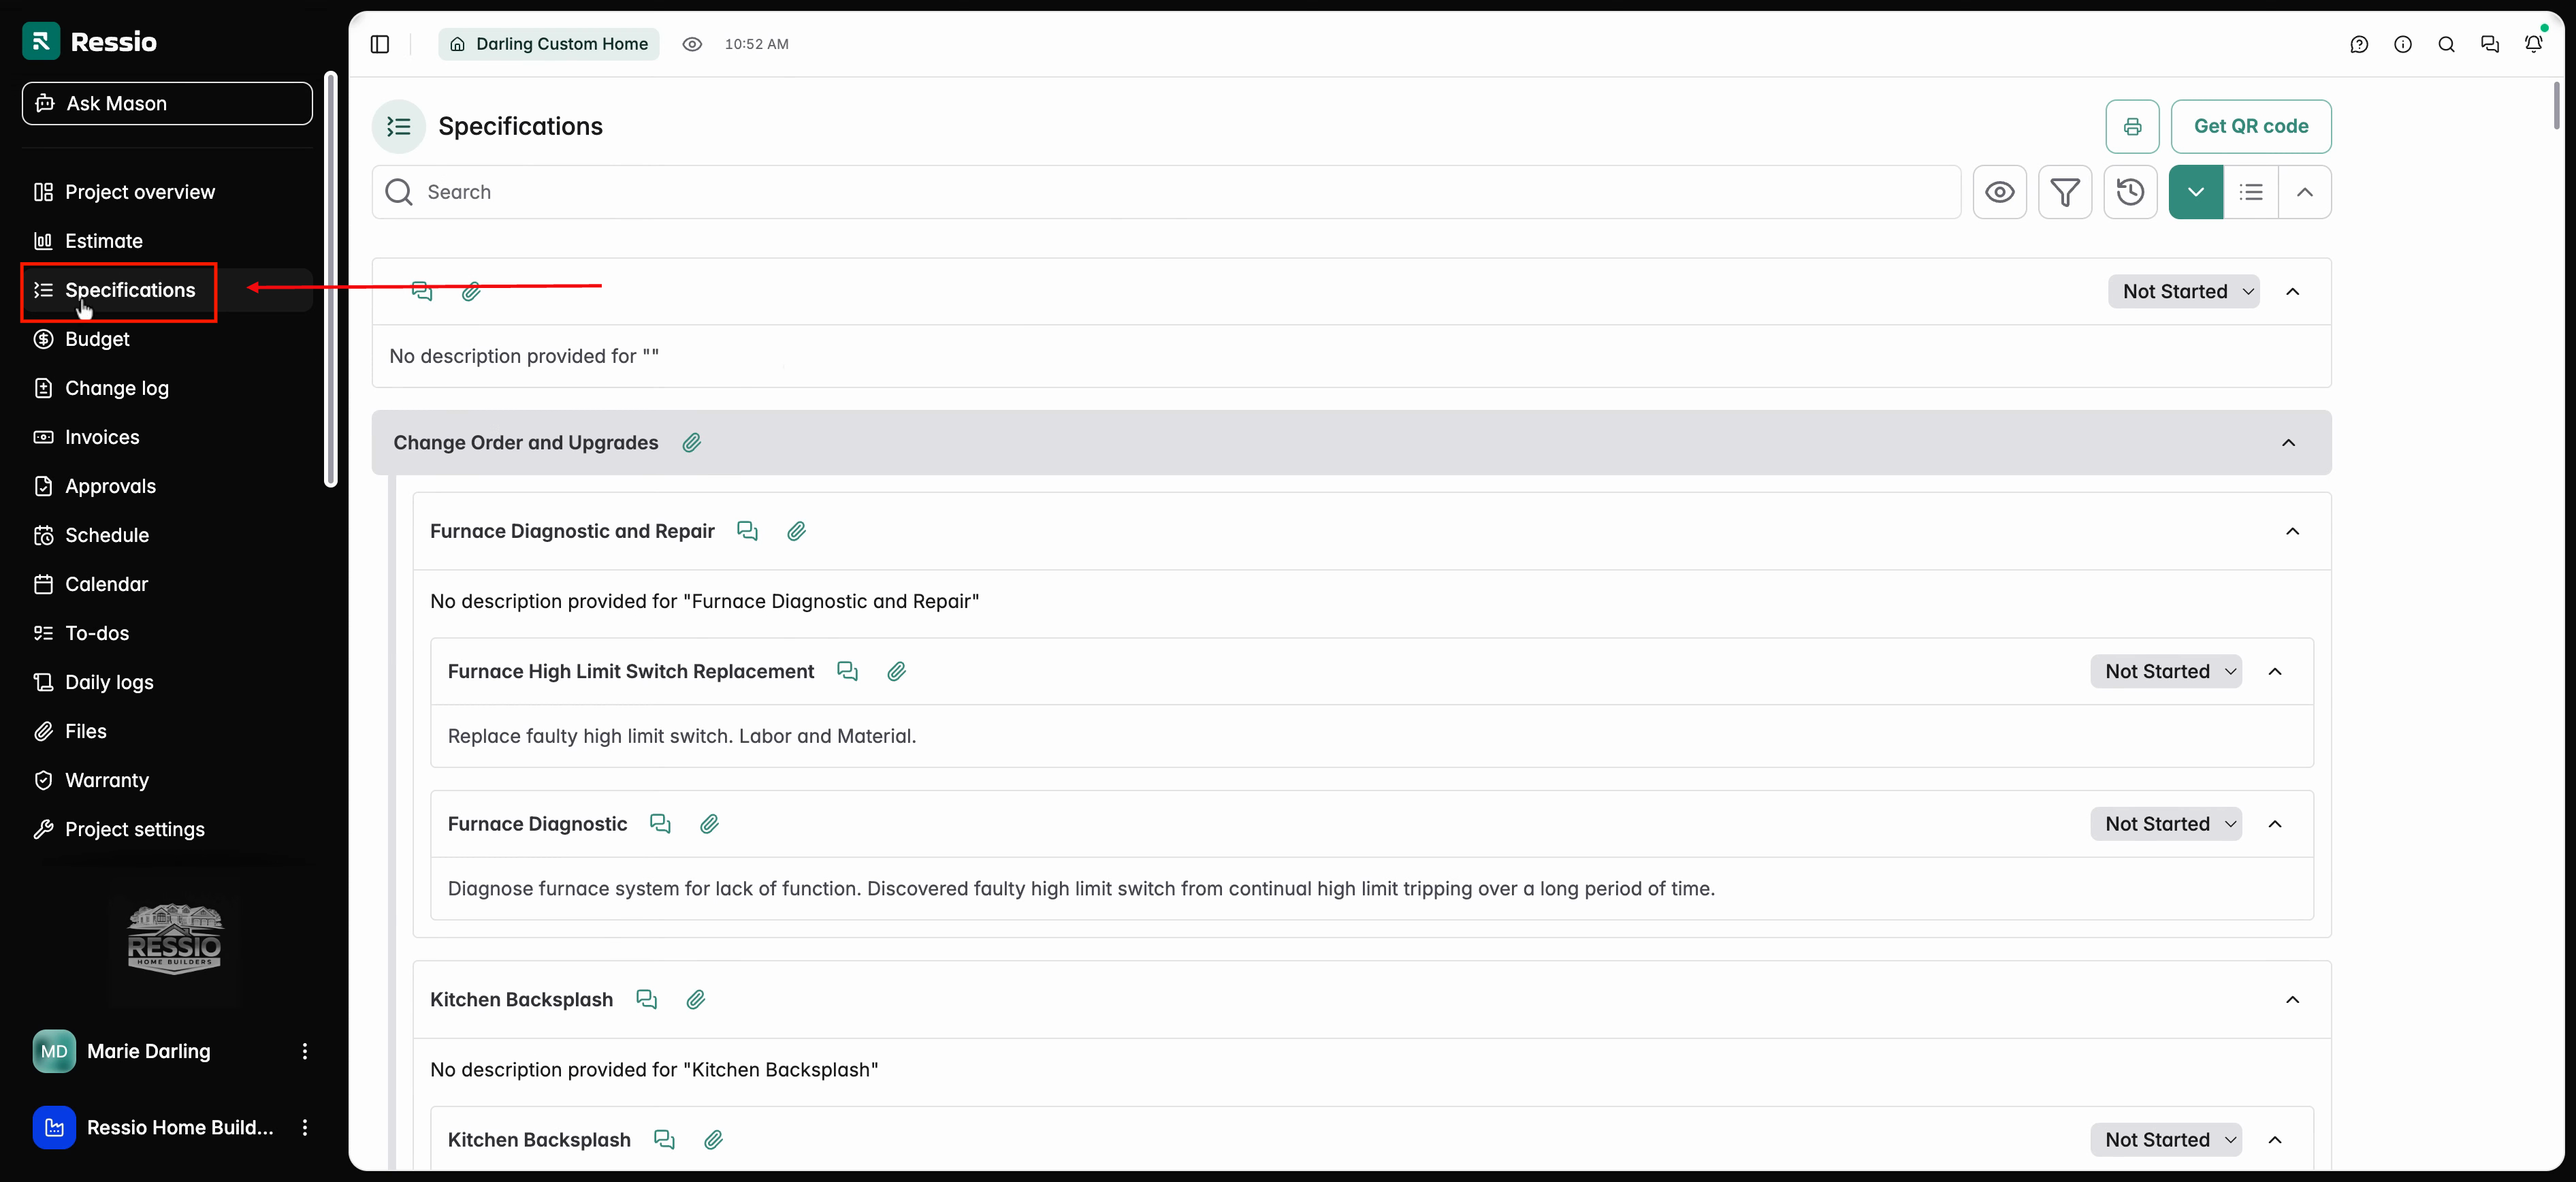
Before using Specifications, review project settings. These settings shape who sees which parts of your project, including customers and vendors.
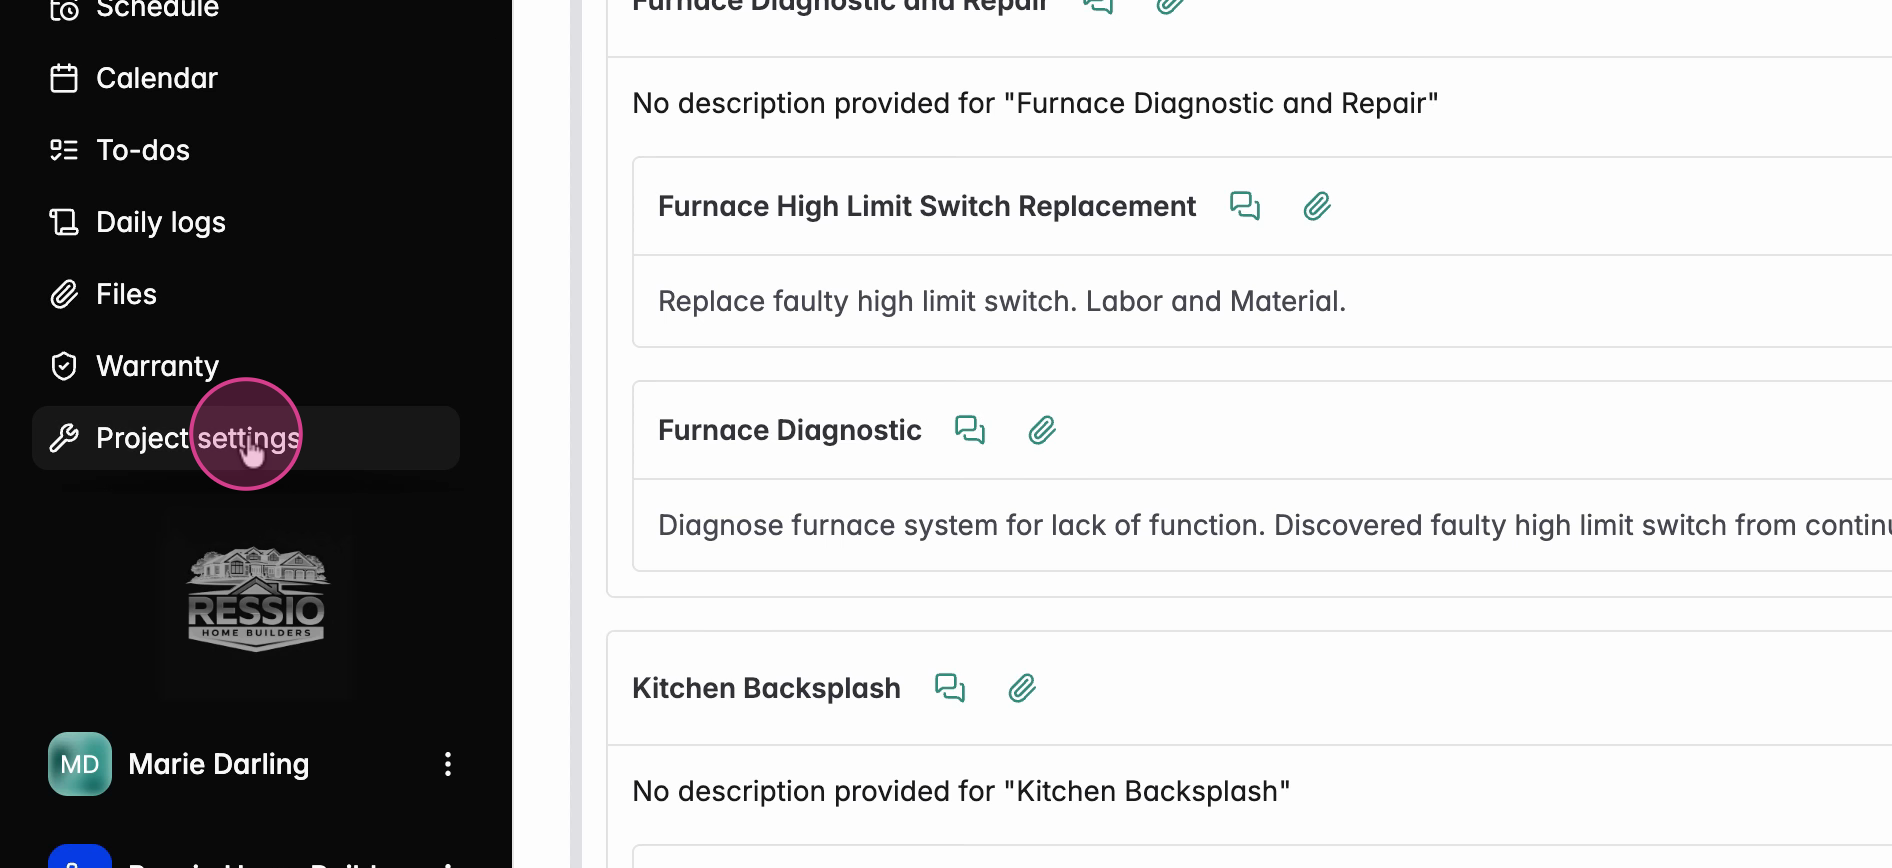
Move to project settings to control sharing preferences.
Settings and visibility on individual projects can be found under Project settings.
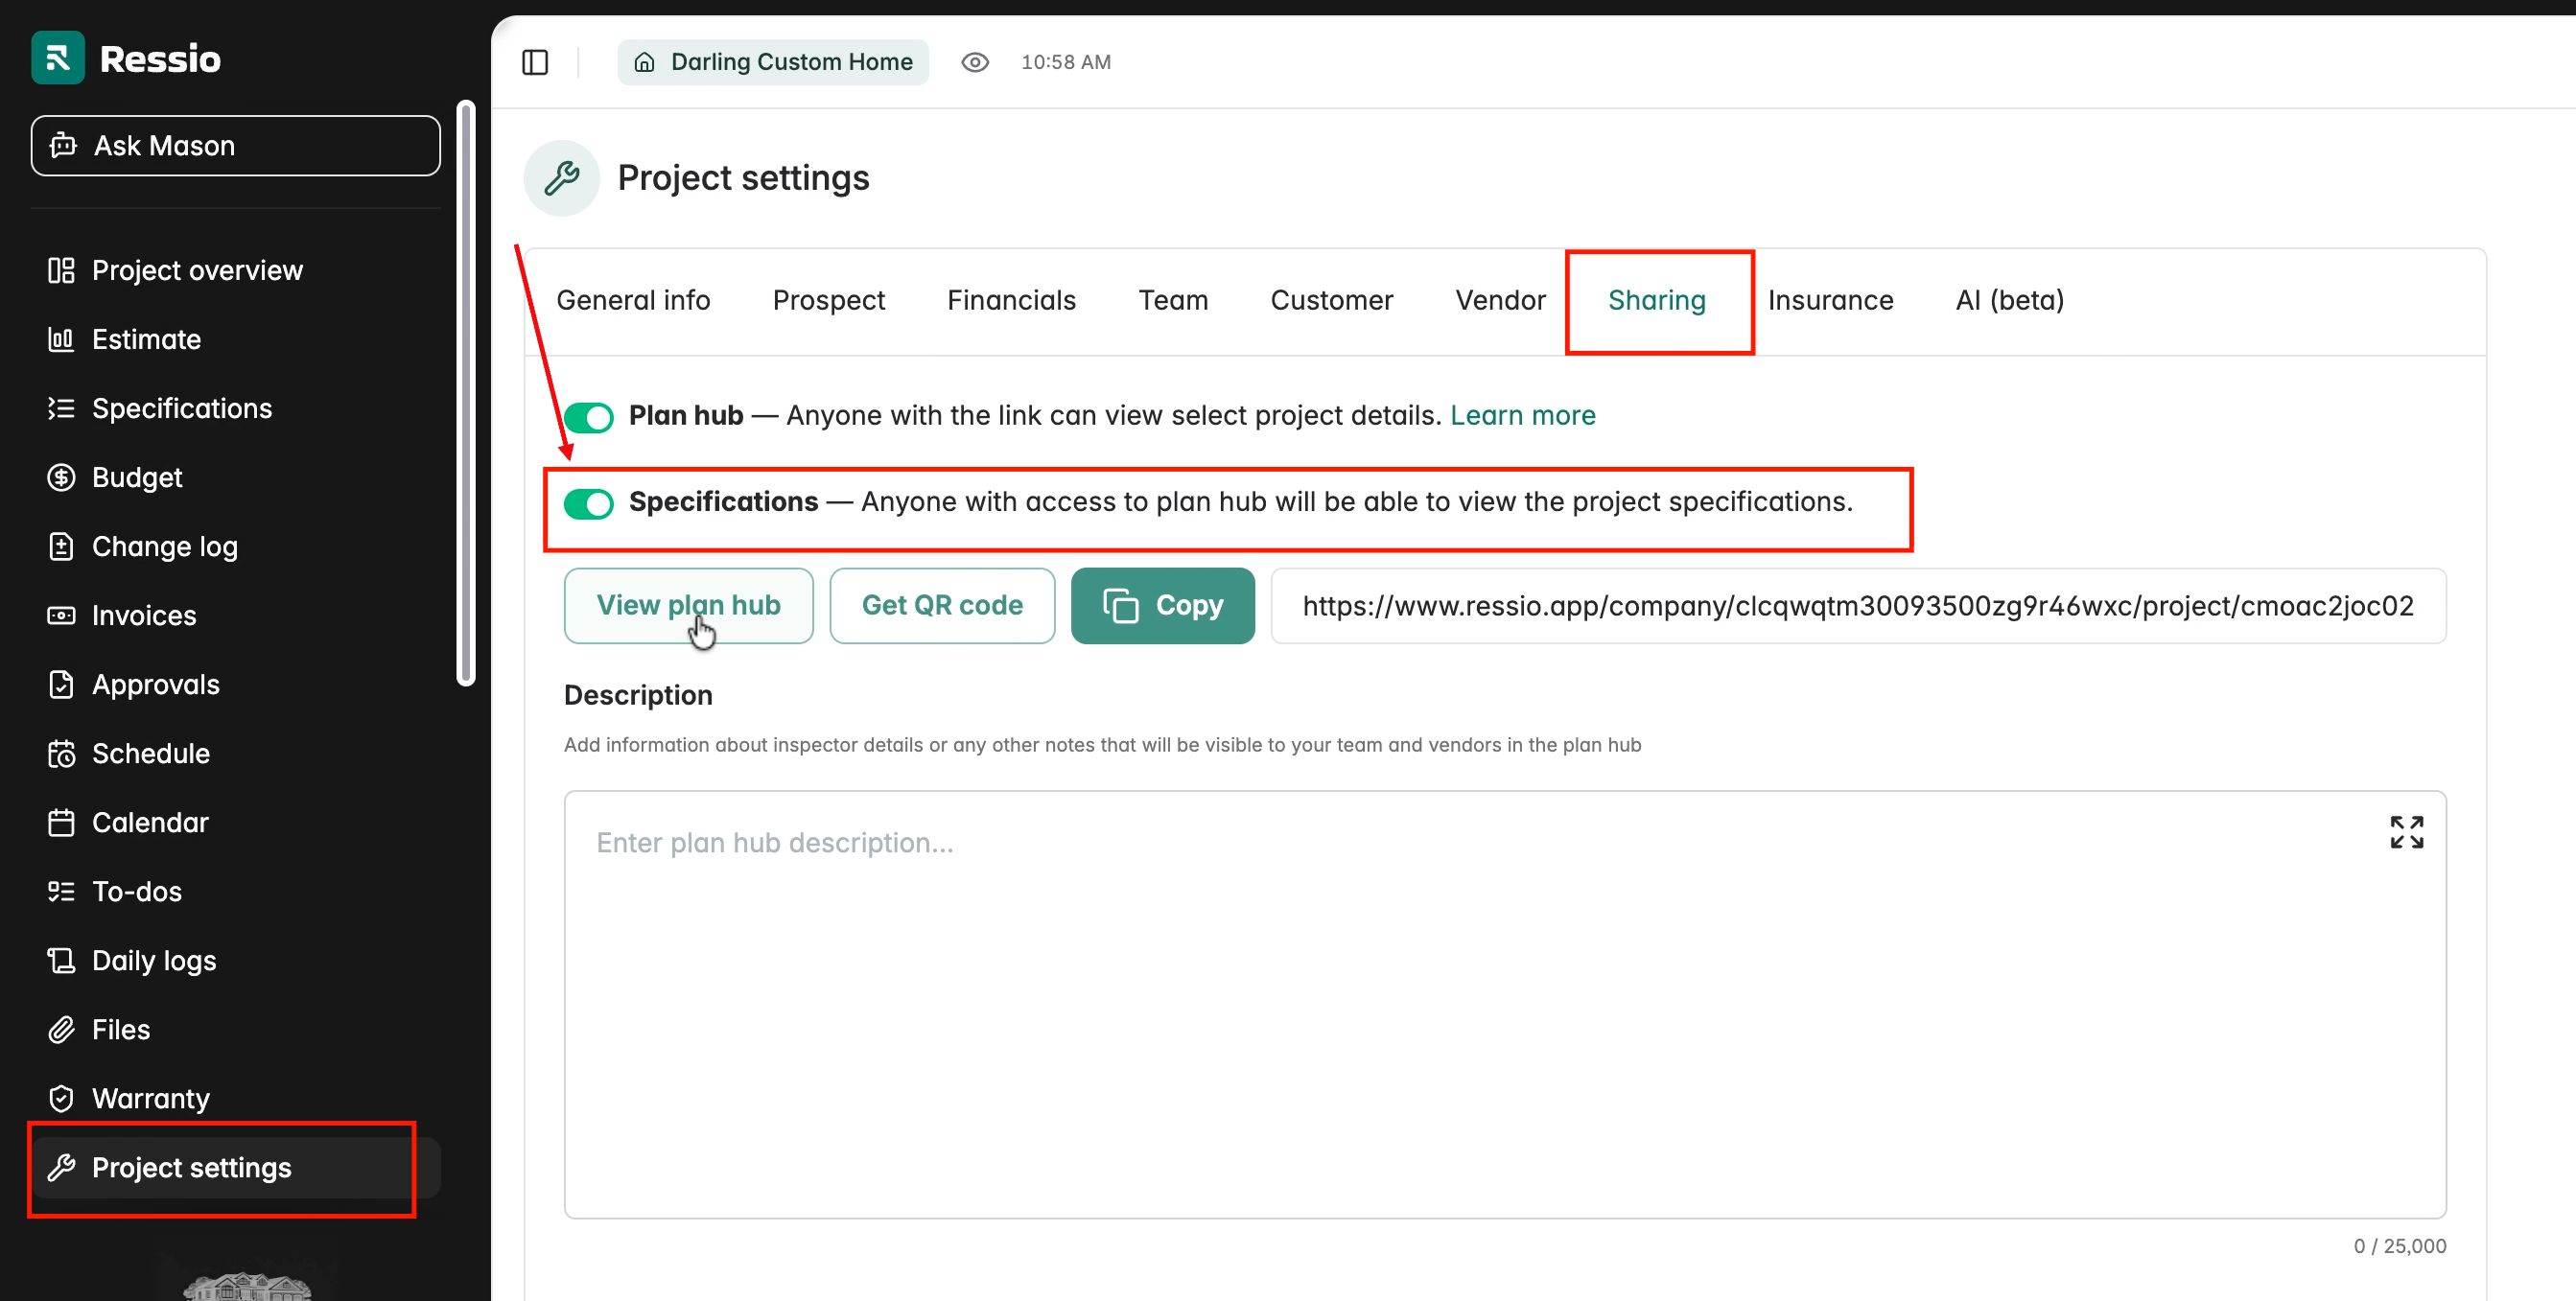
Plan Hub
Under the Sharing tab you can enable the Plan hub. The Plan Hub controls the visibility of specifications for the project for everyone. Disabling Plan Hub removes the Specifications tab from vendor and customer views.
✅ Enable the Plan Hub in settings for the Specifications tab to appear. Anyone with Plan Hub access can then see specifications.
Vendor Visibility
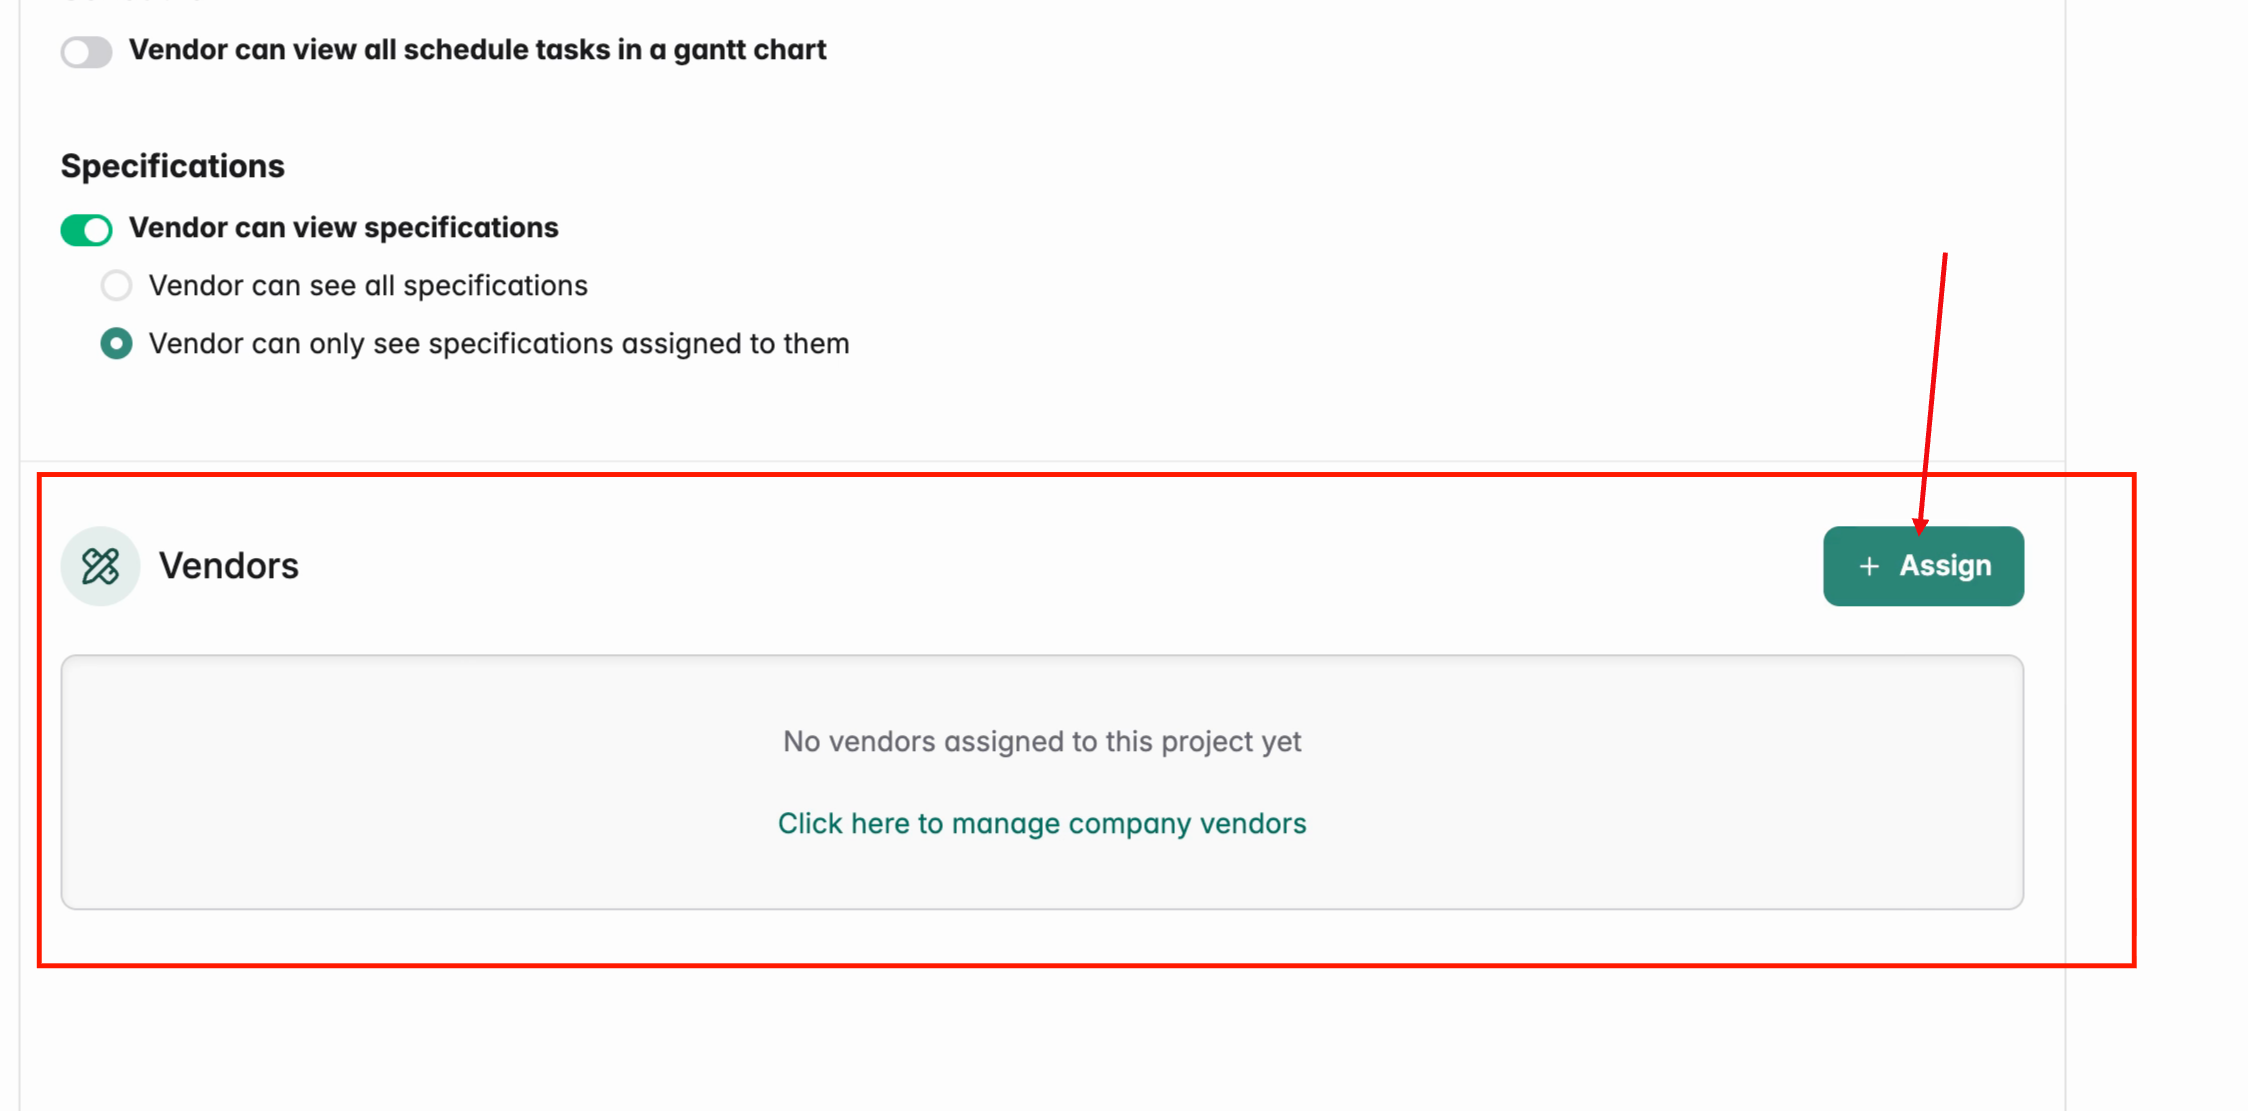
Under the Vendor tab you can allow vendors to view all specifications or limit access to just their assigned specification items. Once you enable "Vendor can view specifications", you can allow:
-
Vendor can see all specifications
OR -
Vendor can only see specifications assigned to them
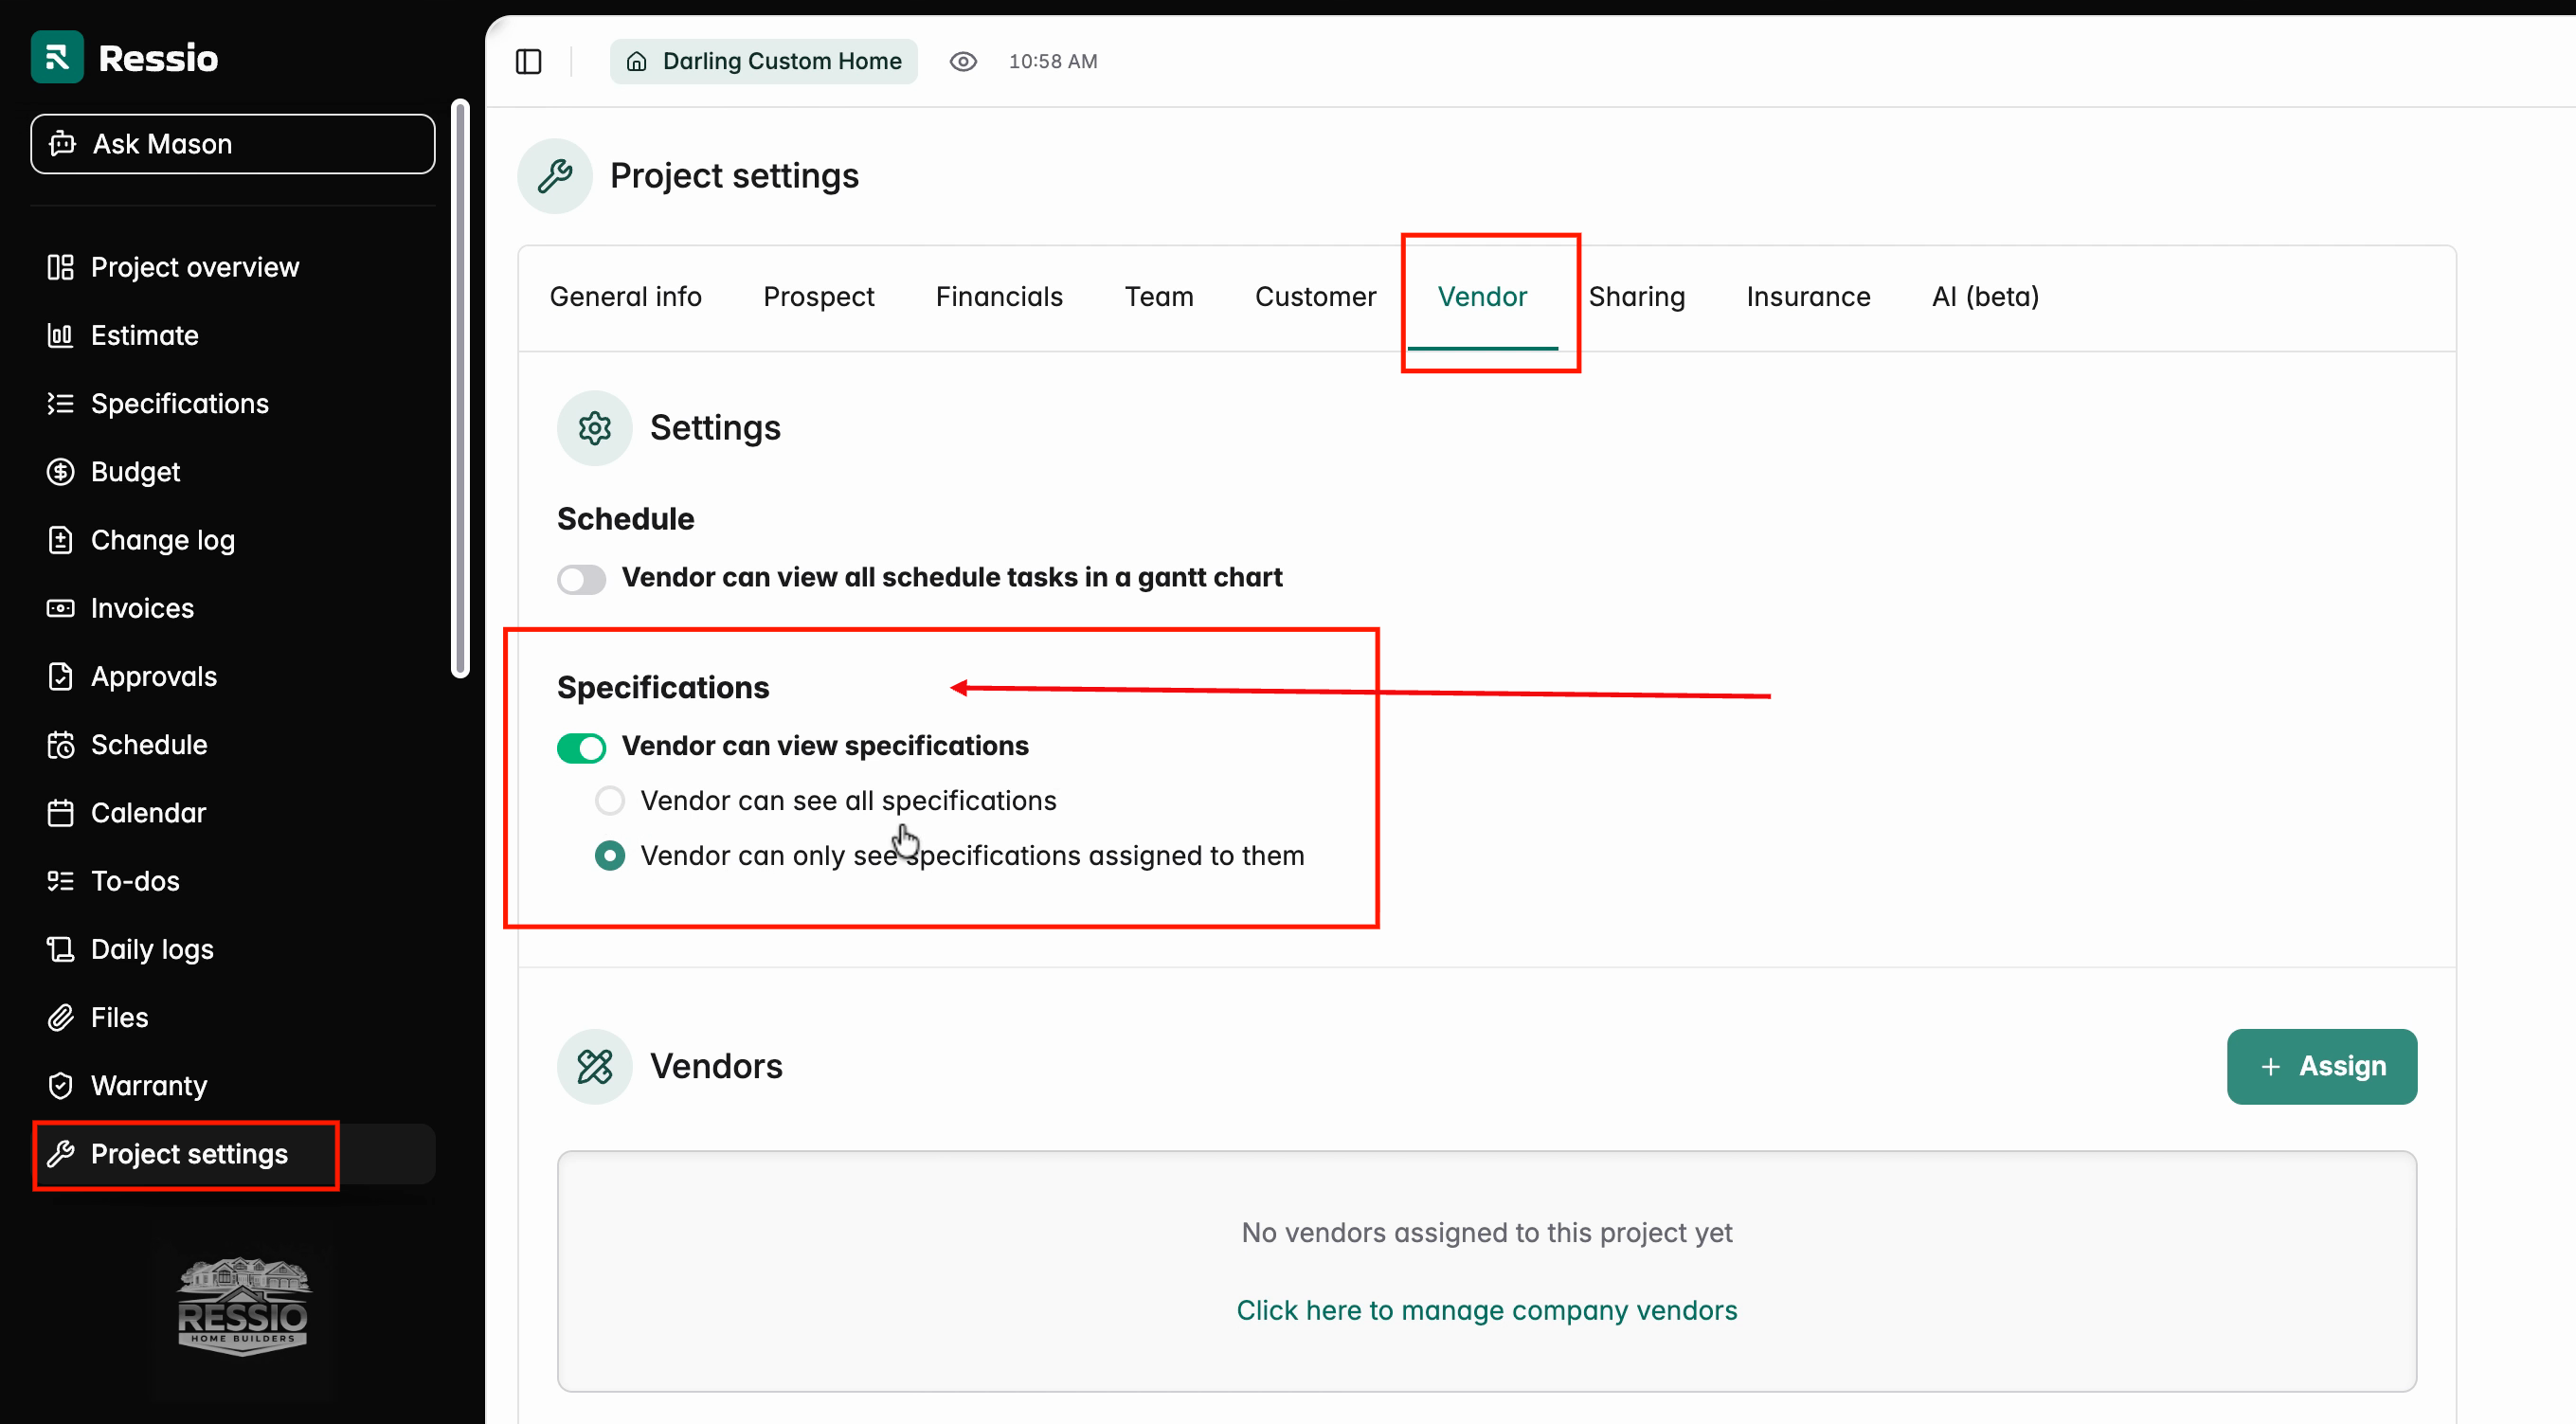
Vendors must be assigned before they can see their items. Assign vendors directly from the project settings.
🎓 To learn more about managing Vendors, read Adding and Managing Vendors.
Customer Visibility
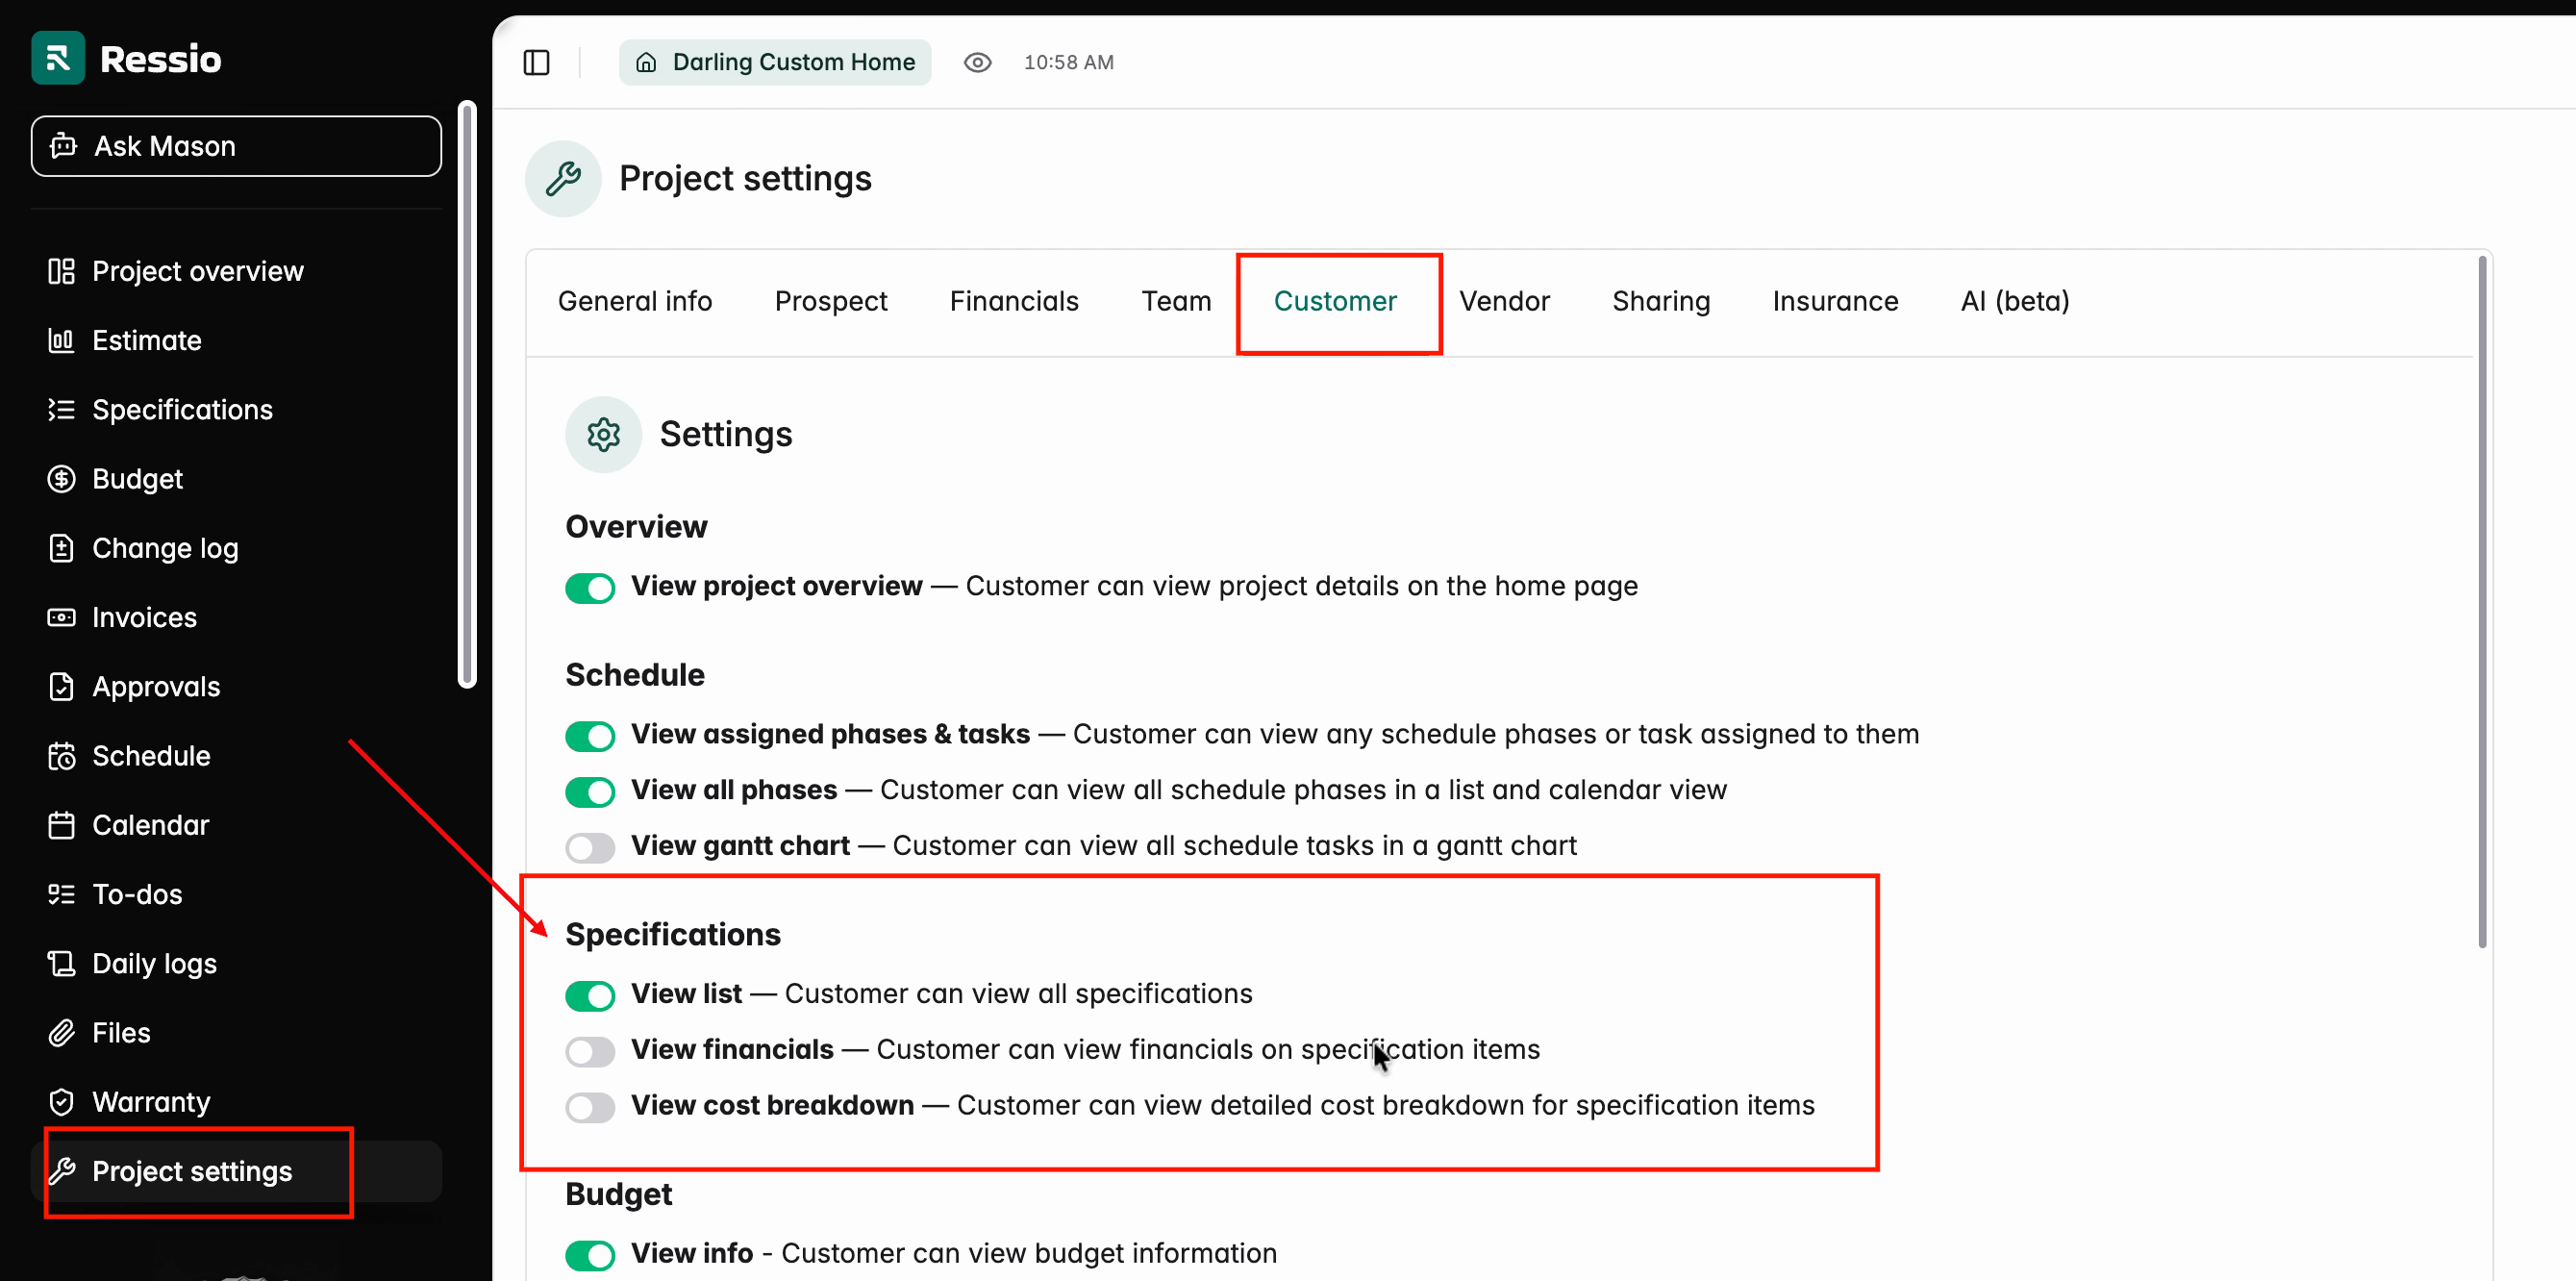
For customers, adjust settings to permit viewing specifications, financials, and detailed cost breakdowns. Toggle these options based on what information is required for their choices or involvement. Go to Project settings -> Customer tab and scroll down to the Specifications section.
The toggles you can enable under specifications are:
-
View list - Customer van view all specifications
-
View financials - Customer can view financials on specification items
-
View cost breakdown - Customer can view detailed cost breakdown for specification items
✅ Both vendor and customer visibility options function the same for Fixed Price and Cost Plus projects.
🎓 To learn more about Customer management, read Adding and Managing Customers.
Working with Specifications
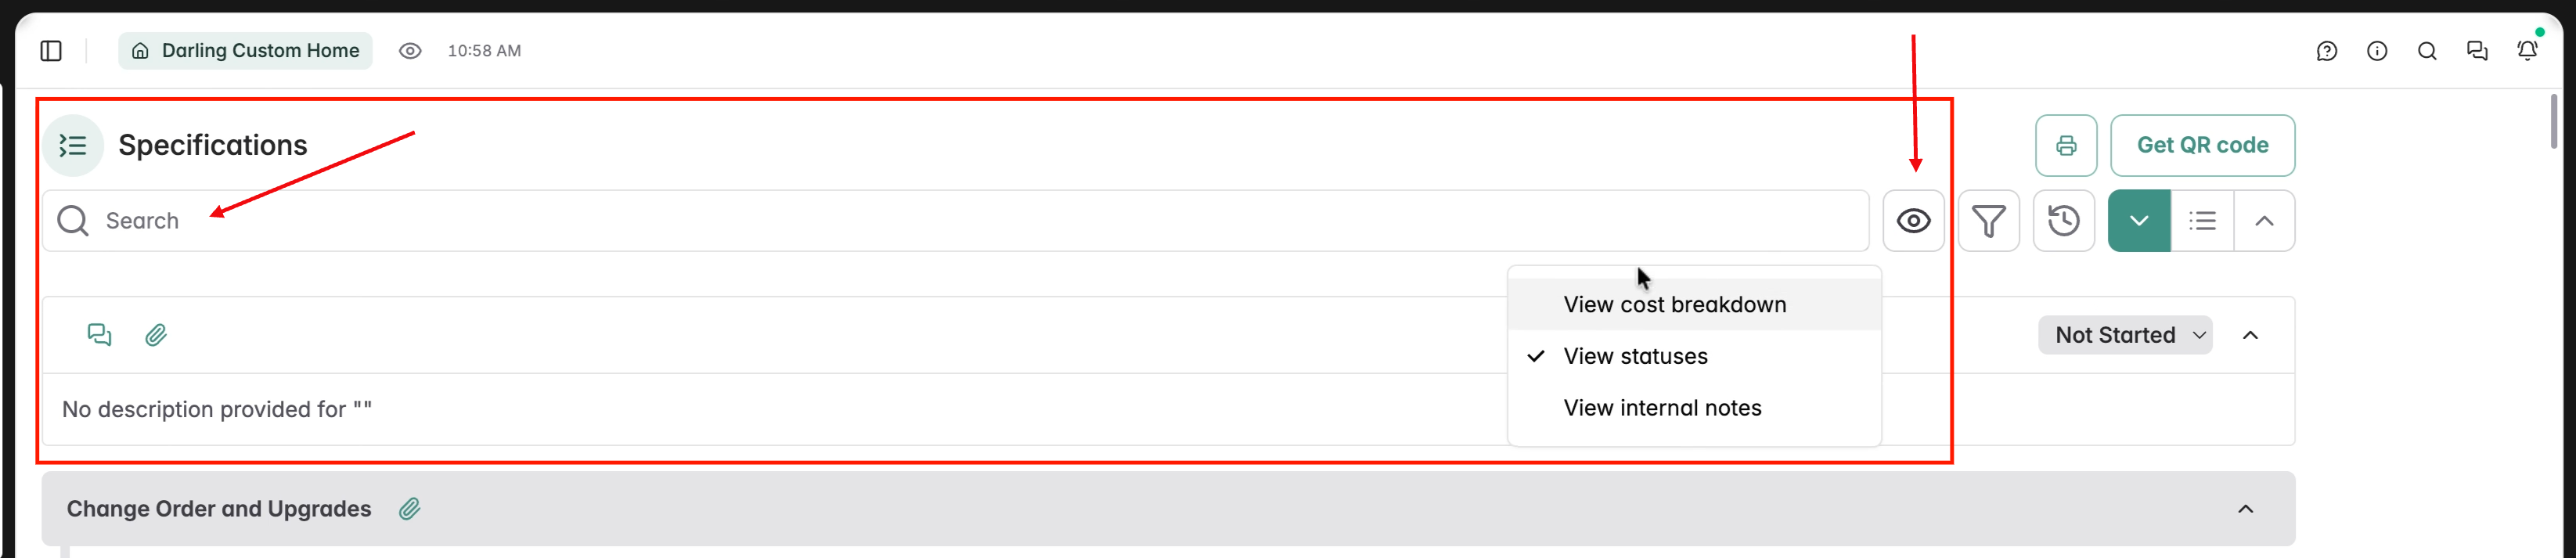
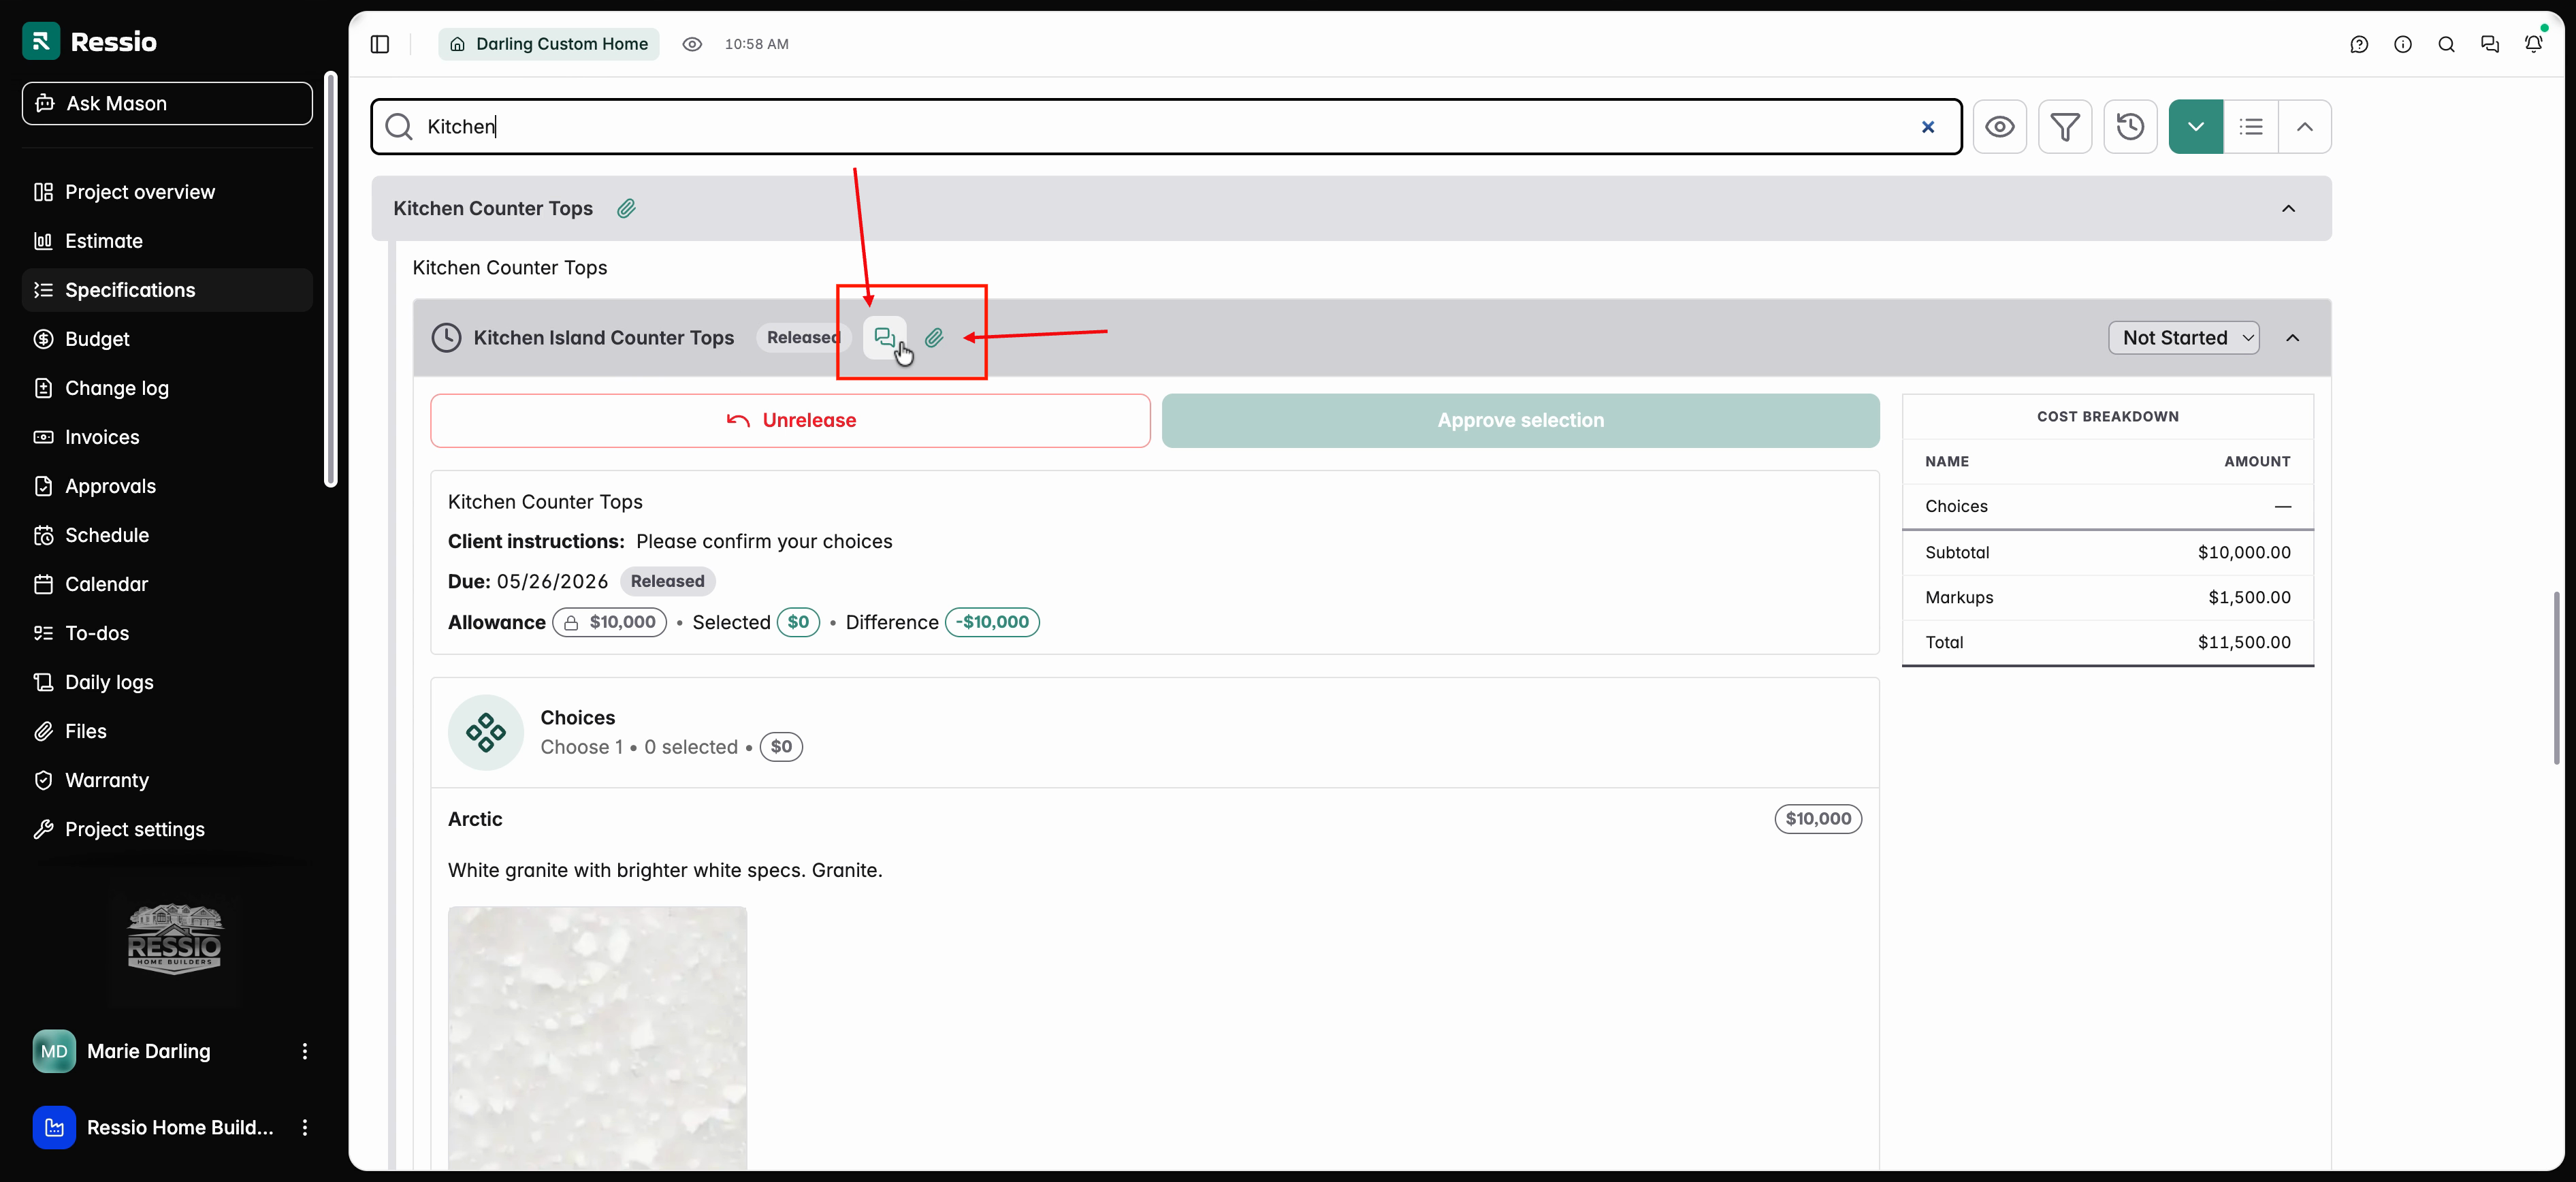
At the top of the Specifications page, you will find a search bar and in the top right are a series of actions you can take on how you view your specifications.
-
The eye icon allows you to change what data shows in the view (cost breakdown, status, internal notes).
-
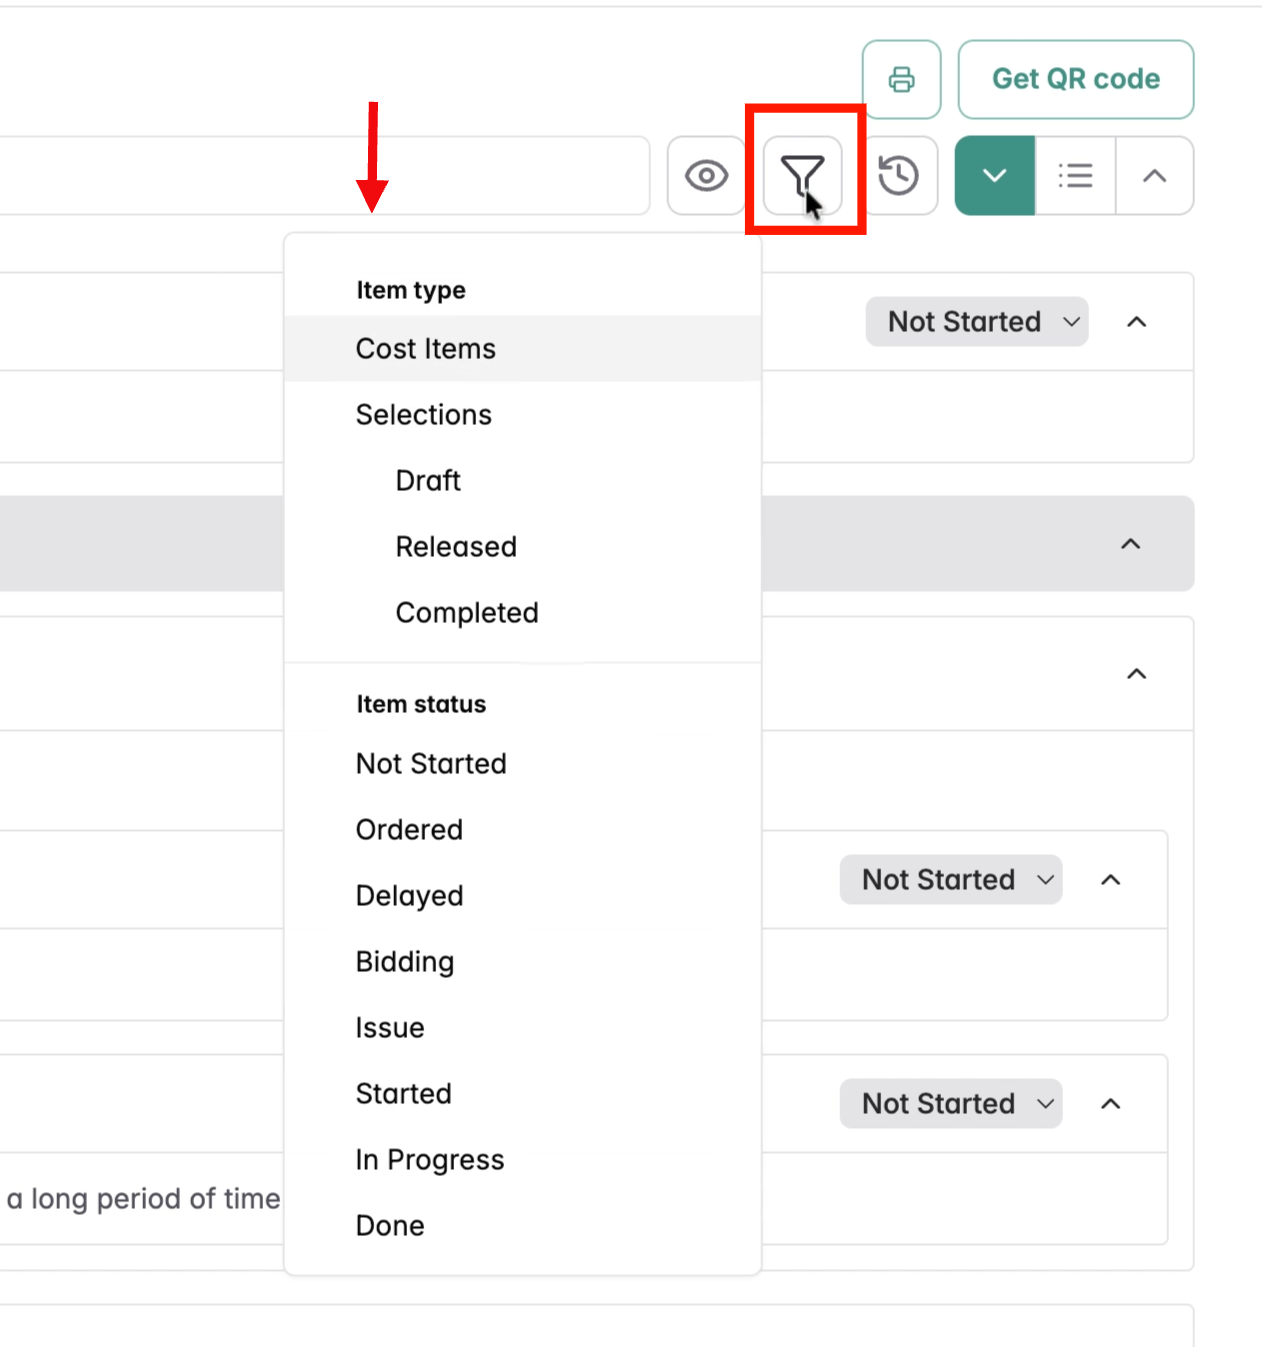
Filter items by type and status.
-
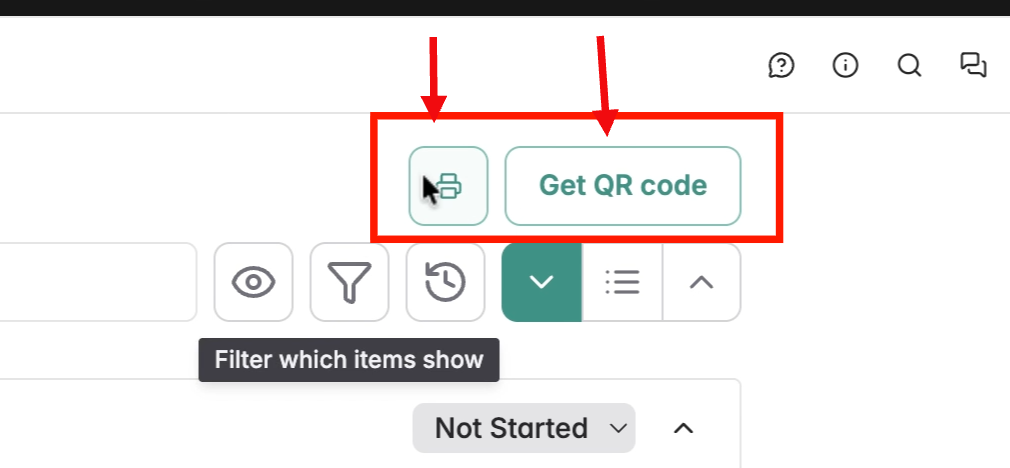
Print and Get the QR code
-
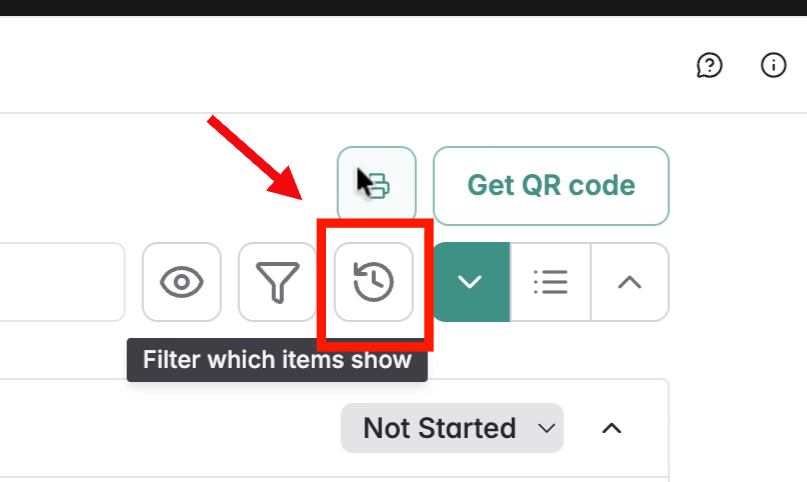
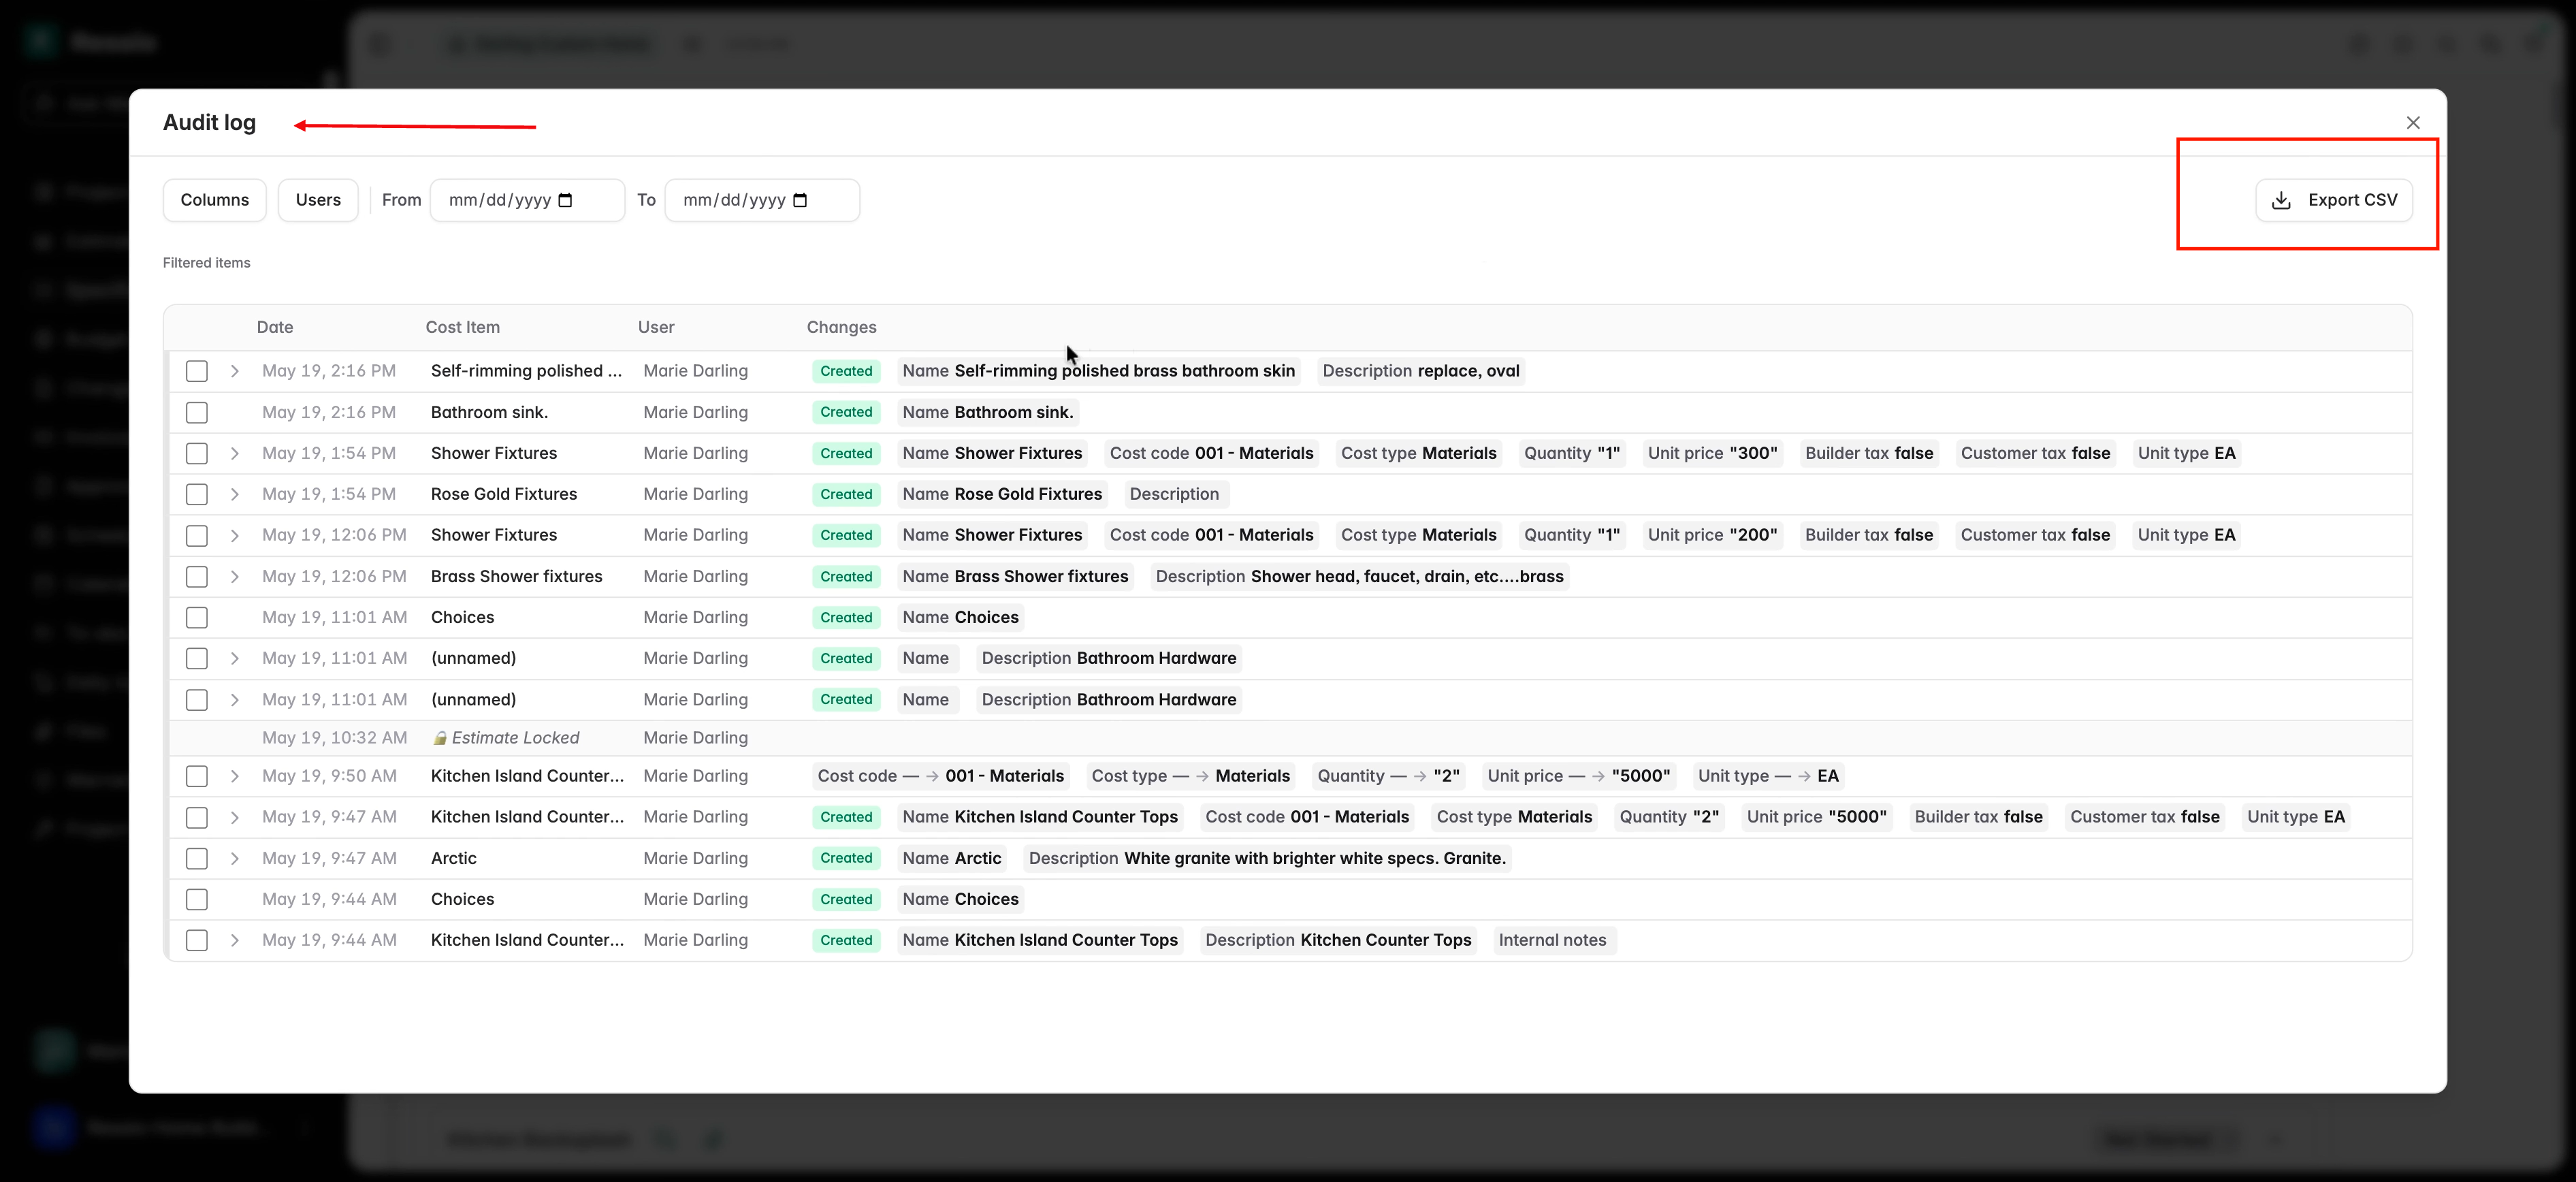
Export details (CSV), print, and access an audit log to track all changes by clicking the timer.
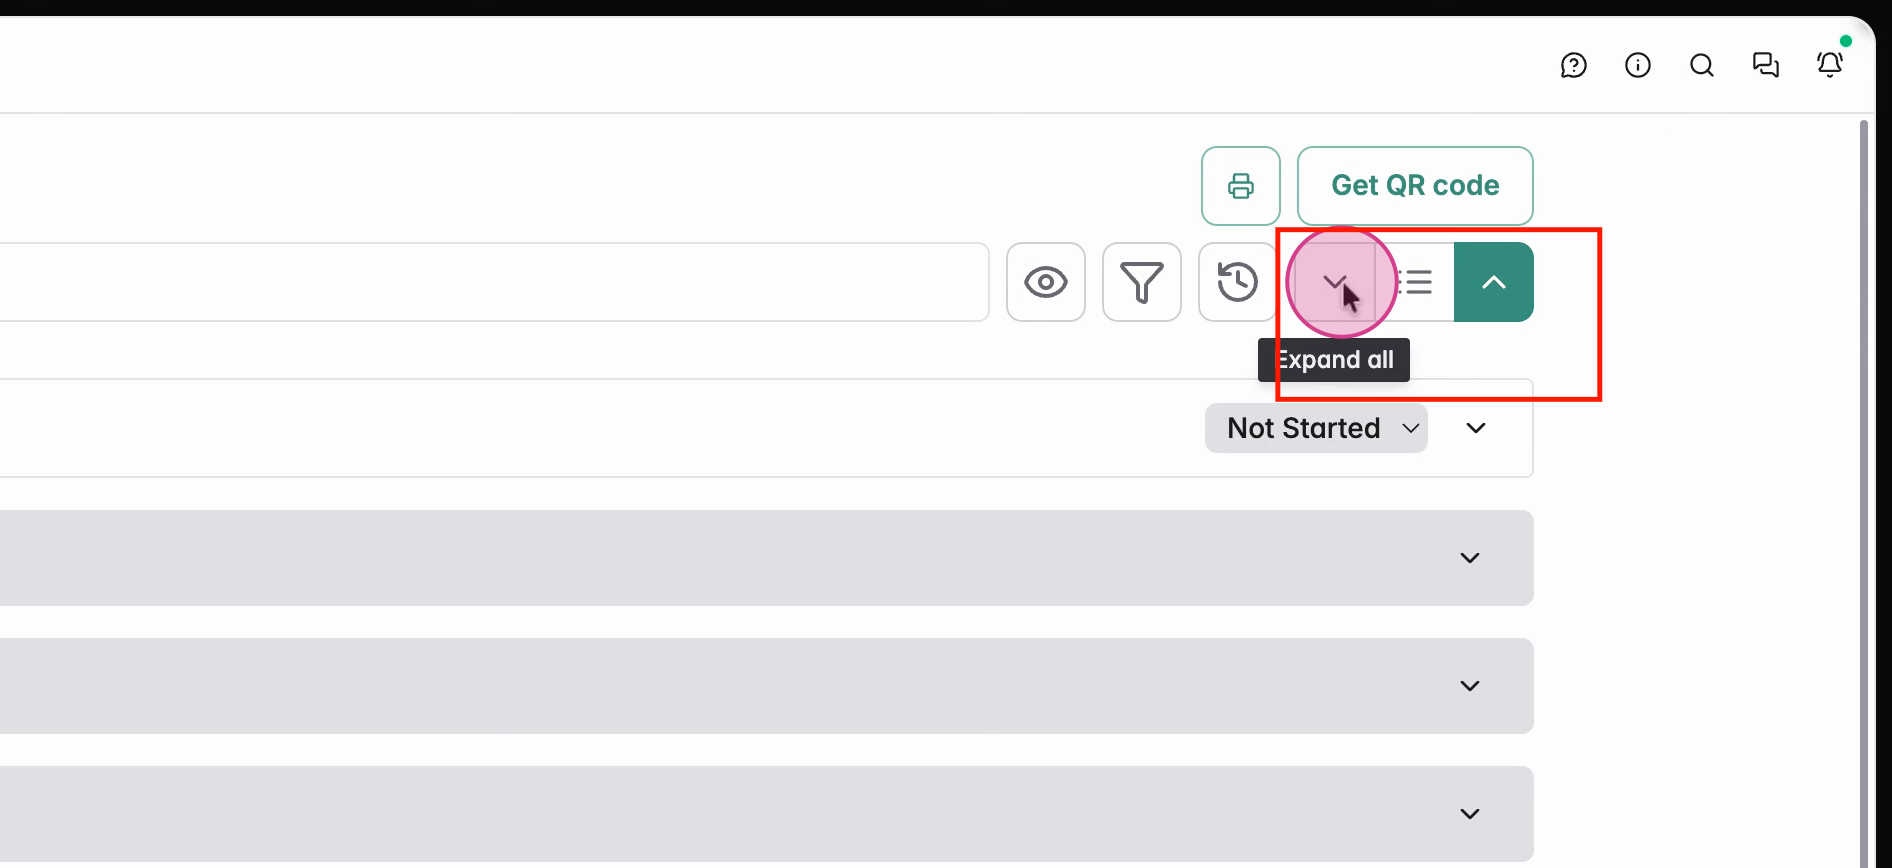
Expand or collapse sections with the arrows beside category headers.
Interact with each specification item directly: message, add files, or update status. Approve selections, release details to customers, and see history or due dates.
By clicking on the header or item, you can edit or view a specification in more detail. A panel will open on the the right hand side.
From the panel you can:
- See the Overview
- Add/edit descriptions and instructions
- Message
- See/Add Files
- Enable single/multiple choice options
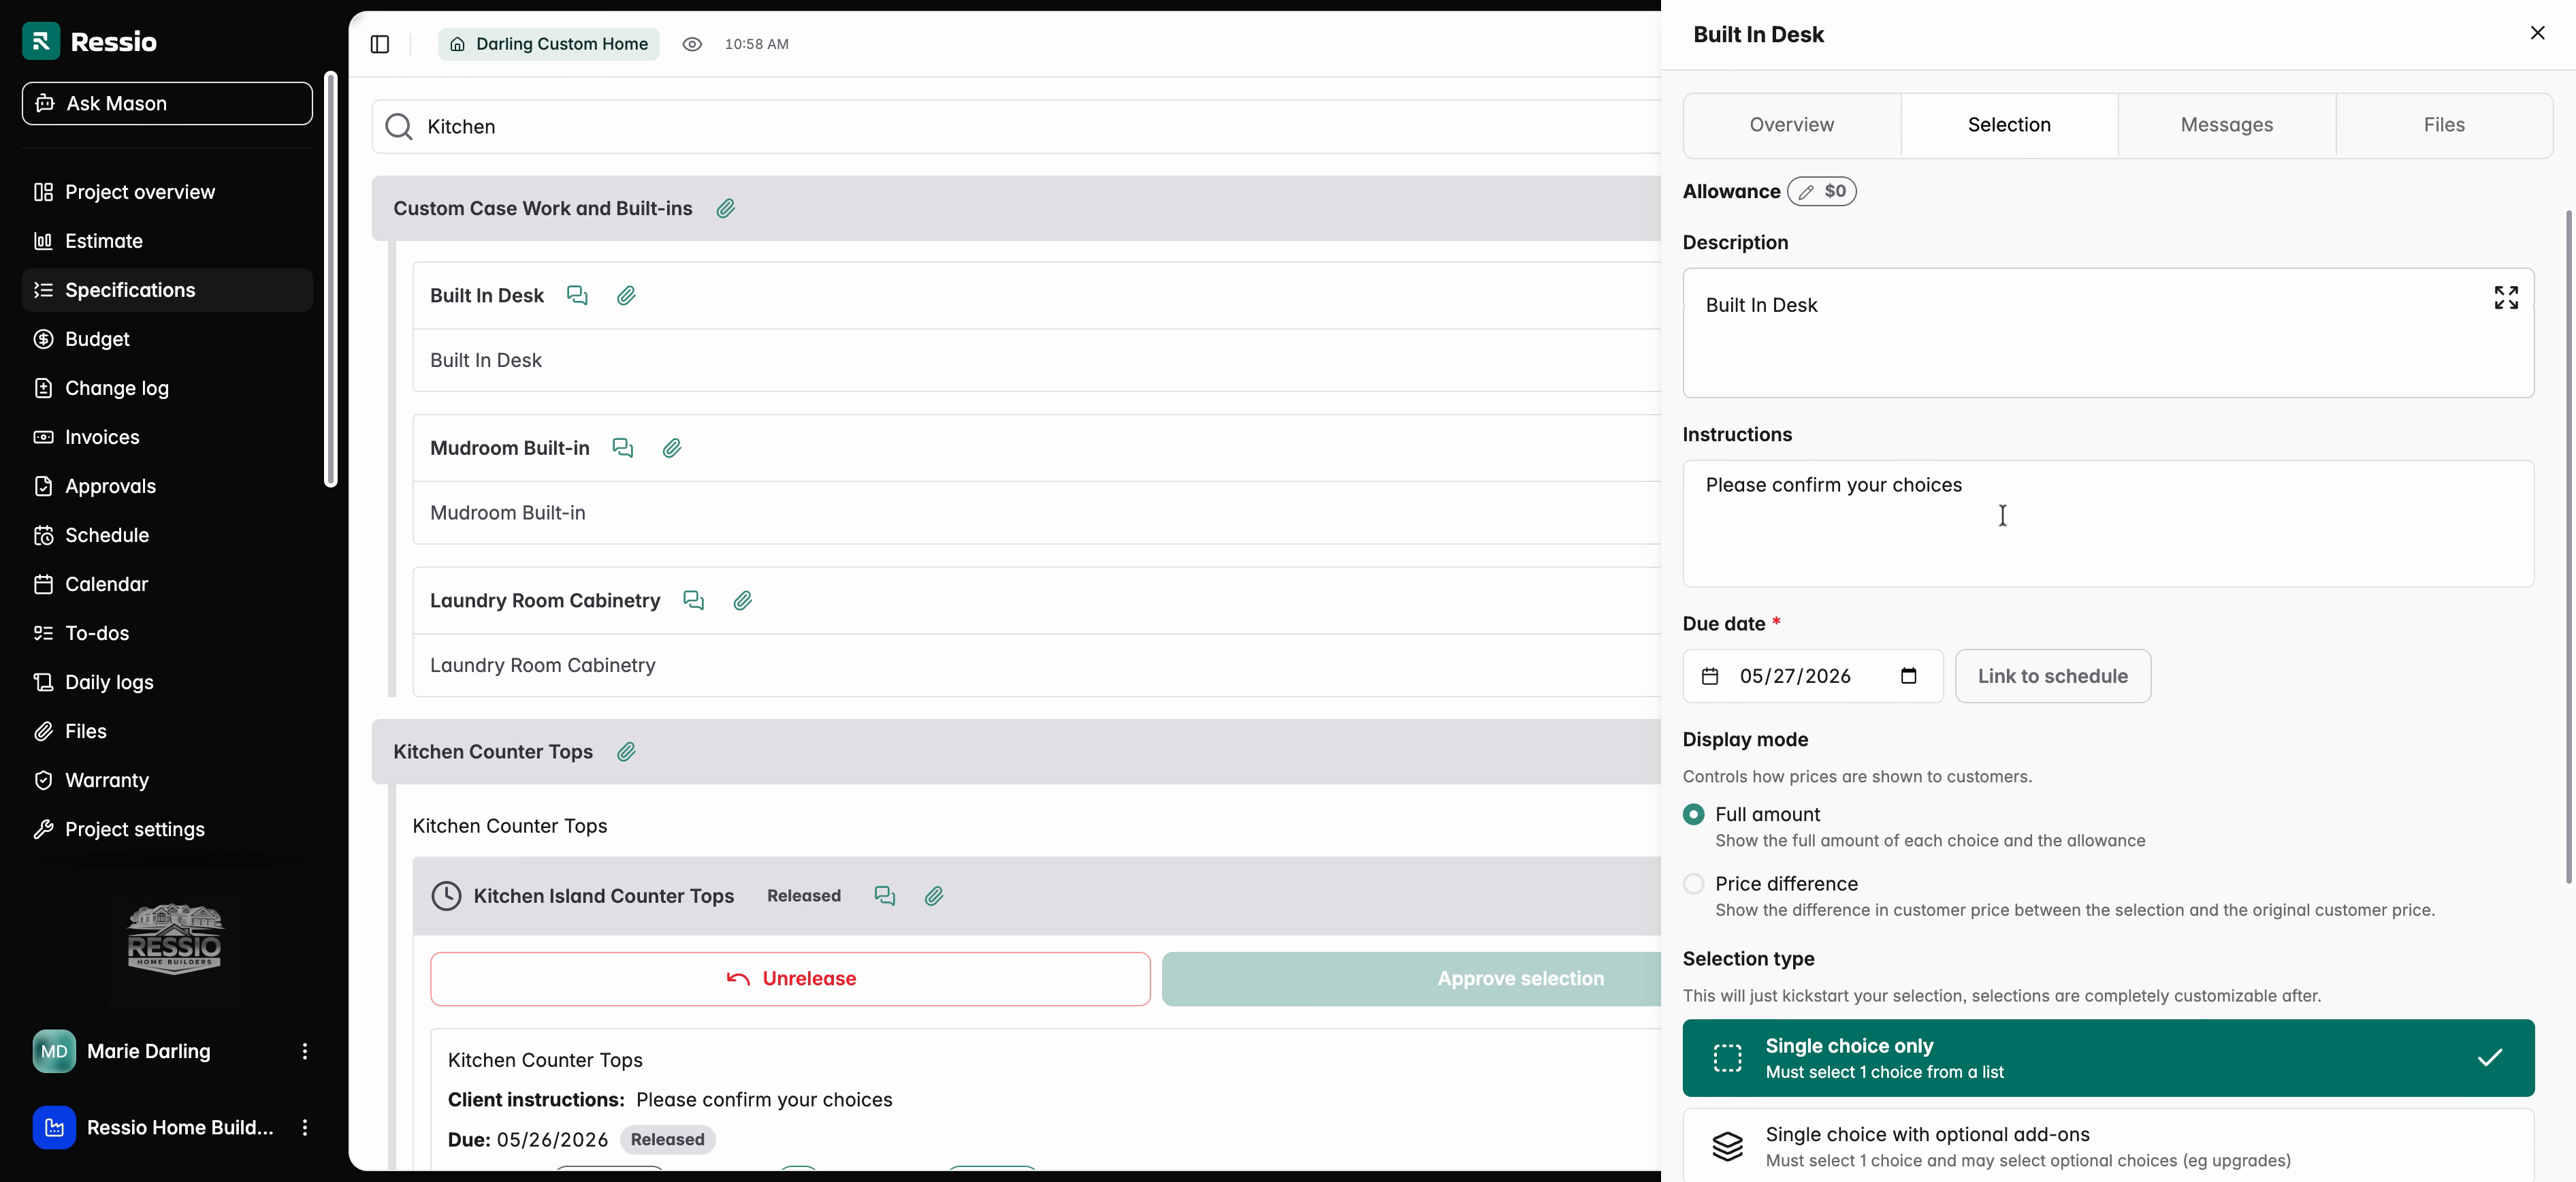
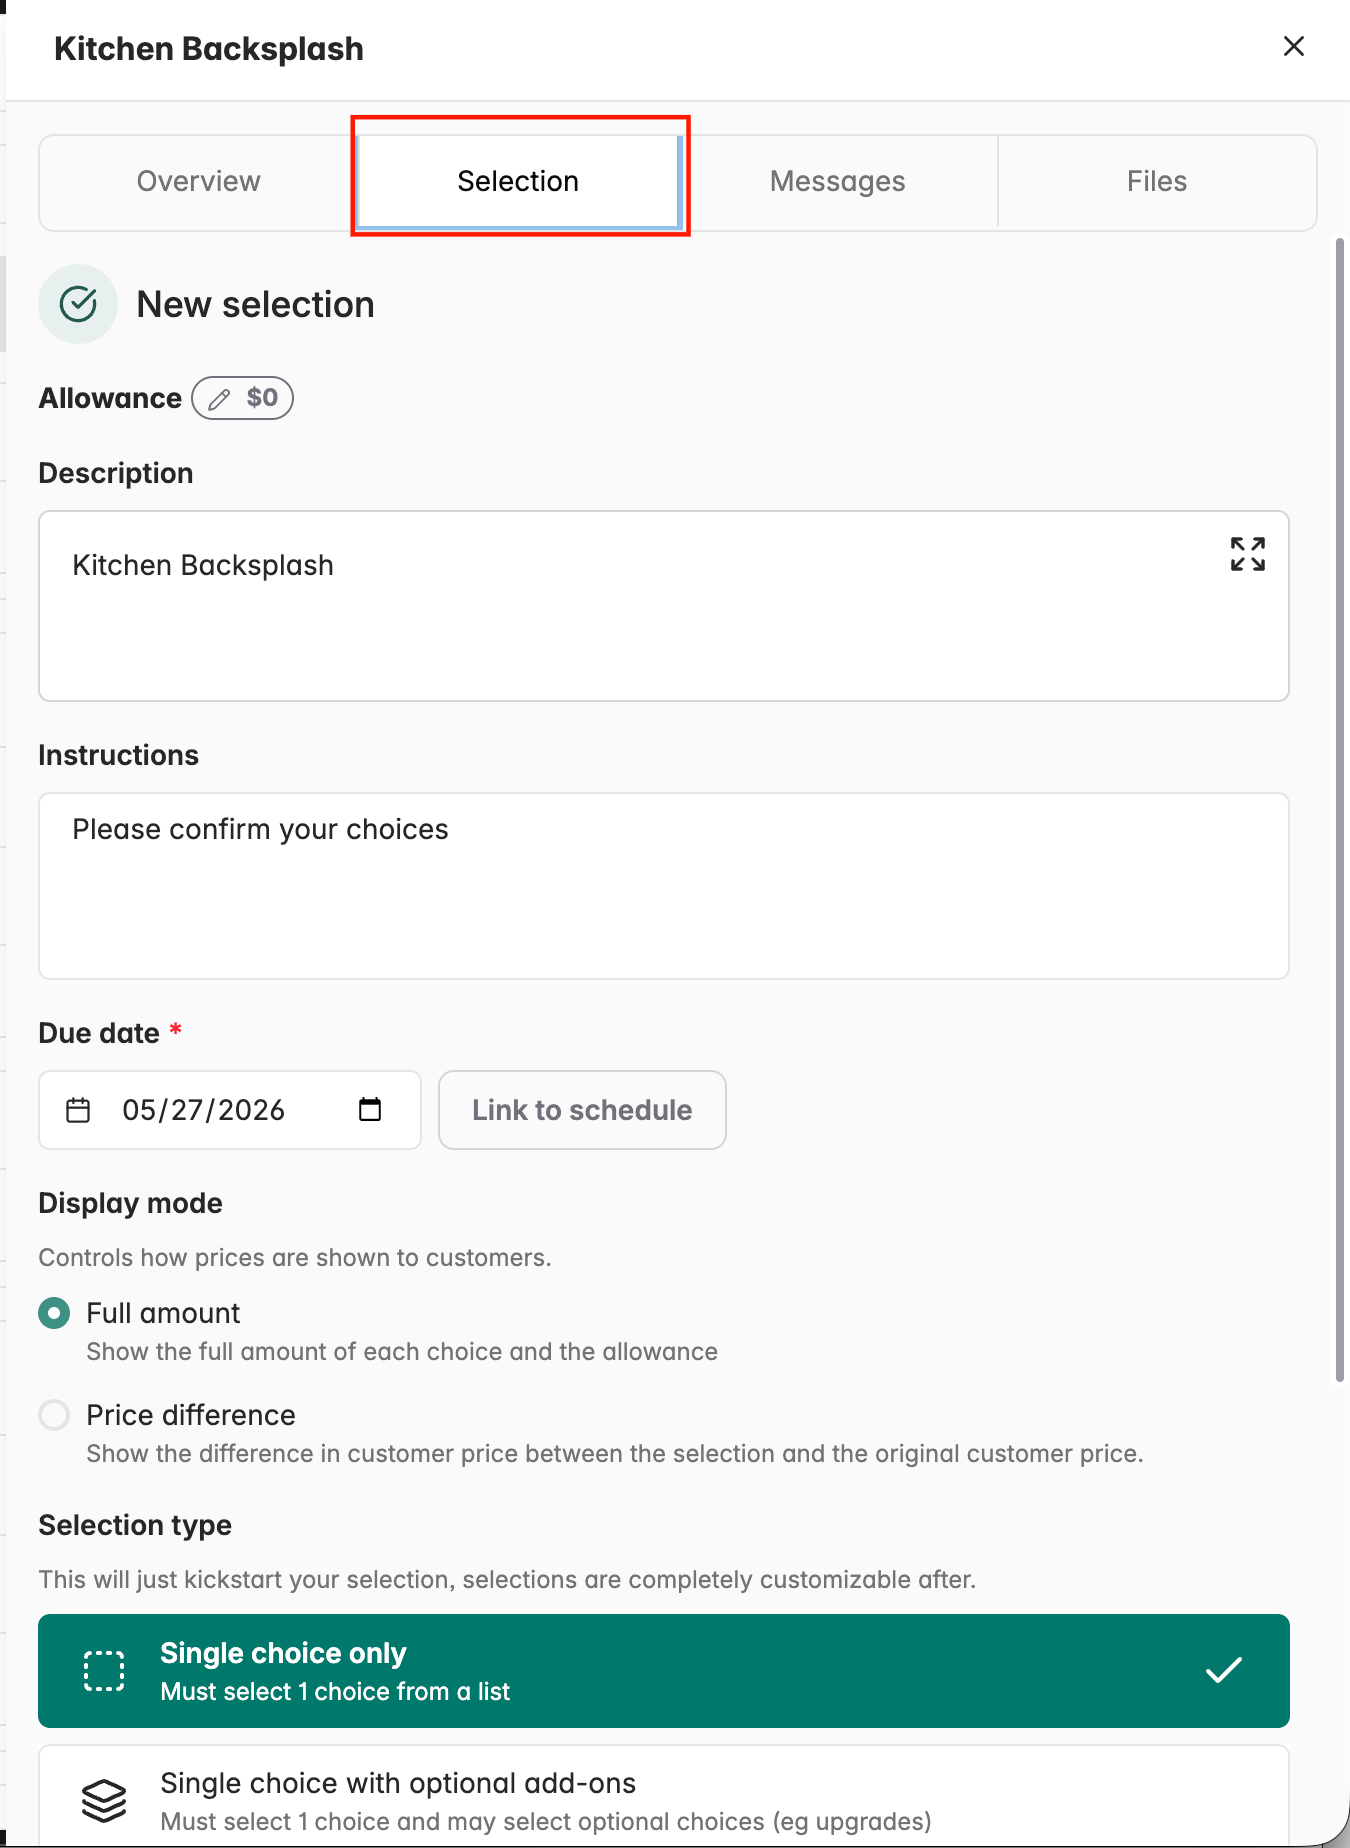
Communicate with customers over specific selections. Message threads and file attachments remain accessible in each item's panel. You can also create, add, edit selections and link to your schedule.
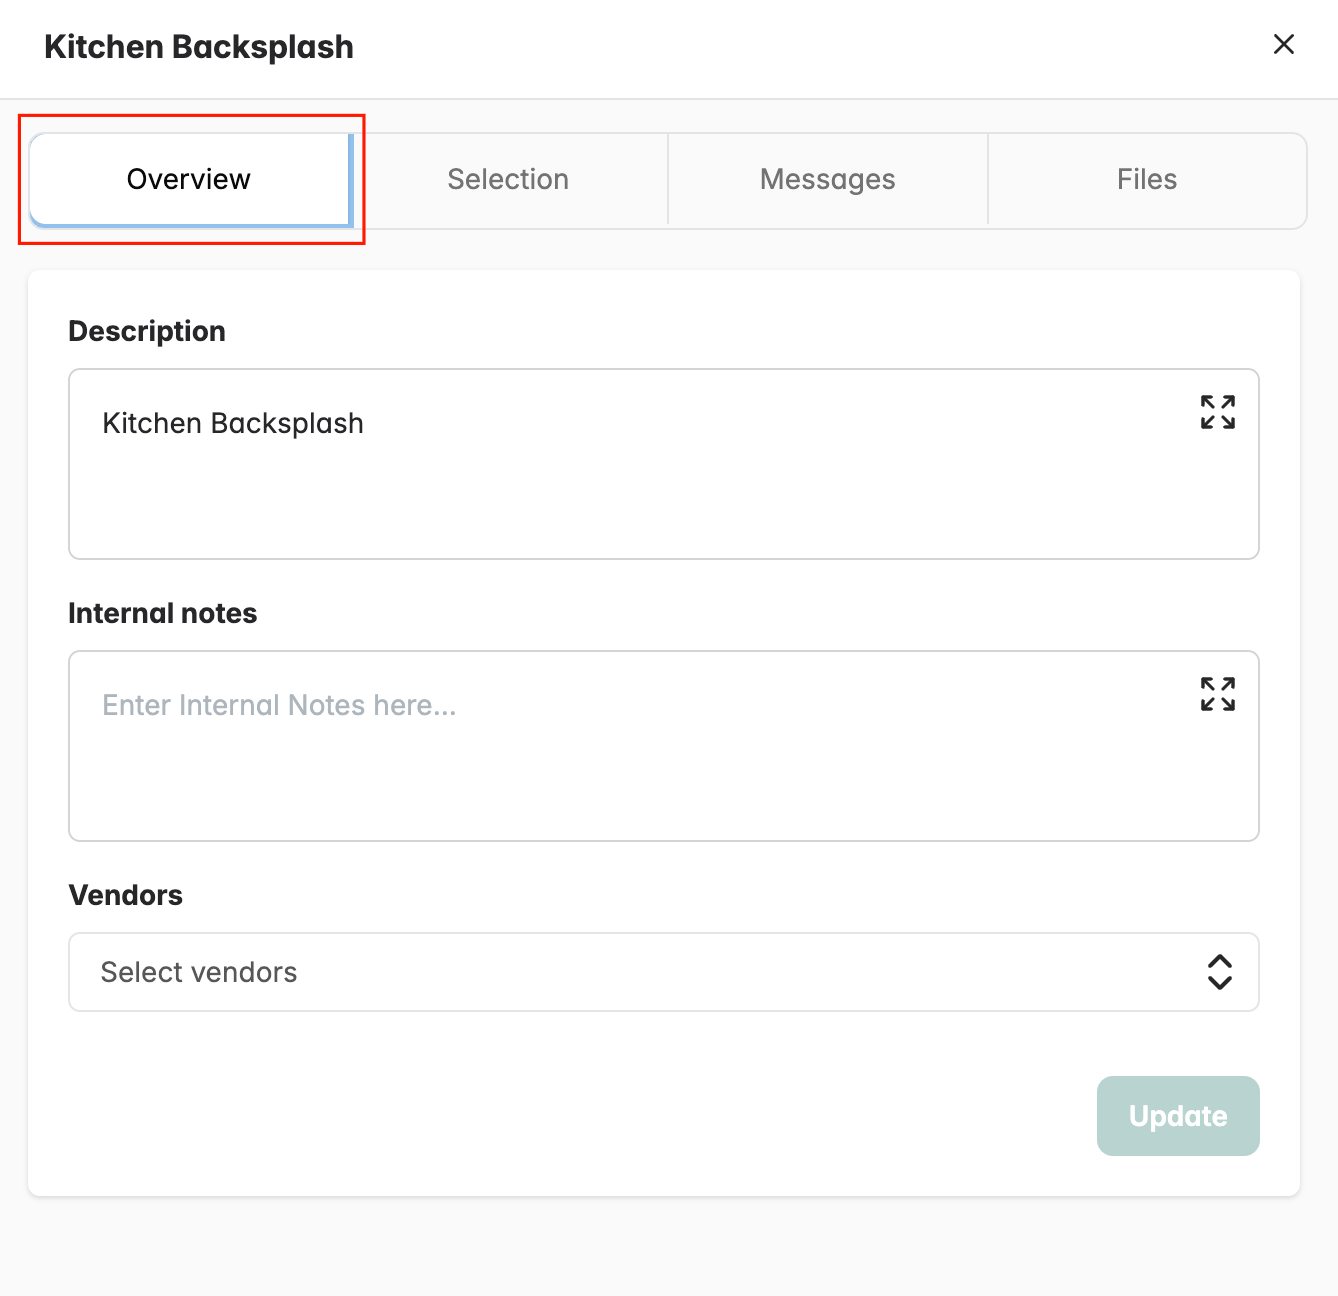
Under the Overview tab, you can add a descriptions, add internal notes and select vendors.
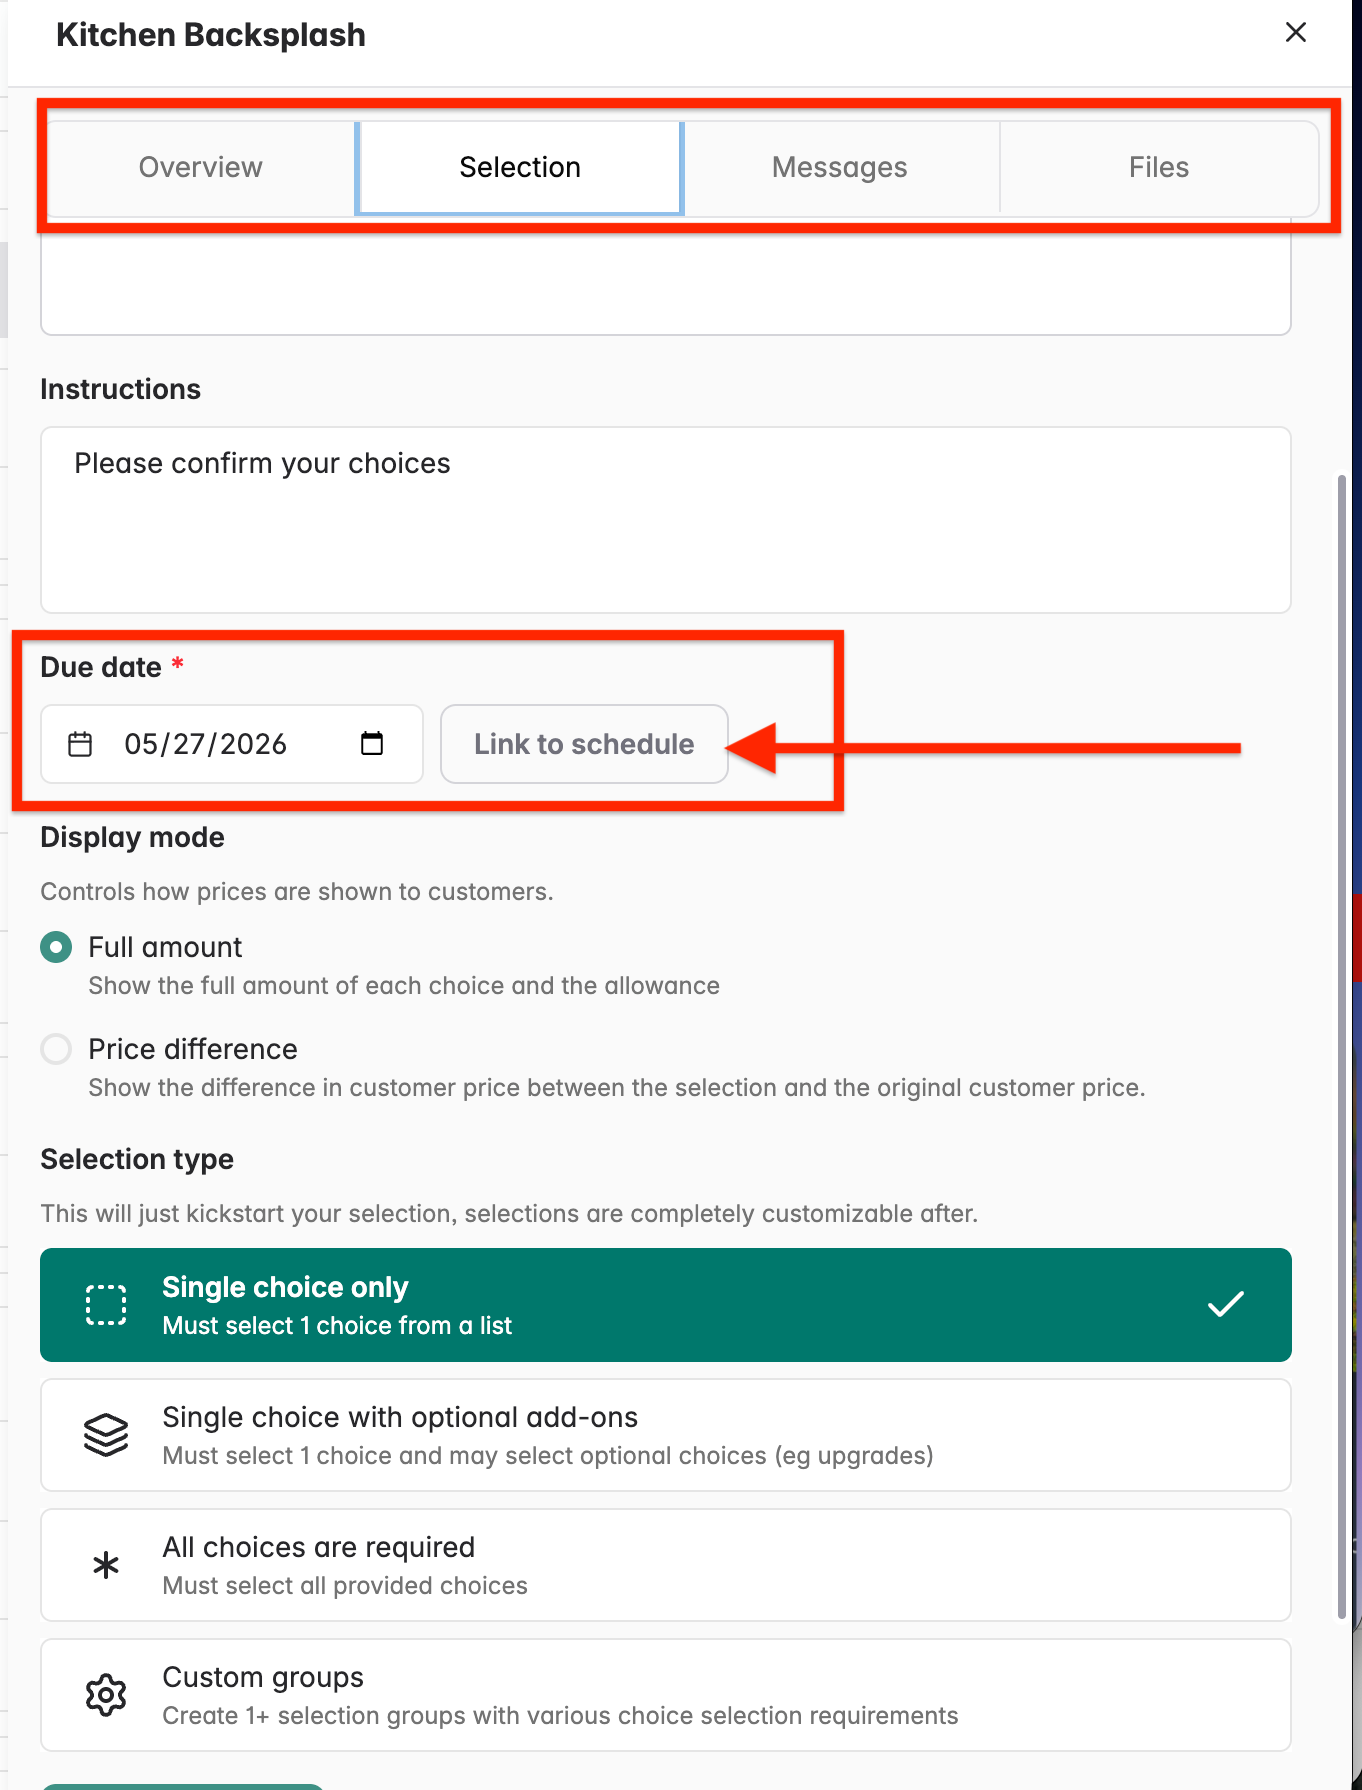
Under the Selection tab you can:
-
Add instructions
-
Due date (required)
-
Link to schedule
-
Decided on the display mode
-
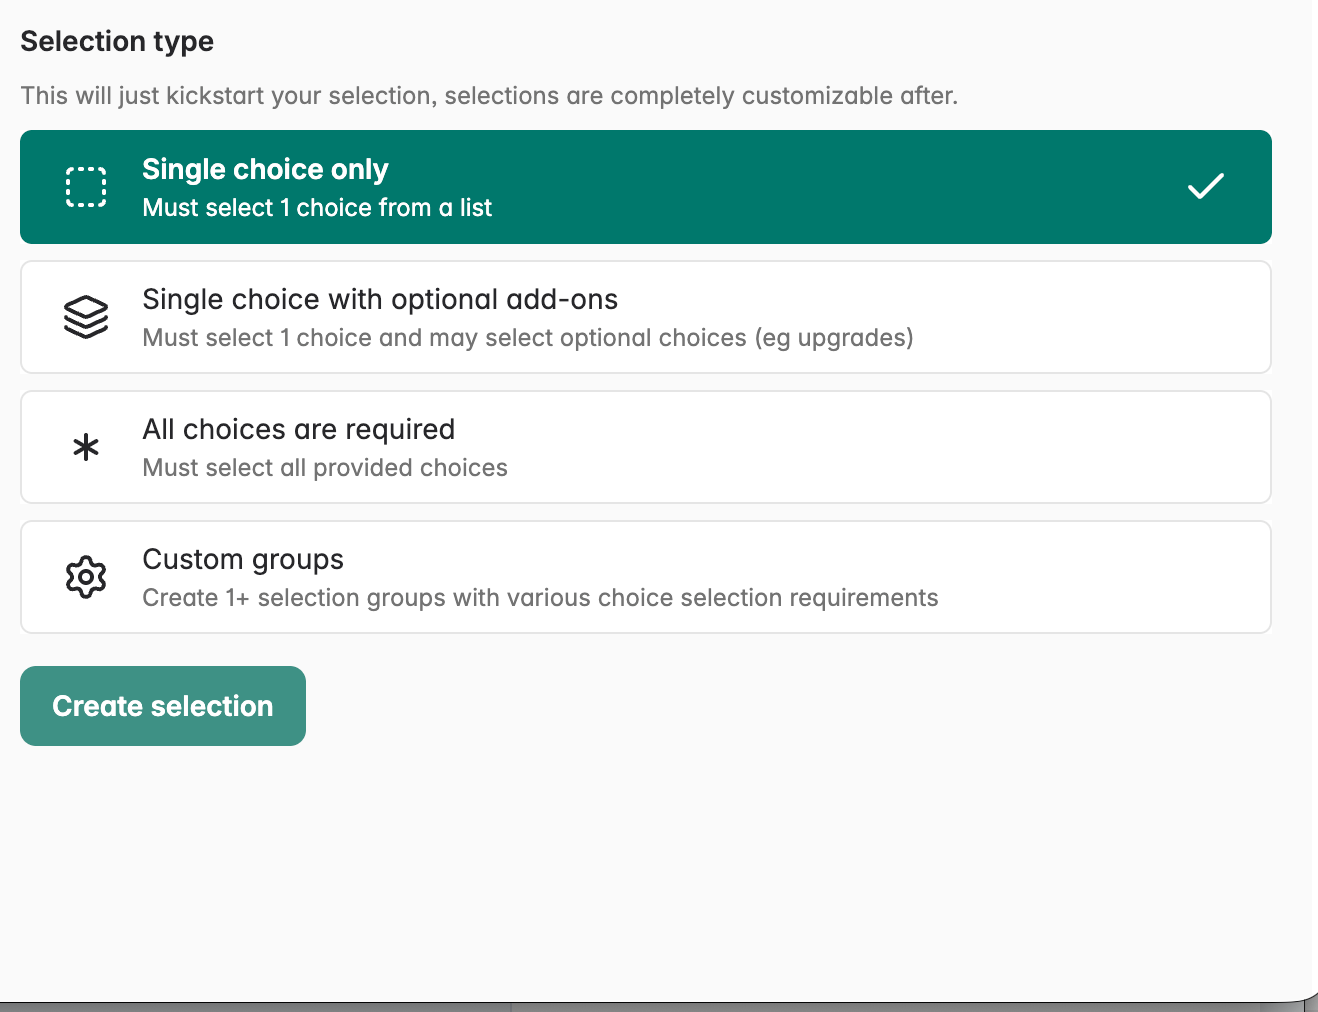
Add Selection type
-
Create selection
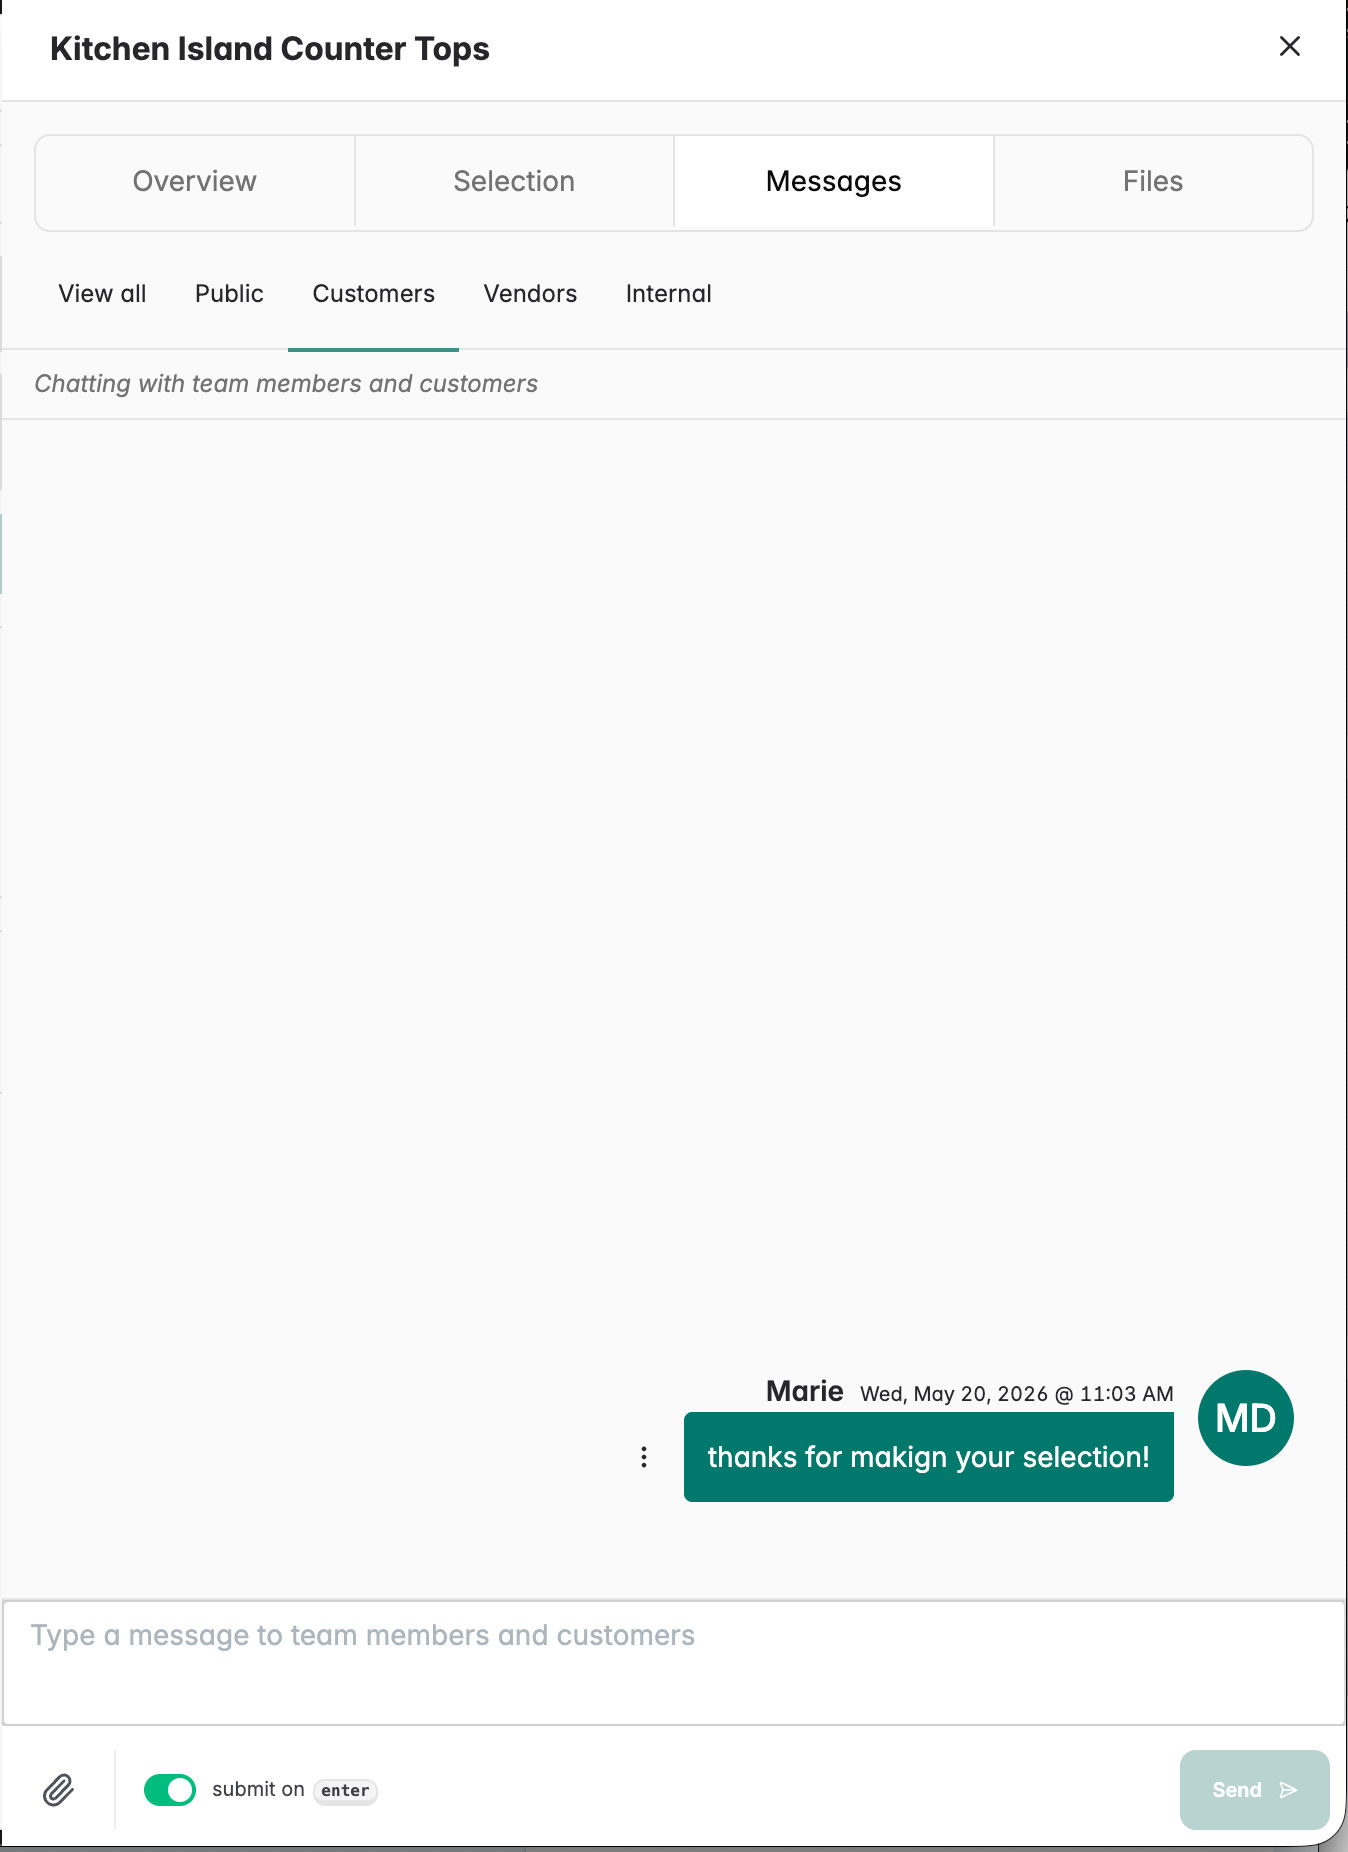
Under the Messages tab you can create a thread to that item and communicate to the customer, vendor, internally or allow everyone to view the message.
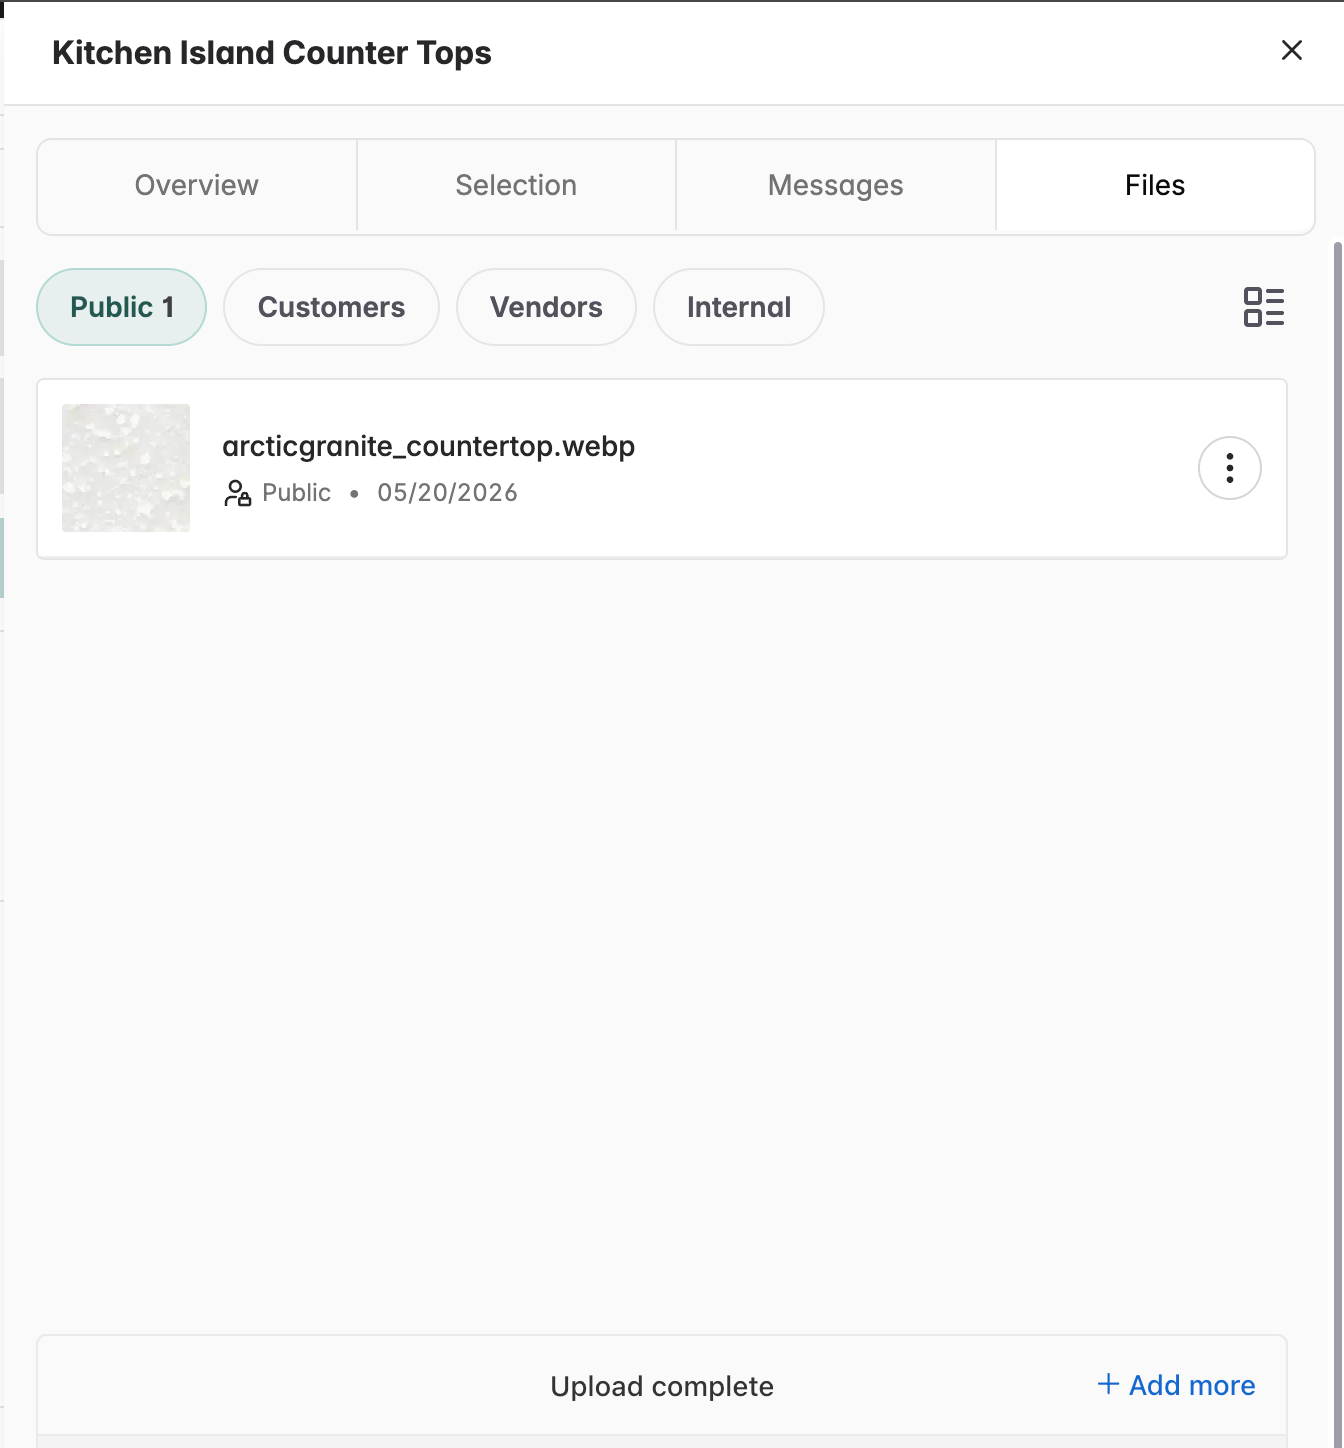
Under the Files tab you can add files and view files attached to that specific item. Files can be added directly here for public, customer, vendor or internal view.
Preview the customer perspective by using the eye icon in the top left hand corner of any page. Confirm what customers see, including updates, decisions needed, and files shared.
Mobile View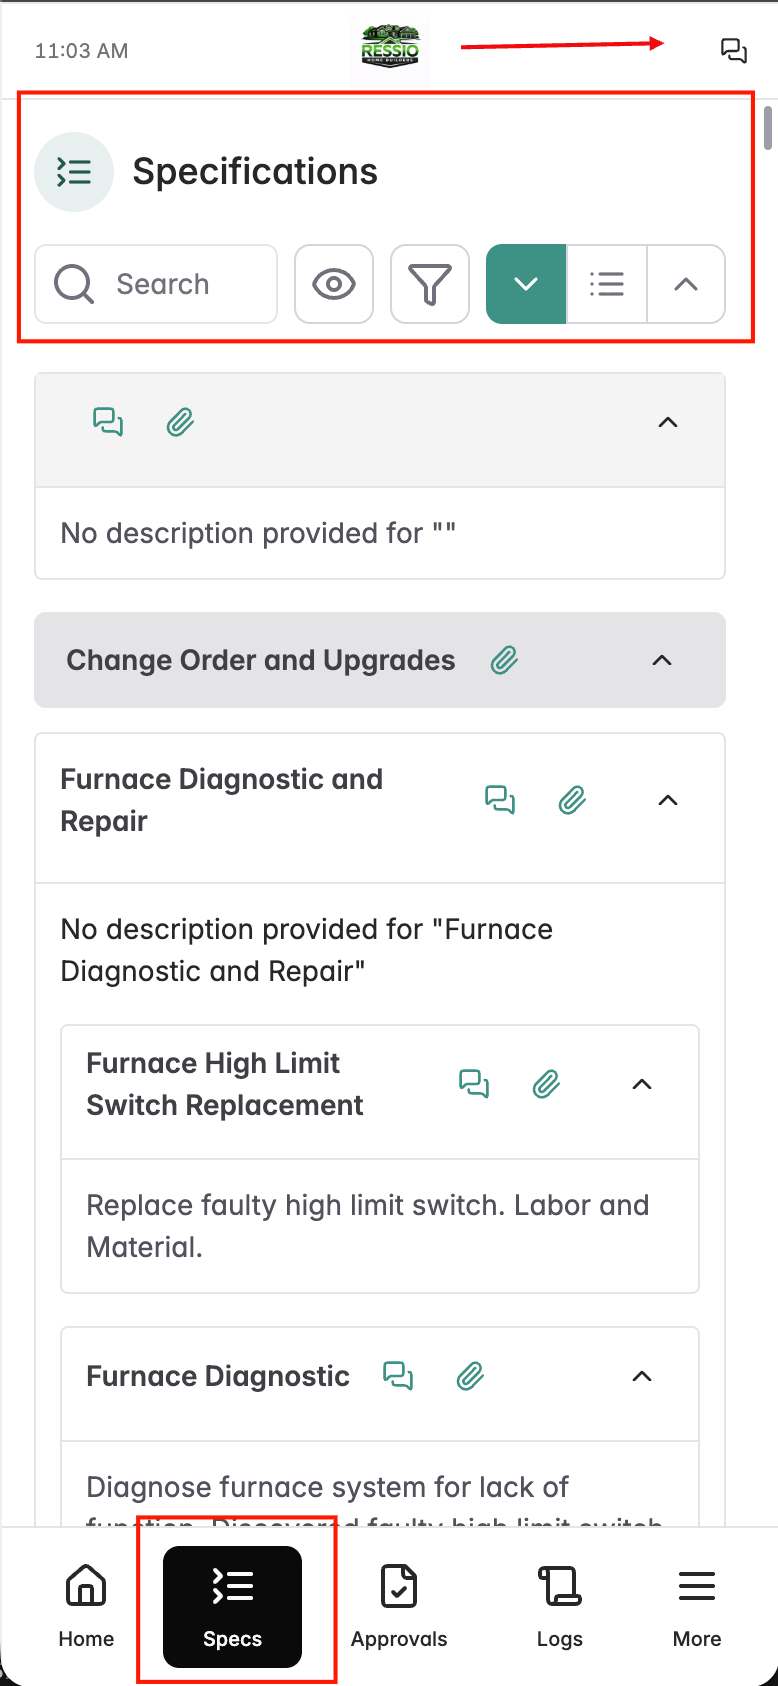
Desktop View
If you have any questions or need further assistance, contact our support team at support@ressiosoftware.com. We're here to help!