Selections includes a Price Difference display option. This setting changes how pricing is presented to your customers by highlighting the difference between the selected item and the original allowance.
Instead of only showing the full selection amount, customers can clearly see the cost impact of upgrades and add-ons.
Using the Price Difference display helps:
-
Reduce customer confusion
-
Simplify upgrade decisions
-
Prevent pricing misunderstandings
-
Improve selection approval workflows
Customers focus on what changes, not just total price
Table of Contents
What Is the Price Difference Display?
The Price Difference display compares:
✔ The customer’s allowance (original budgeted amount)
✔ The price of the selected item
Customers see whether a choice:
-
Matches the allowance
-
Falls below the allowance
-
Exceeds the allowance
This makes upgrade decisions easier to understand.
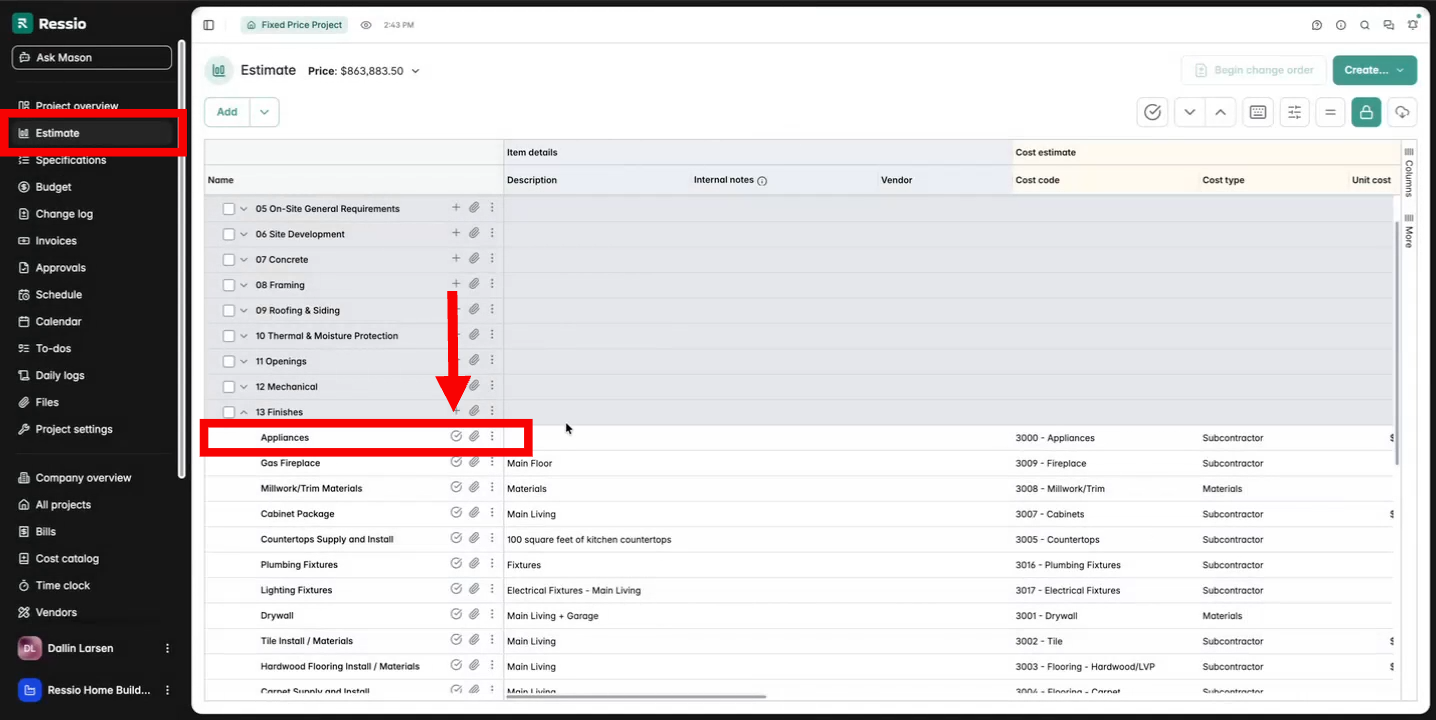
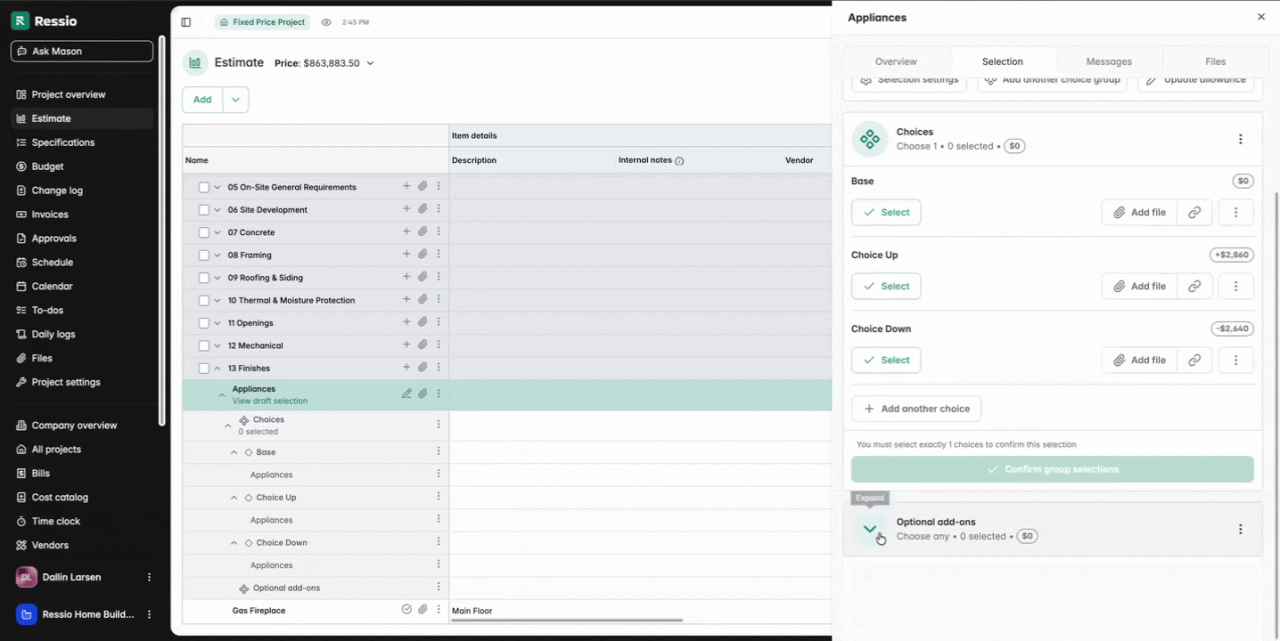
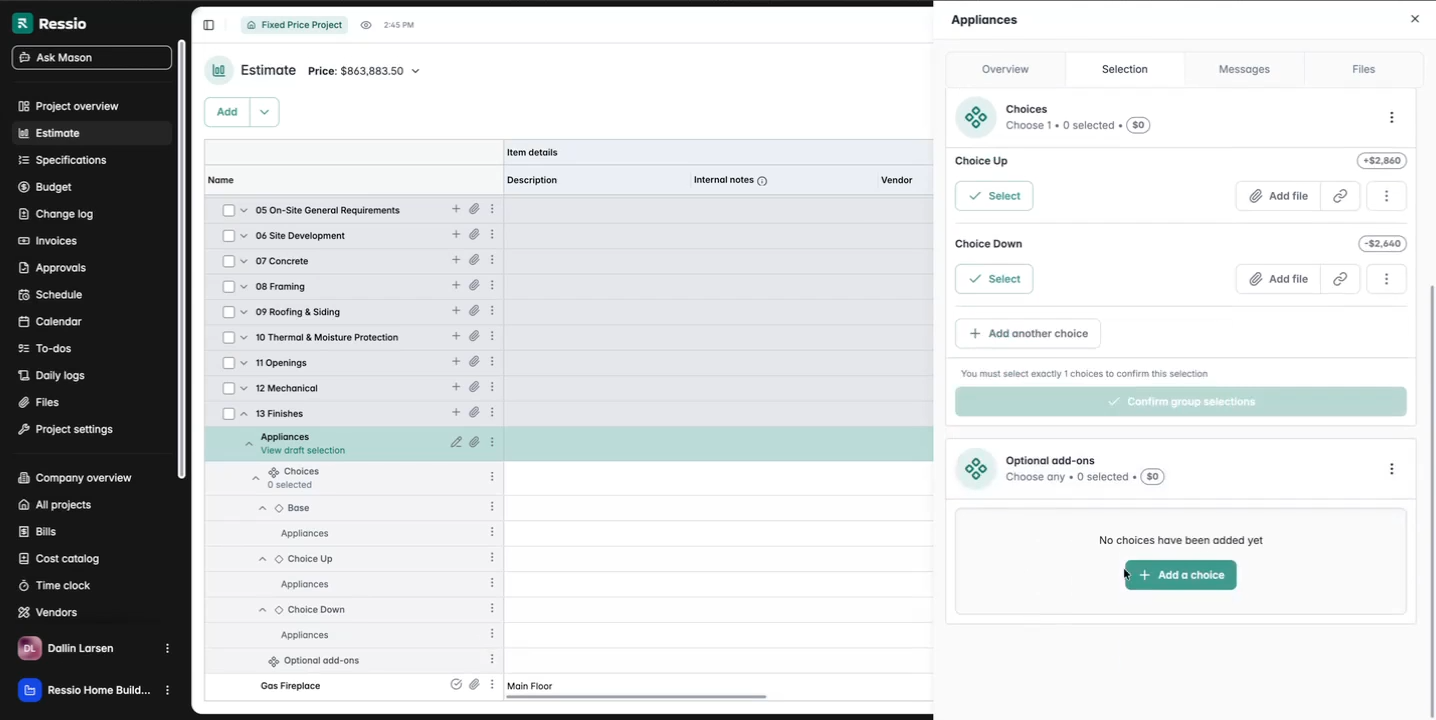
Choose the project and navigate to you Estimate. Go to your category and click the check mark next to the title to create a selection.
🎓 To learn to learn more about the selections process from start to finish, read "Creating & Releasing Selections".
Enabling Price Difference Display
The selections drawer will come out on the right hand same of the estimate where you can fill out all information. There is a section titled "Display mode". Two options to control how prices are shown to customers:
-
Full Amount - show the full amount of each choice and the allowance
-
Price difference - show the difference customer price between the selection and the original customer price

💡 Price difference mode applies only to "Single Choice" and "Single Choice with Optional Add-ons" selection types. The other two options are greyed out.
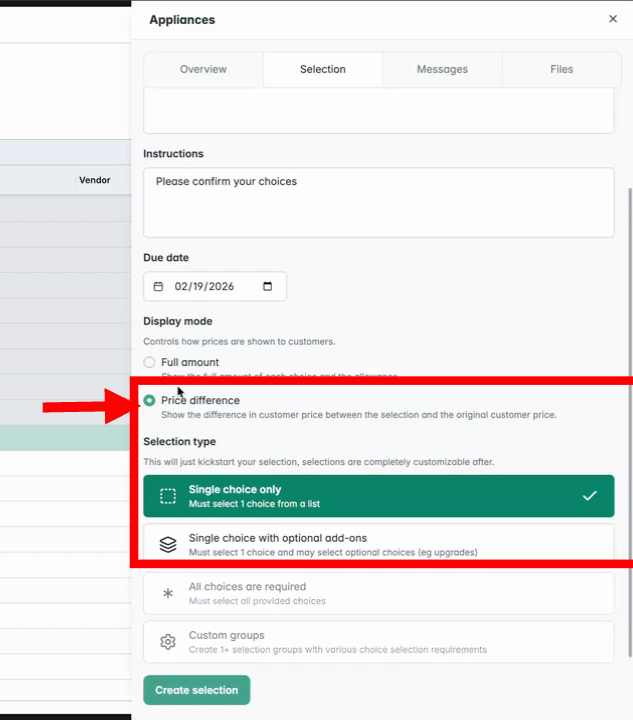
Continue by choosing the desired selection type and creating the selection.
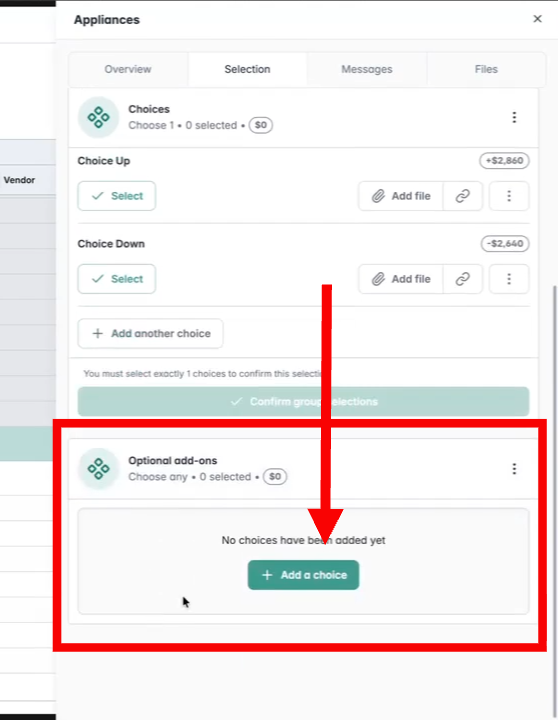
Working with Choices and Add-ons
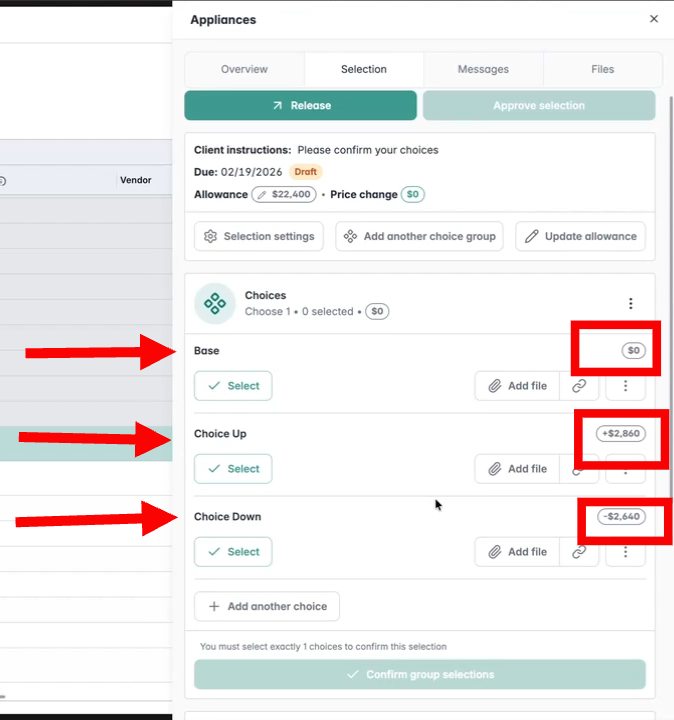
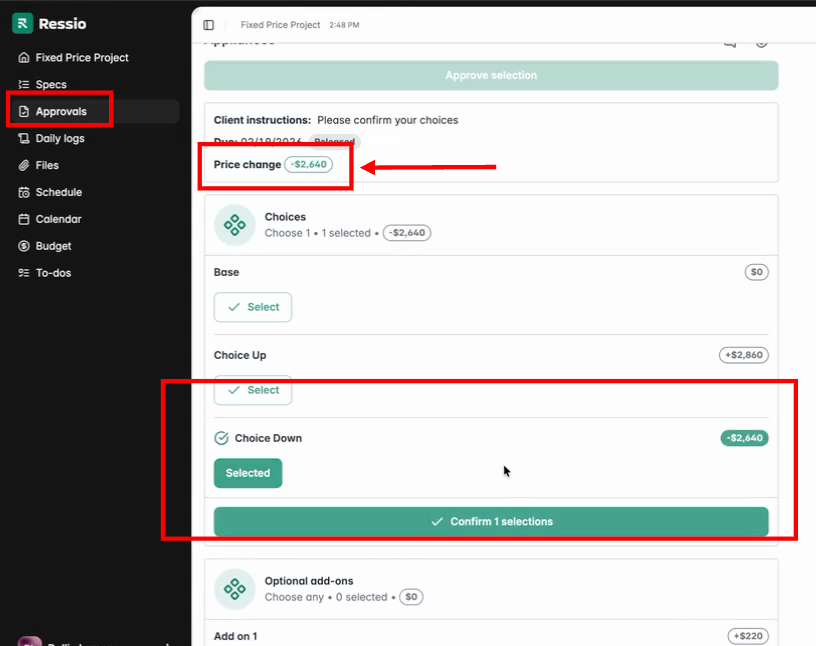
Add choices as usual. The display updates to show the difference from the quoted price.
-
For choices matching the allowance: the difference displays as $0.
-
For higher-cost choices: the difference displays as an added amount.
-
For lower-cost choices: shows negative values (cost savings).
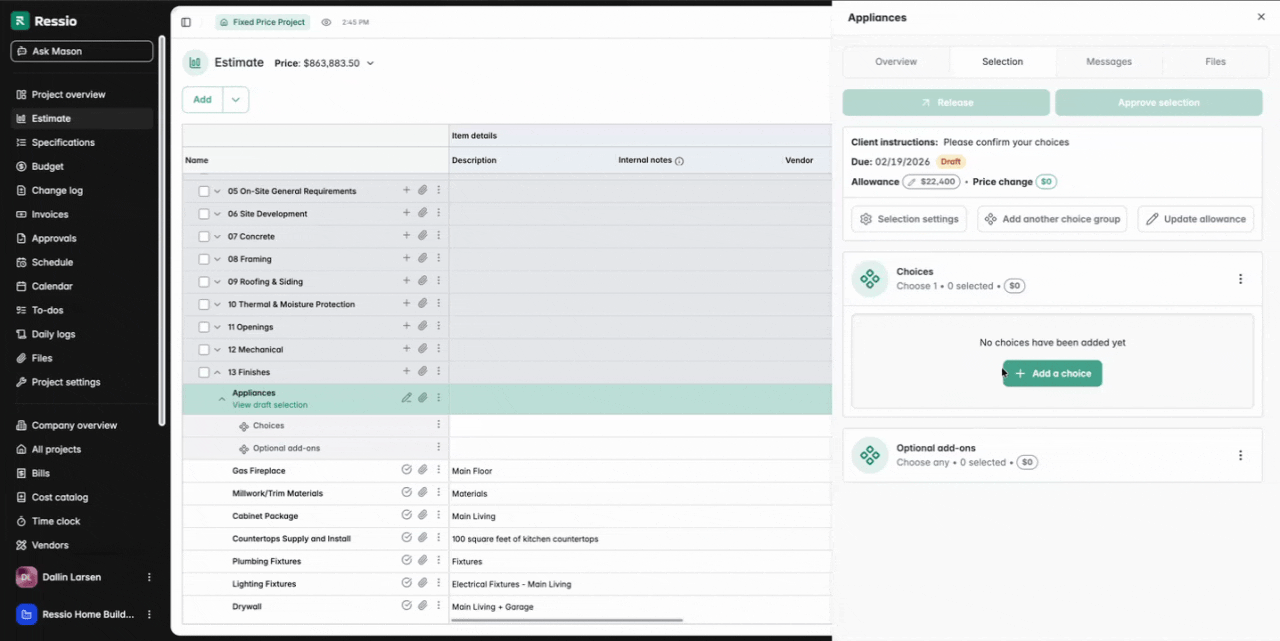
Add more choices to present upgrades or downgrades.
Adjust the choice prices to see the effect on the customer's total project cost.
Include add-ons (e.g., optional features) to display their isolated price impact.
Customizing Display Options
Ressio enables builders to tailor how customers view selection pricing:
-
Switch between Full Amount and Price Difference any time in the Selection settings.

-
Toggle whether to show the allowance amount to the customer as needed, also under "Selection settings".
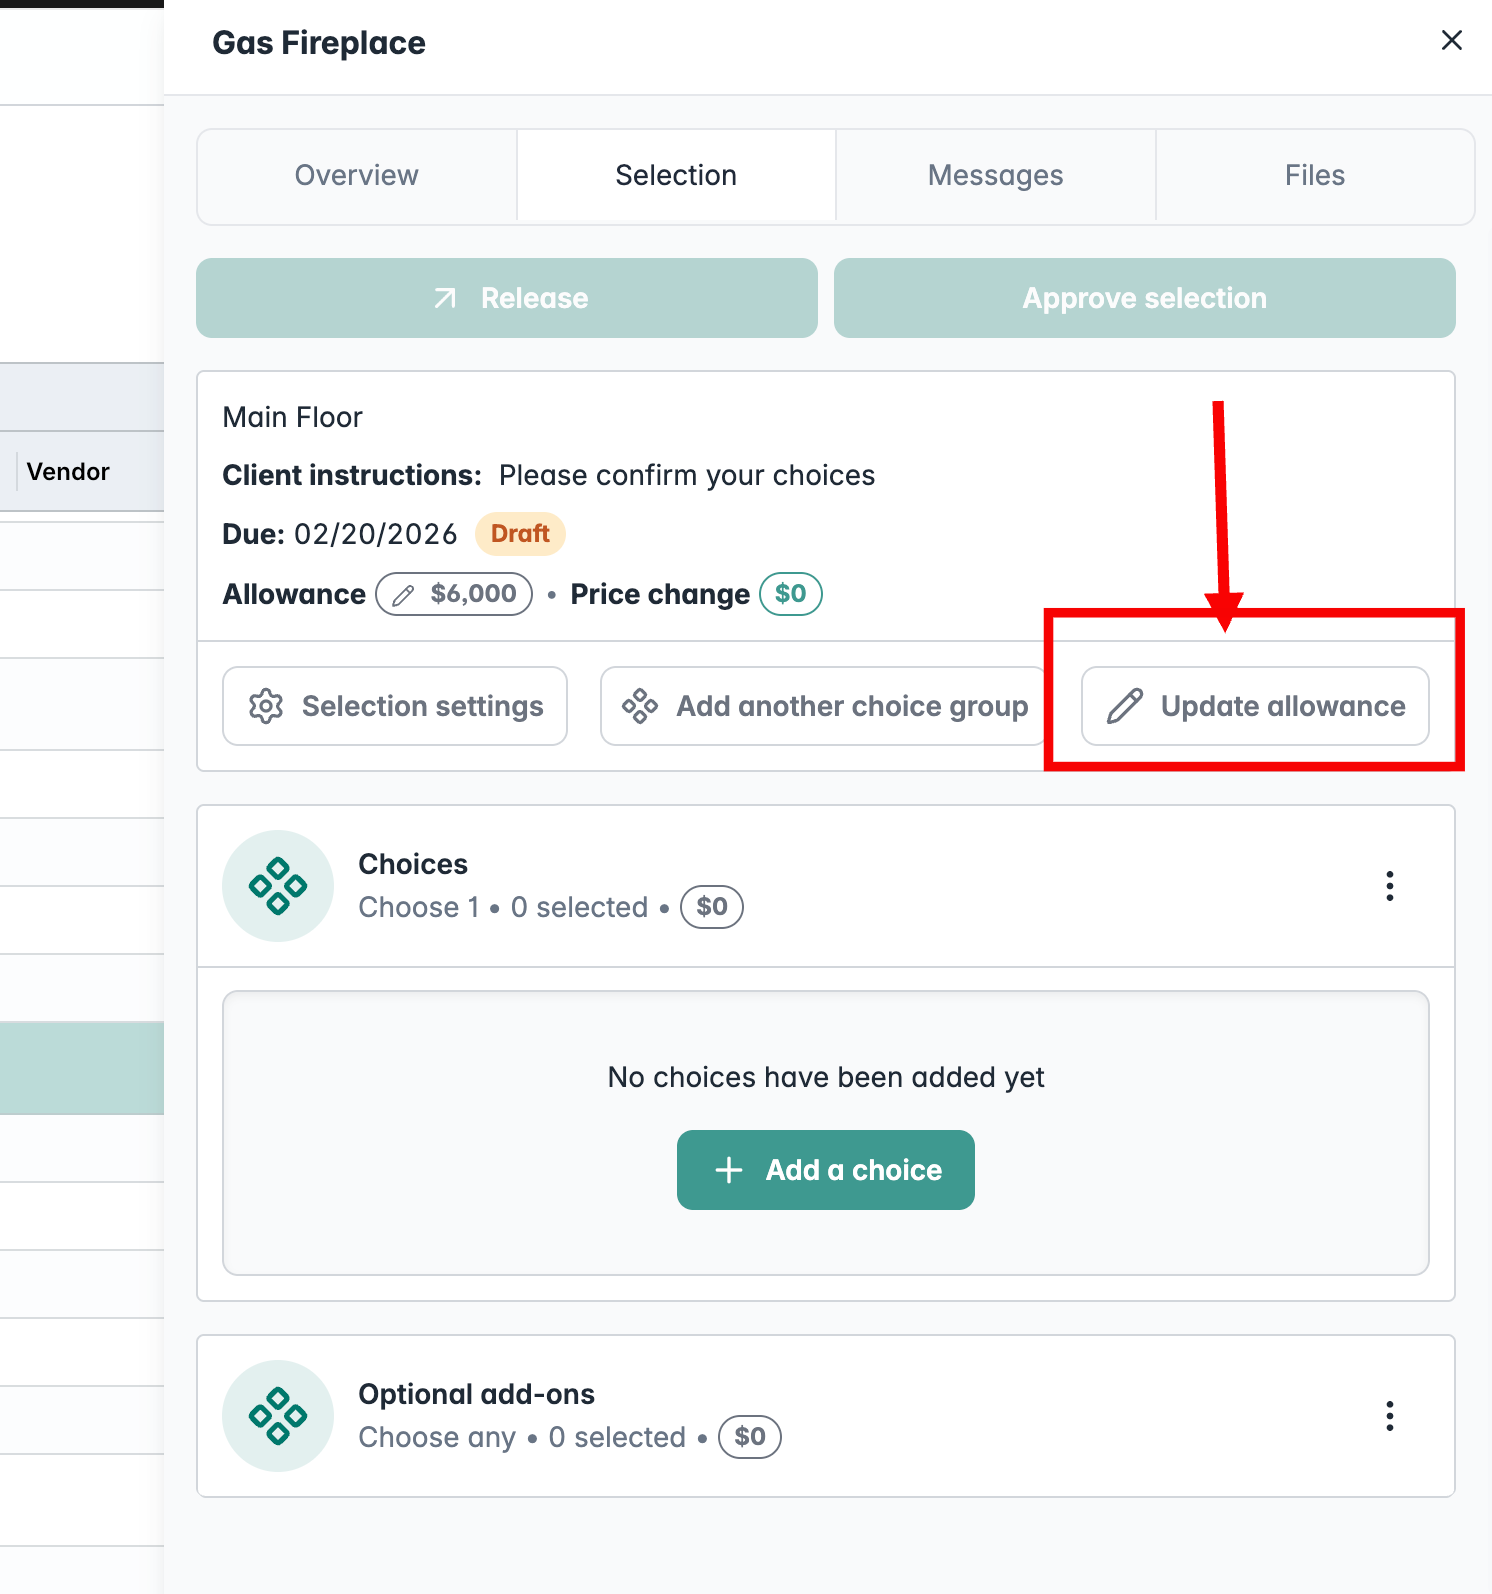
Updating Allowance
You can also update allowance when needed under "Update allowance".

Release the selection to the customer.
Customer Experience and Change Log
Customer View
In the portal, customers see choices as price differences, helping them understand potential cost increases or savings at a glance. As customers make selections (including add-ons), Ressio displays the combined cost impact.
All selections and changes are recorded in the change log for full transparency.
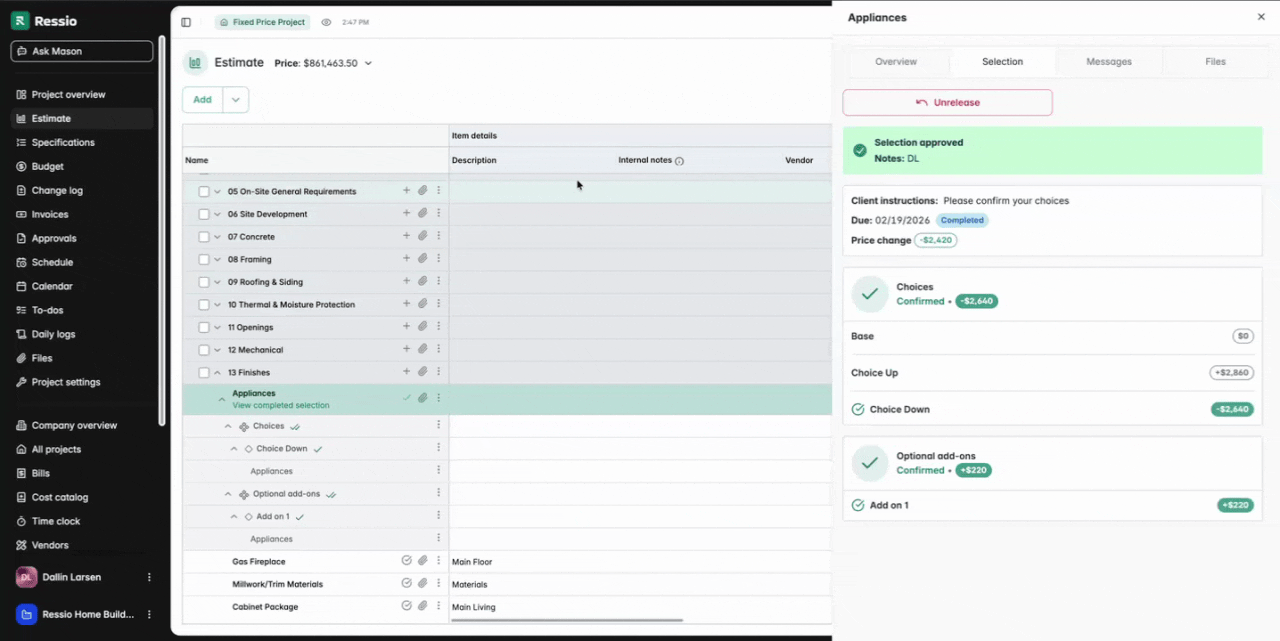
Invoices reflect the approved price differences, streamlining project billing.
If you have any questions or need further assistance, contact our support team at support@ressiosoftware.com. We're here to help!