Whether you're running a fixed price job or a cost plus project, tracking labor costs is important to the profitability of your jobs.
No more double entry: Entering labor totals manually each pay period or client invoice can be tedious.
Set a billable rate for your employees, use the time clock, and approve the entry to sync the labor cost to that project's budget.
🔄For help integrating time clock with Quickbooks online, see Integrating Time Clock with Quickbooks Online.
Table of contents
Adding Team Member Billable Rates
💵Adding your expenses per employee labor hour allows Ressio to calculate labor costs.💵
- Fixed Price projects: Oftentimes burden rates, a combination of employee pay, insurance, social security, taxes, and other costs are used.
- Cost Plus projects: Charge out rates are more common in open-book projects.
👀 Admins only: Billable rates are only visible to Admin users. 👀
To set an employee's billable rate, go to Company Settings->Team Members and select the Billable Rate (shift type) tab.

Select Add Rate + next to an employee name to add a burden rate. 

✅ NOTE: The name of the billable rate IS the shift type. You can edit and name the rate.
TIP: Employees can choose from multiple pay rates when they clock in. Add as many as needed and set their default rate by checking the Default checkbox on the right.
Examples include: Standard, Overtime, Vacation, PTO
Time Clock Review
In addition to pay rates, time entries are required to calculate labor costs. The following fields will need to be completed by the employee for each time entry.
- Project: Determines which budget the labor costs will appear
- Cost Code: Determines which cost row in the budget the labor costs will appear
- Shift Type: Determines which BILLABLE RATE will be used to calculate labor costs
- Start time/End time: Determines the duration of the shift
For more information about how employees clock in, see Using the Time Clock.
Approving Time Entries
Time entries must be APPROVED to sync into a budget. Review each entry with the above fields in mind before approving.
⚠️ CAUTION: Once a time entry is approved it CANNOT be changed. Labor costs will automatically sync to a project's budget.
📝 NOTE: Labor costs can be edited on the budget page.
To approve time, go to Time Clock.

Select the green checkbox in the Actions column to approve the entry.

Because this action cannot be undone, there is one last chance to Confirm and approve.

Status: The Status column indicates if a time entry has not been reviewed (Draft), or if it was pushed to a budget (Approved).
Review your budget pages to see your labor hours. They will appear in the Actuals column along with your material and subcontractor costs.
Permissions for Time Clock
You have the ability to allow Team Members and Field Users to edit their own time shifts prior to approval. To enable this go to the Settings tab next to the 'Billable Rates' tab.
Under 'Time Clock', toggle on to "Allow team members and field users to edit their own shifts prior to approval."

[back to top]
Applying Time Entries in Budget Actuals
You have the ability to include time entry cost in budget actuals for your projects. Under the 'Financials' tab under 'Project Settings' there is a toggle under 'Budget Settings'. By default, it is toggles on to "Include time entry cost in budget actuals".
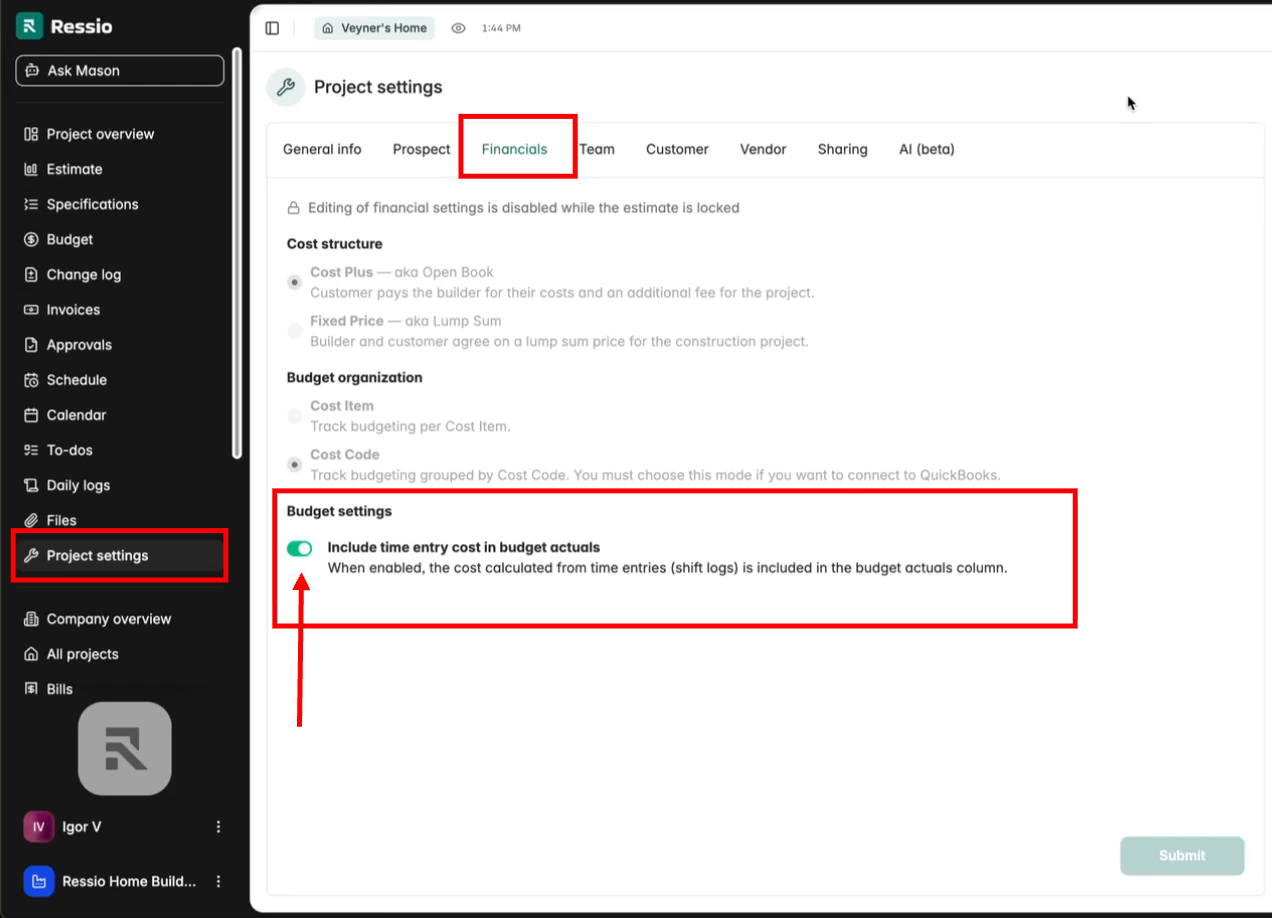
When enabled, the cost calculated from time entries (shift logs) is included in the budget actuals column.
🎗️ All existing projects have this setting active unless manually switched off.
Viewing the Impact on Budget Actuals
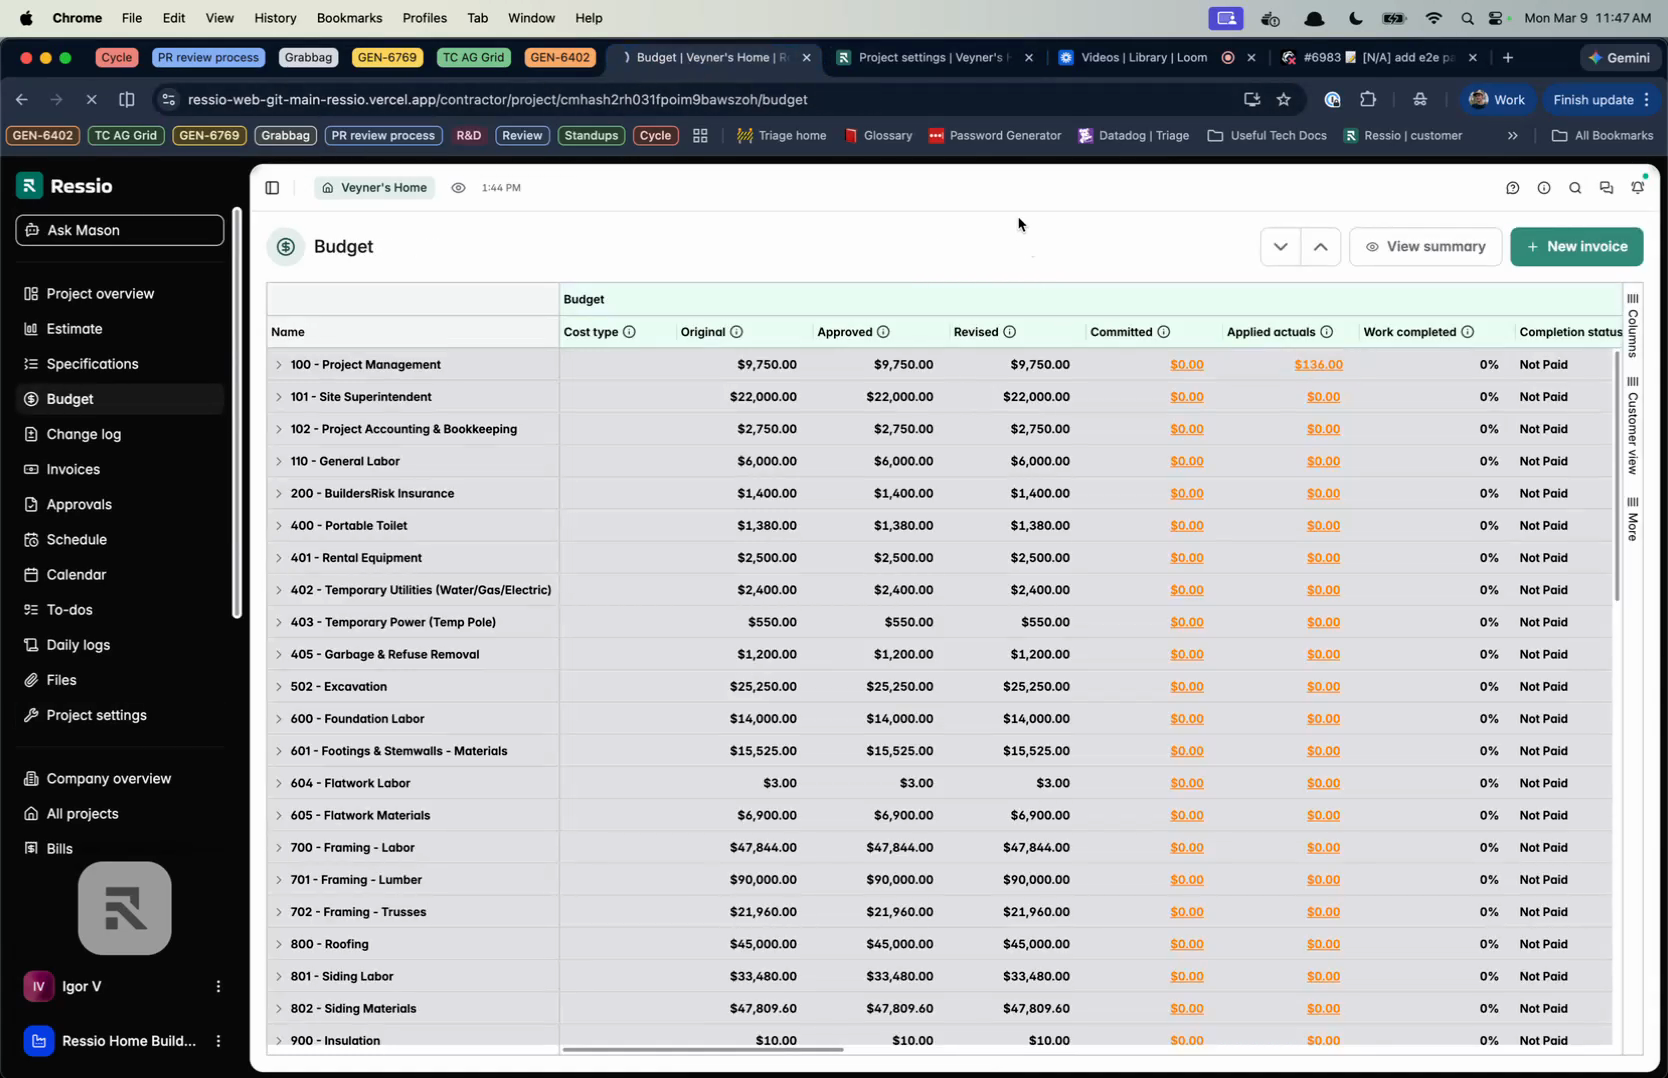
With the setting enabled, the applied actuals in your project budget reflect the total cost including all time entries.
-
Opening the budget displays the applied actuals amount.

-
Expanding the applied actuals reveals time charges contributing to the amount. You have the option of adding a bill by clicking the the button in the bottom left.

-
Turning off the setting in Project Settings removes these time entry costs from budget actuals.
-
Navigate back to the budget and refresh to observe the updated actuals where time entry costs are excluded.
✅ Use this feature to adjust how labor costs are tracked in accordance with your organization’s financial preferences.
If you have any questions or need further assistance, contact our support team at support@ressiosoftware.com. We're here to help!